Cloud Avenue Wiki
WORM Backup Customer Journey for IaaS STD Offering
Introduction
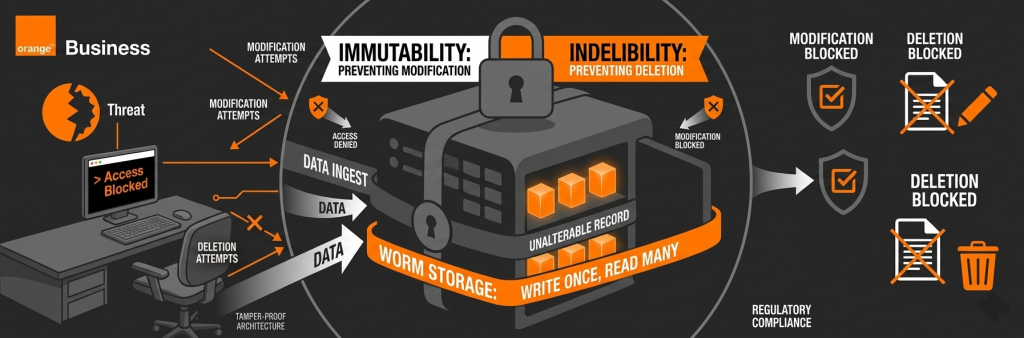
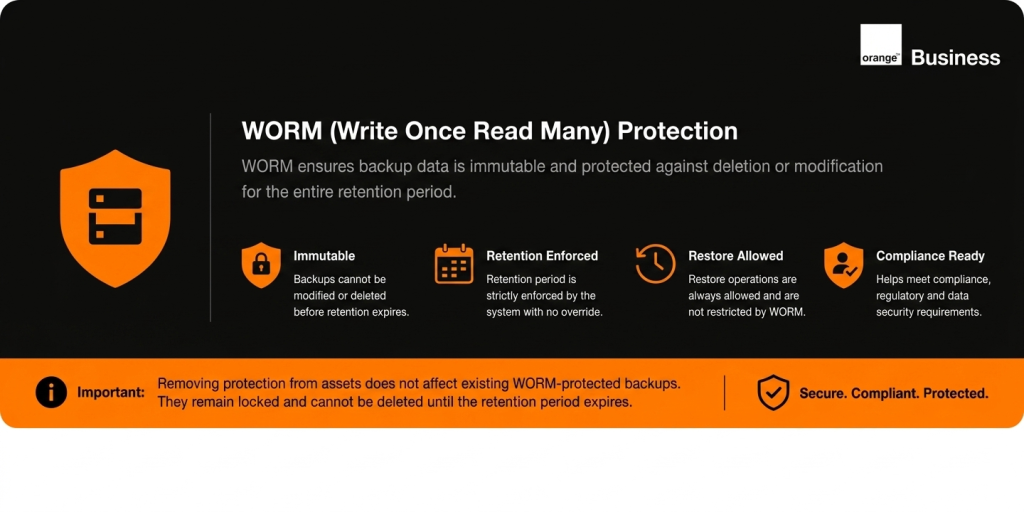
📌 Service Scope (Initial Release)
ℹ️ Availability
Only monthly and weekly Protection Levels are available at service launch
(Daily will be added in a future release)📅 Retention Policy
The retention period is 12 months for the months PLs
Customer Journey
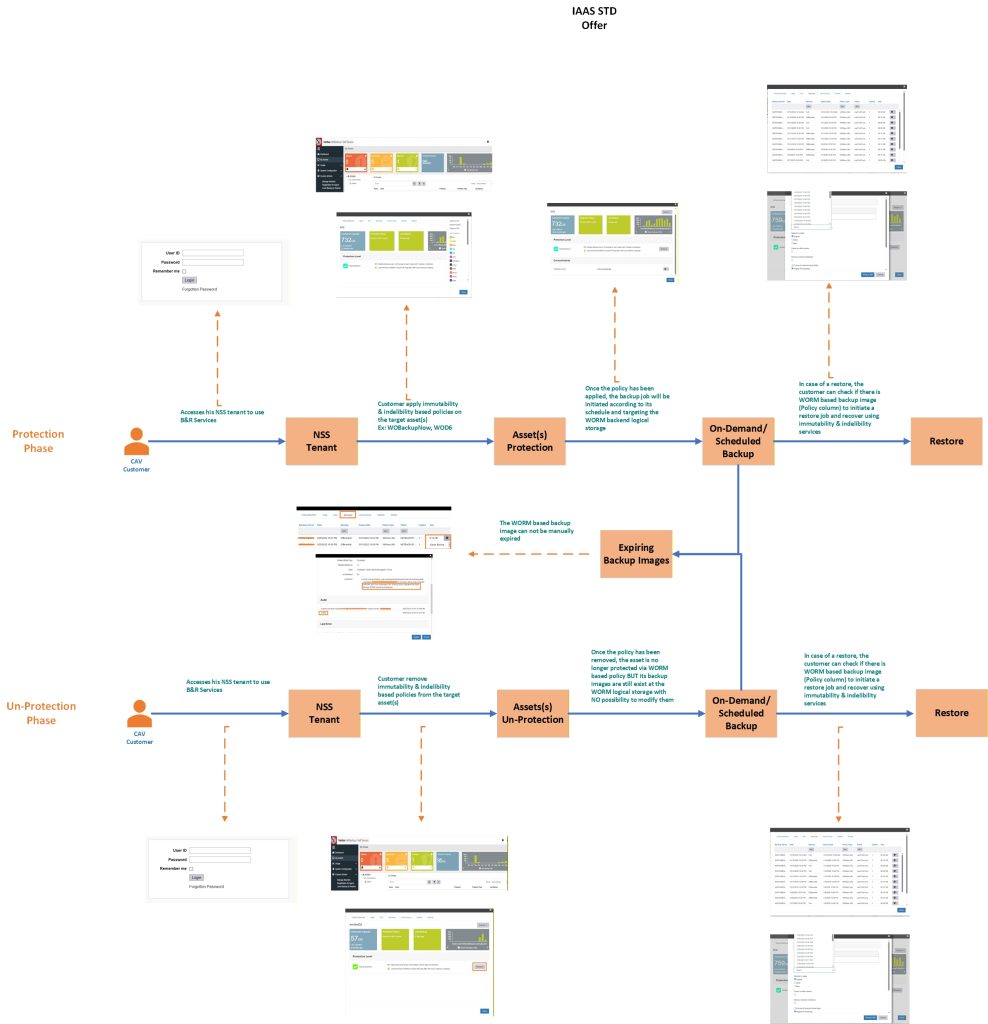
The below screenshot summarizes the overall customer journey while the next sections provide more details on how to deal with the feature
Protection Phase
- Access NSS Portal
- Log in to your NetBackup Self Service (NSS) tenant
- Navigate to My Assets page
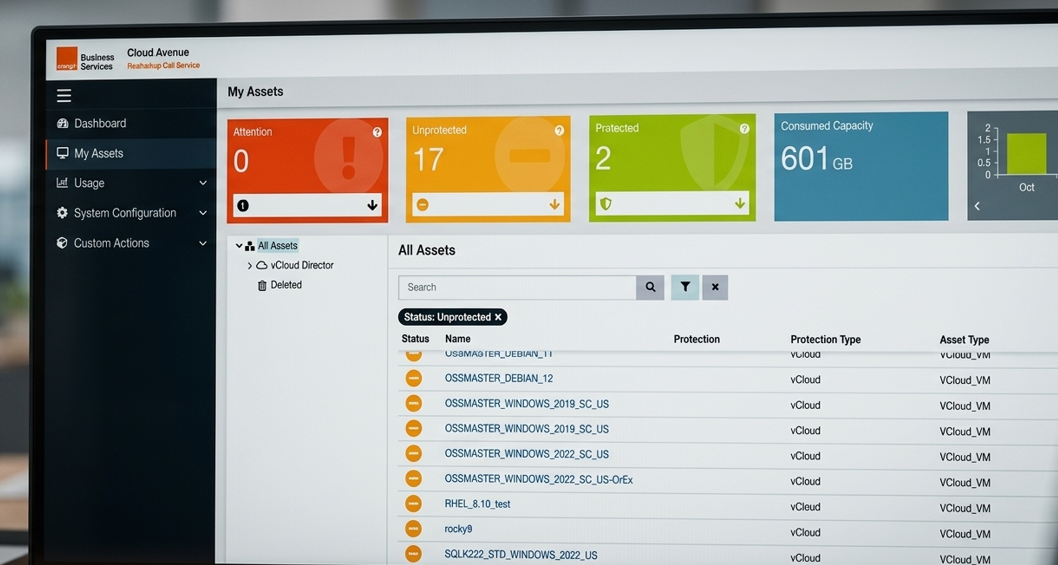
- Log in to your NetBackup Self Service (NSS) tenant
- µTo enable WORM, configure Protection Policy
- Select target asset (ex: VM, …)
- Choose from available preconfigured Protection Levels (PLs)
- Select a protection level that includes immutability (WORM) and indelibility.
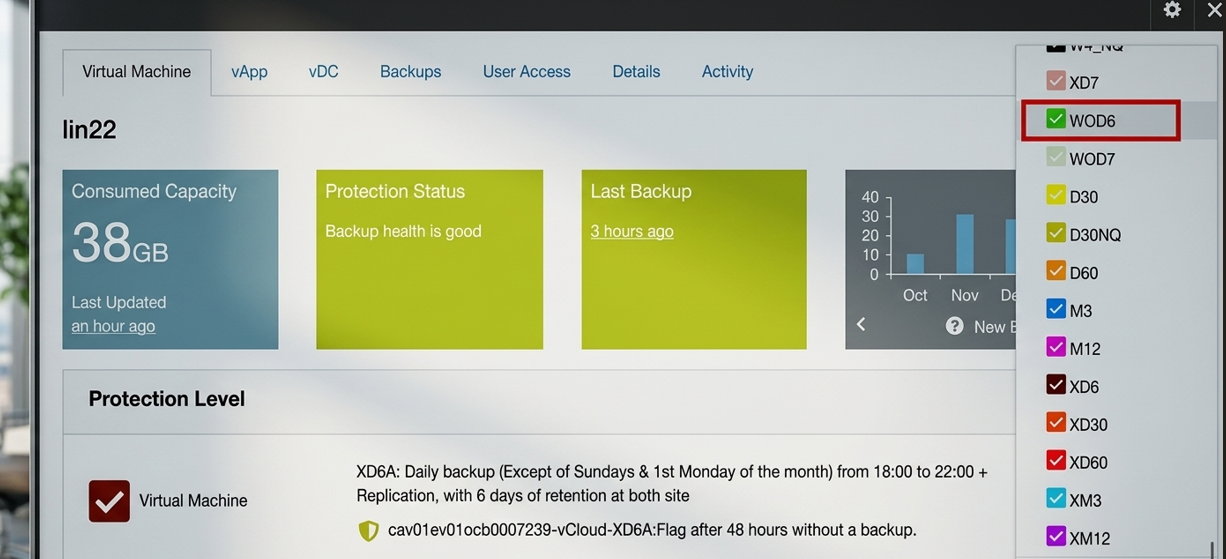
- Notes:
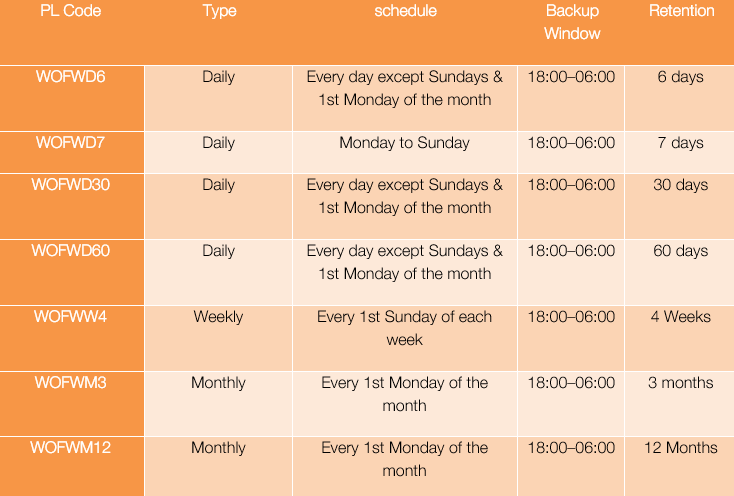
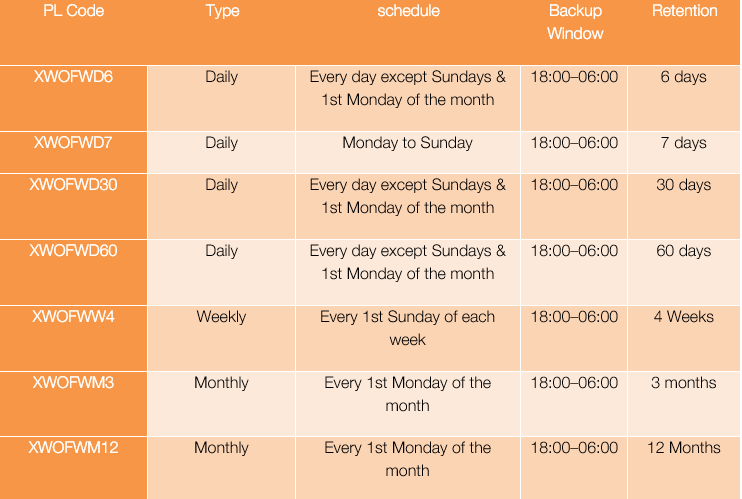
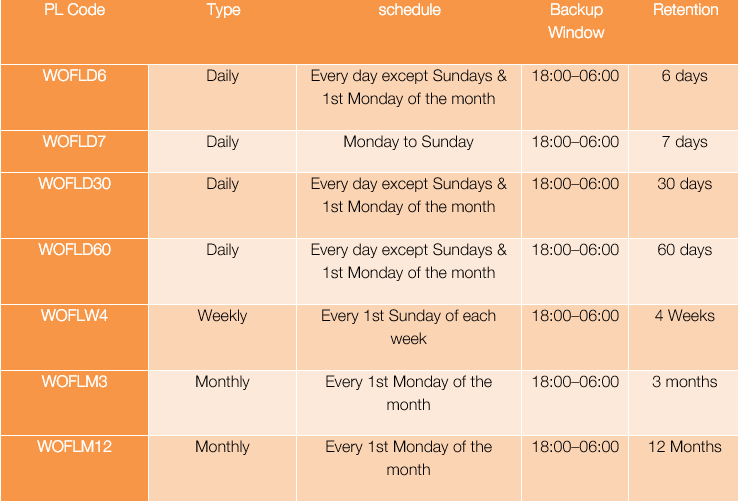
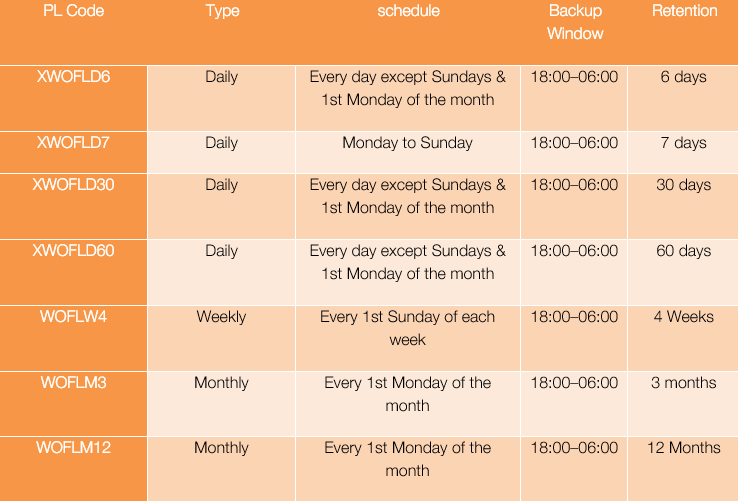
- Protection levels are preconfigured by the platform and include backup frequency, retention, and WORM settings.
- The Backup Window refers to the time range during which a backup job is permitted to start. The job may begin at any point within this defined window.
- Once a backup is created using a WORM-enabled protection level, it cannot be modified or deleted until retention expires.
- A) VMware protection levels without replication
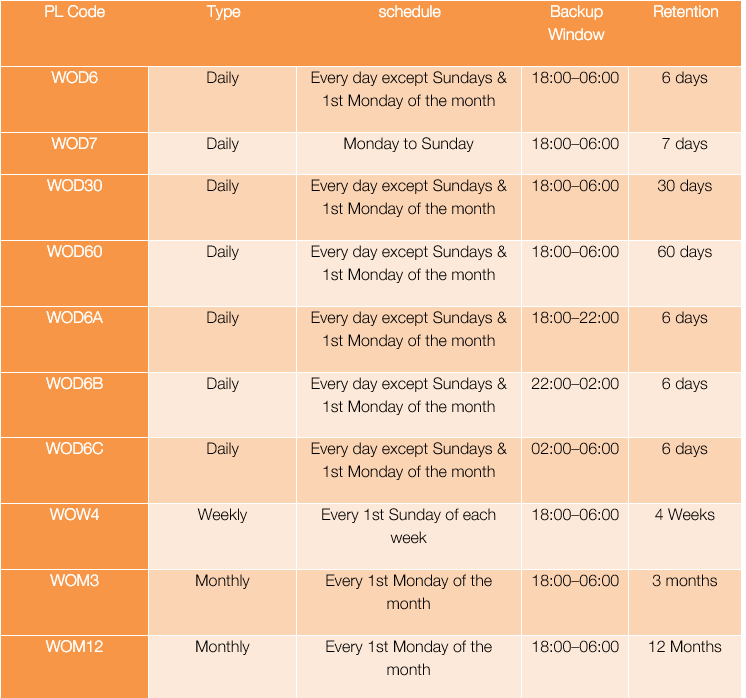
- B) VMware protection levels with replication “X-Series“
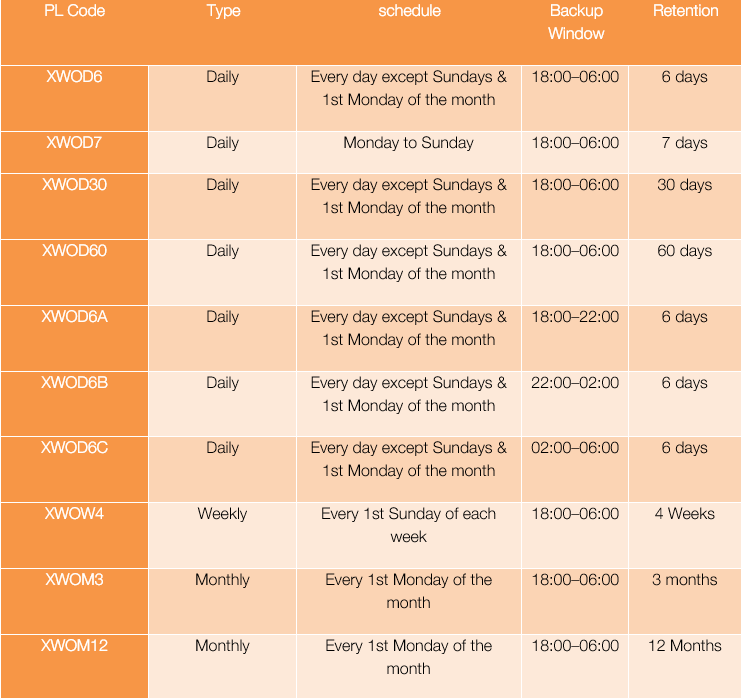
- C) Windows Agent protection levels without replication
- D) Windows agent protection levels with replication “X-Series“
- E) Linux Agent Protection Levels without replication
- F) Linux Agent Protection Levels with replication “X-Series“
- G) On-demand protection levels
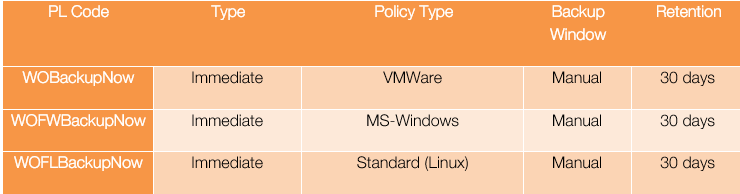
- Run Backup
- Scheduled backup
- Once the PL has been applied, the backup job will be initiated according to its schedule.
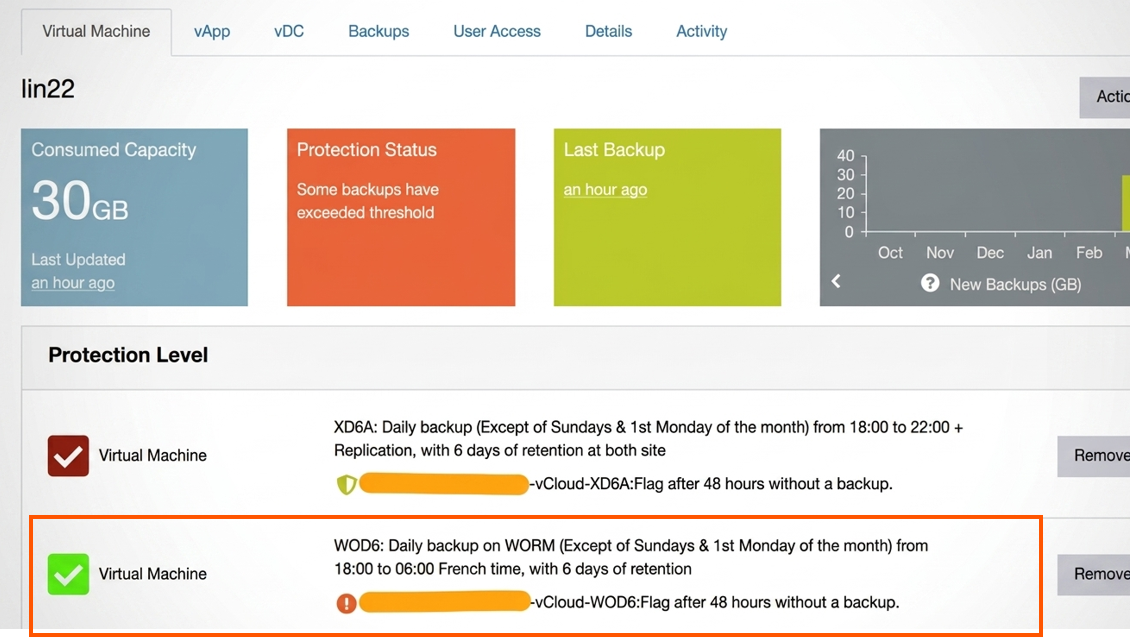
- Once the PL has been applied, the backup job will be initiated according to its schedule.
- On-demand backup:
- Once the PL has been applied, a pop-up page will appear.
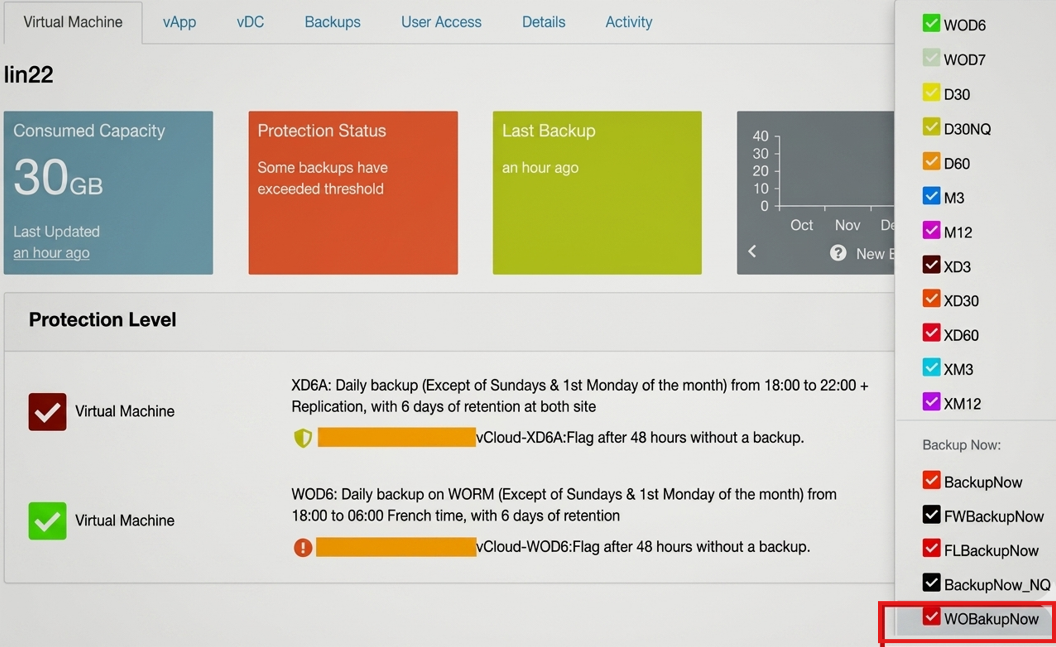
- Once you confirm “Backup now,” the backup job will be initiated immediately.
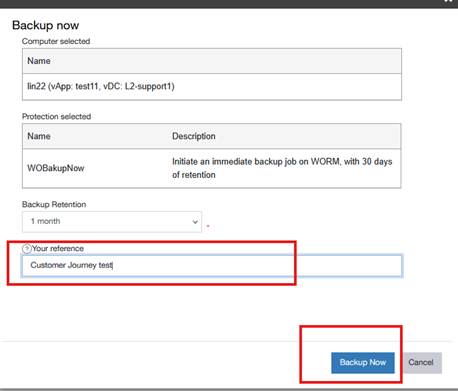
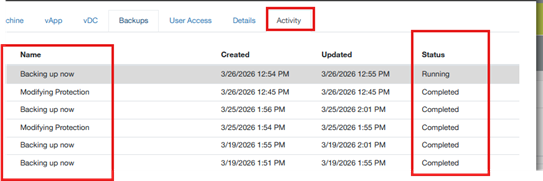
- From the activity tab you track the status of the VM activity (modifying protection, Backup now, ….)
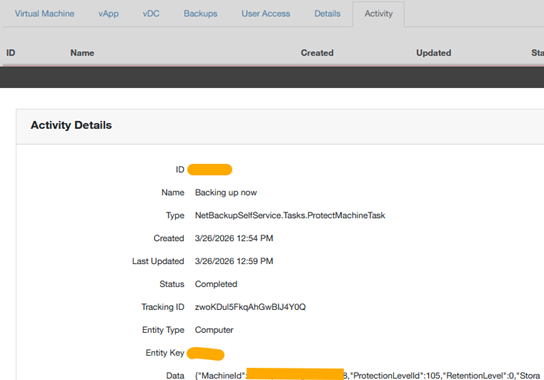
- You can find more details by clicking on the activity record.
- Note:
- Backup is stored in WORM backend logical storage.
- Backup is stored in WORM backend logical storage.
- Once the PL has been applied, a pop-up page will appear.
- Scheduled backup
- WORM Protection Effect.
- Backup images are:
- Not editable
- Not deletable
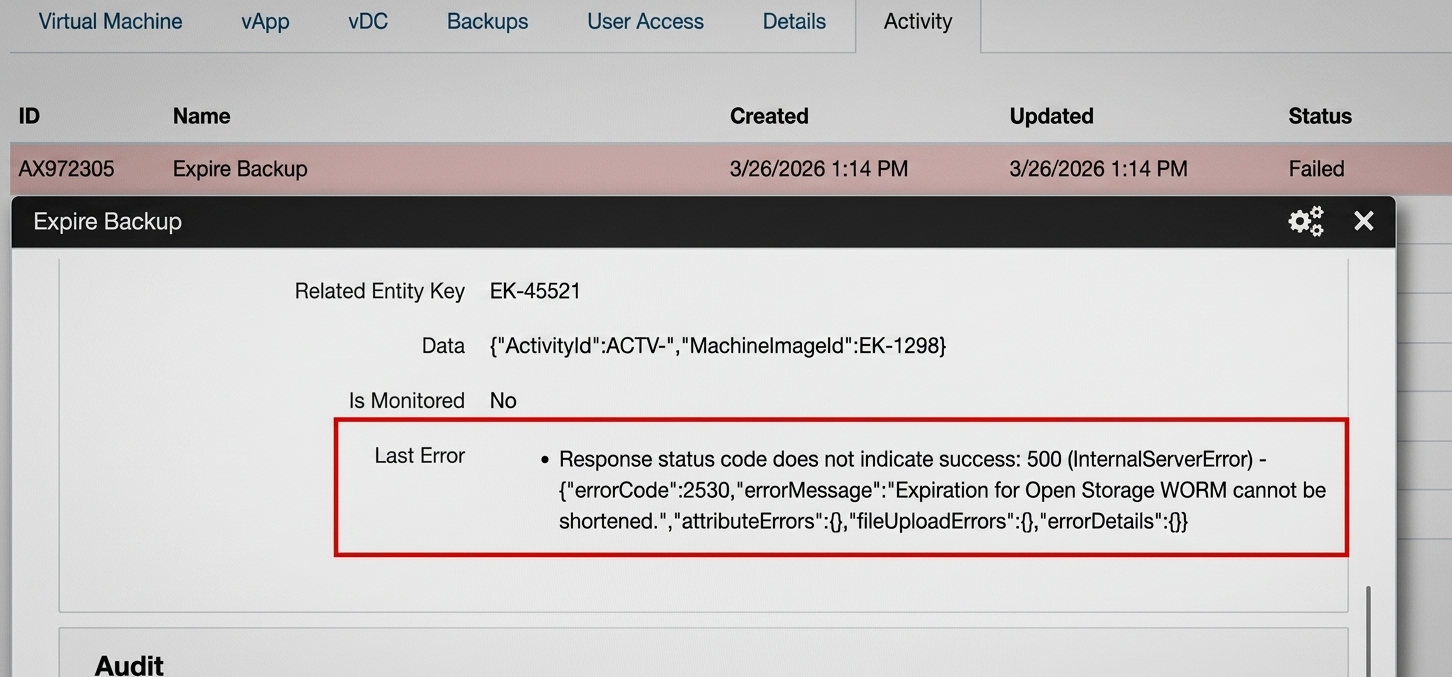
- Not manually expirable
- Protected until retention period expires
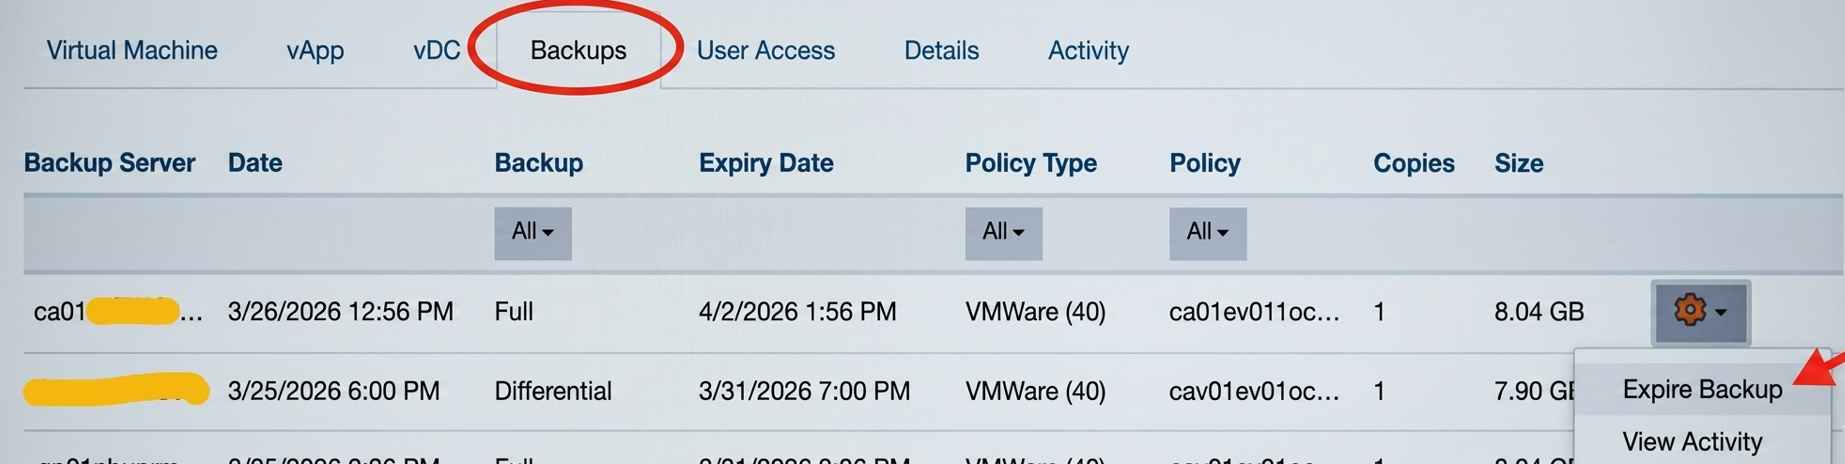
- As an example, please find below the result when trying to expire a WORM backup image:
- Backup images are:
- Restore Data
- Navigate to Backups tab.
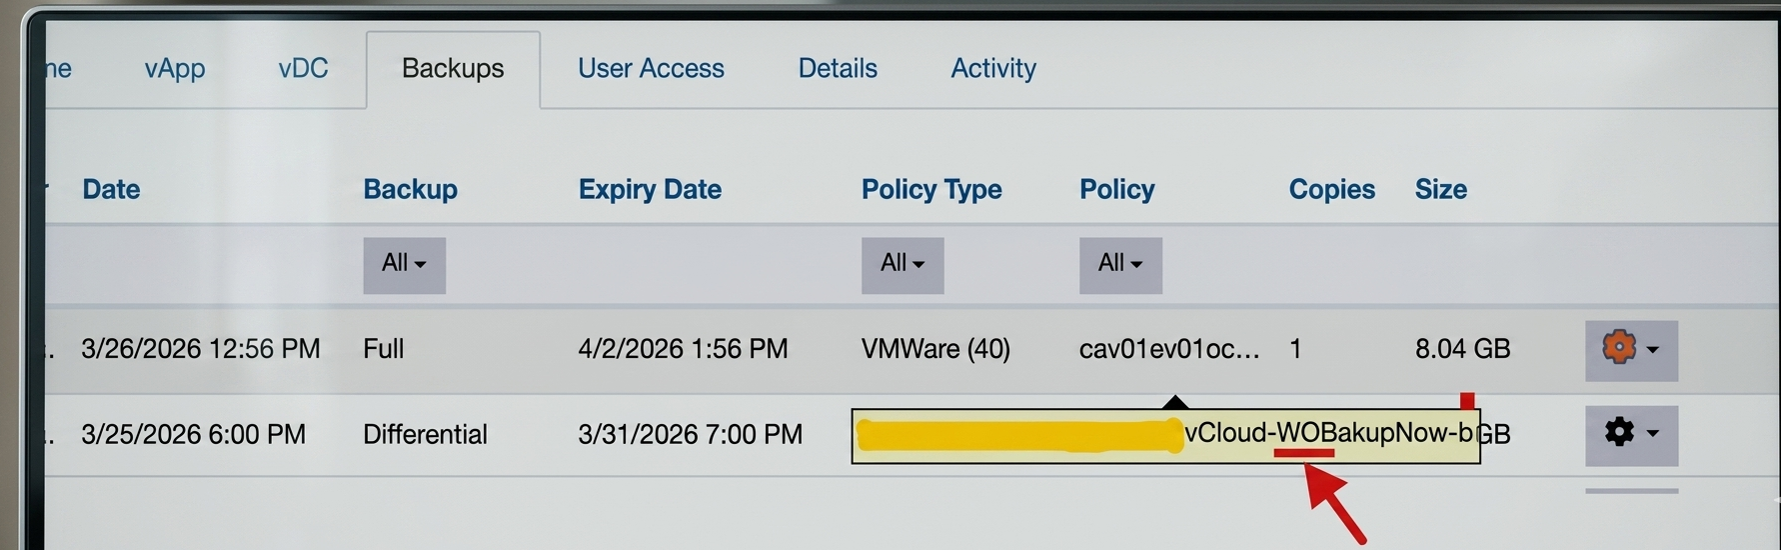
- From the Policy column you can check the WORM attrribute of backup images:
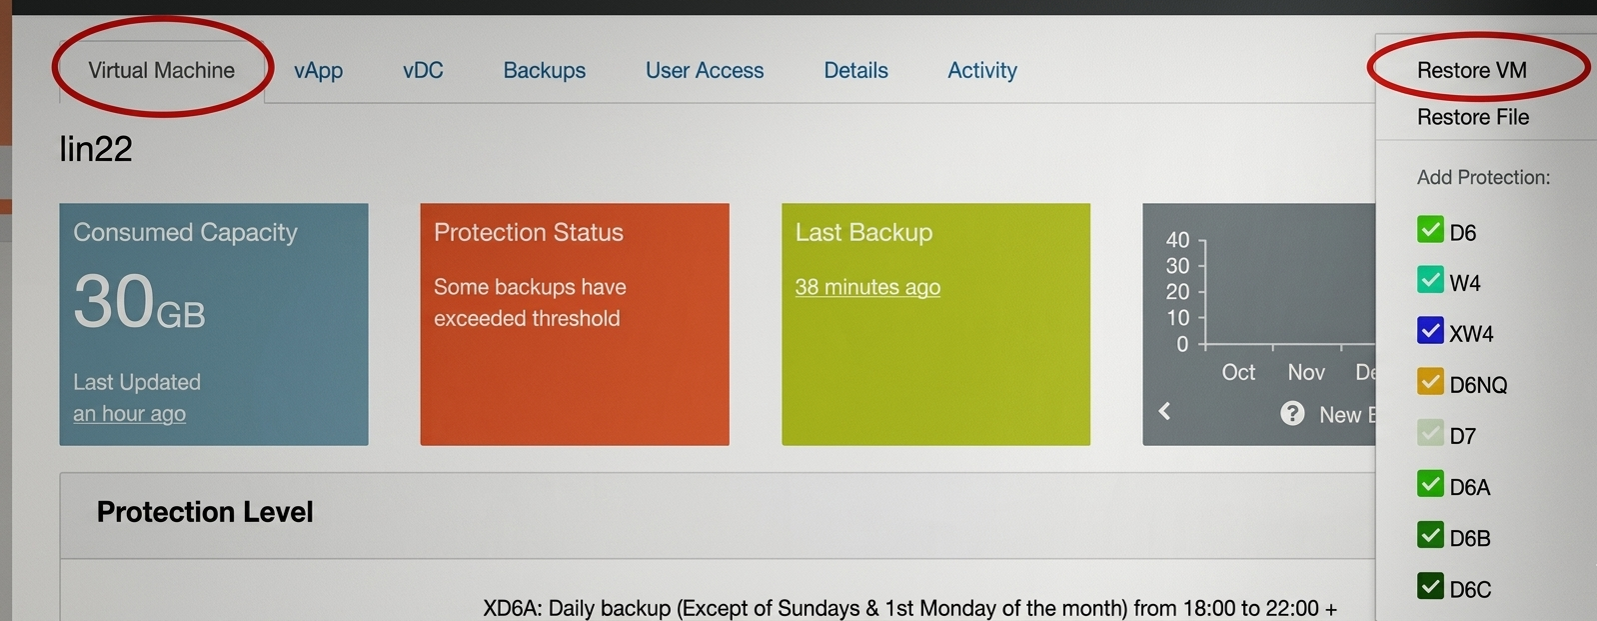
- Perform restore as usual (same procedure for WORM backups than for non-WORM backups):
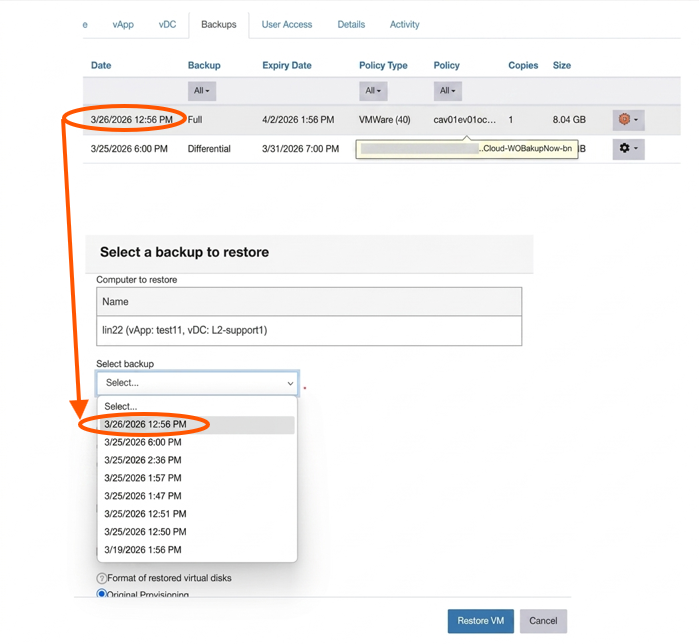
- Select the backup image you want to restore:
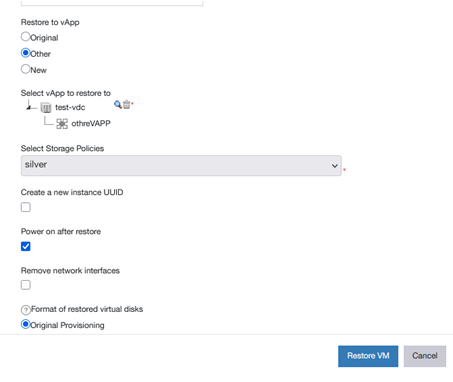
- Make your choice for the other options, then select Restore VM:
Un-Protection Phase
- Remove the Protection Level (PL).
- Navigate to the target asset (e.g. VM):
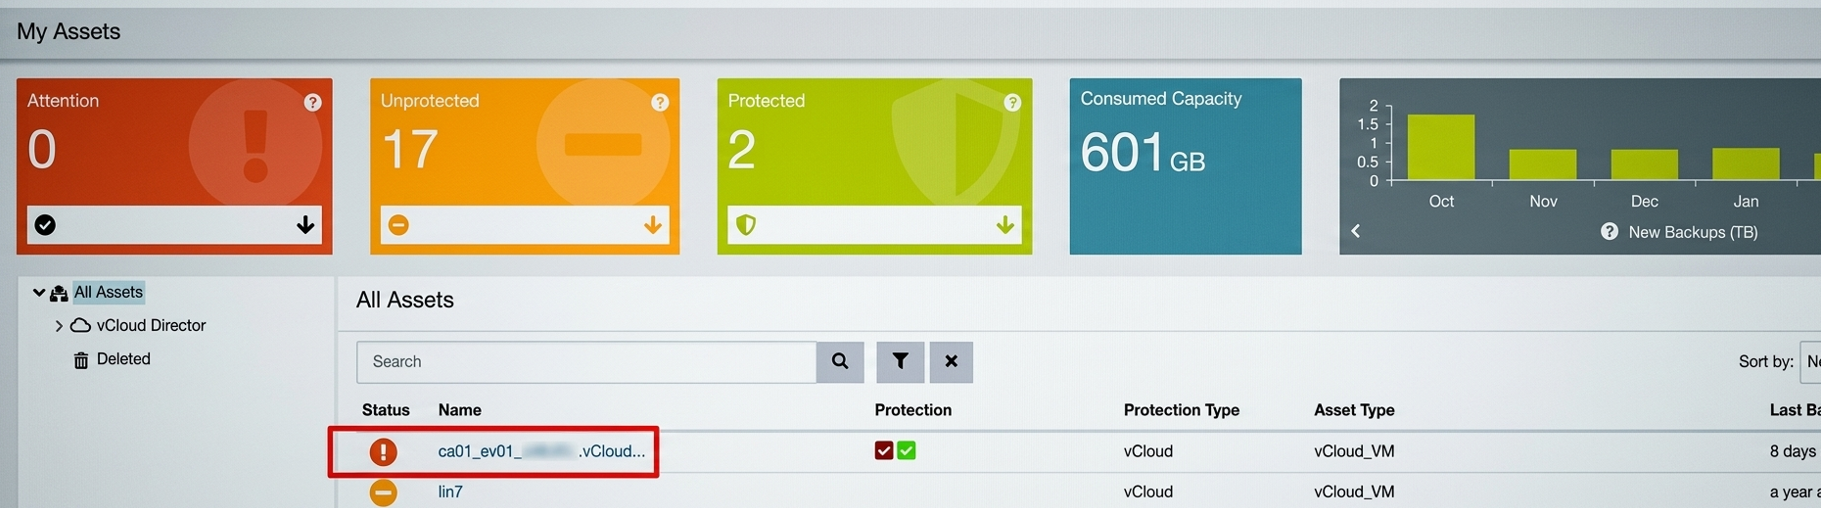
- Select the asset and click “Remove.”
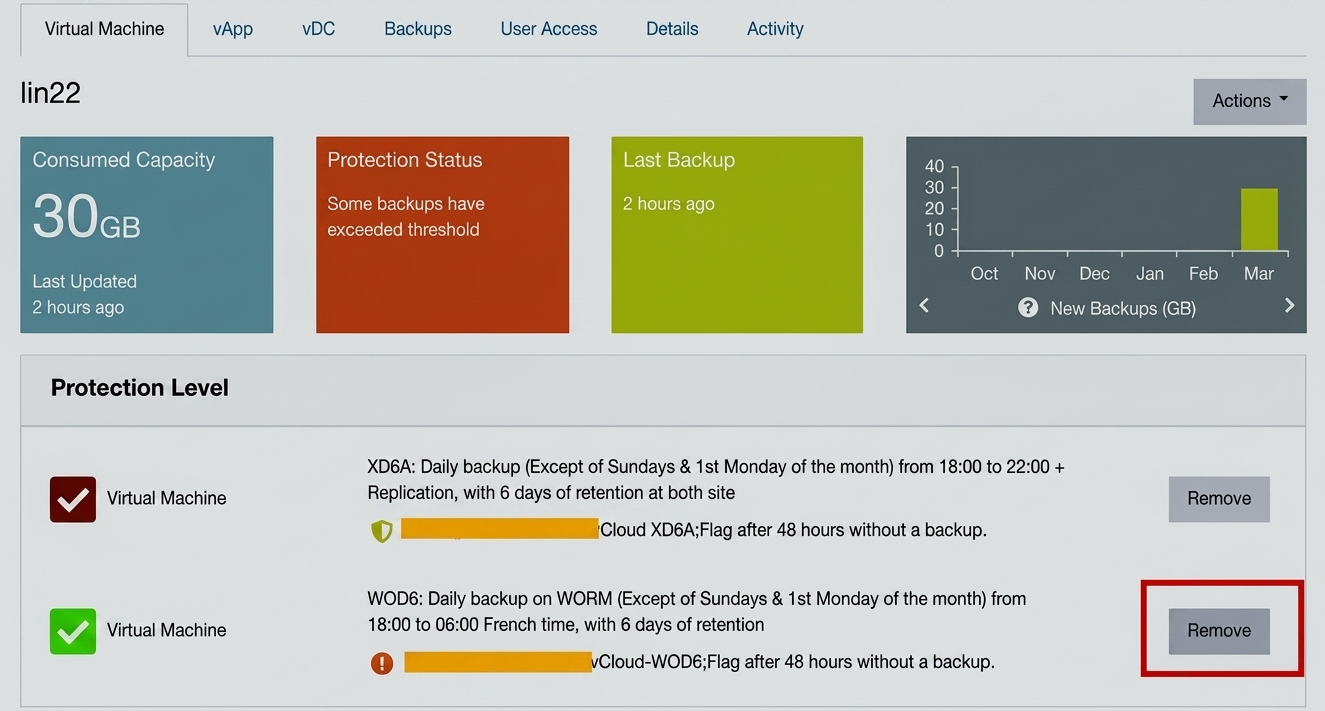
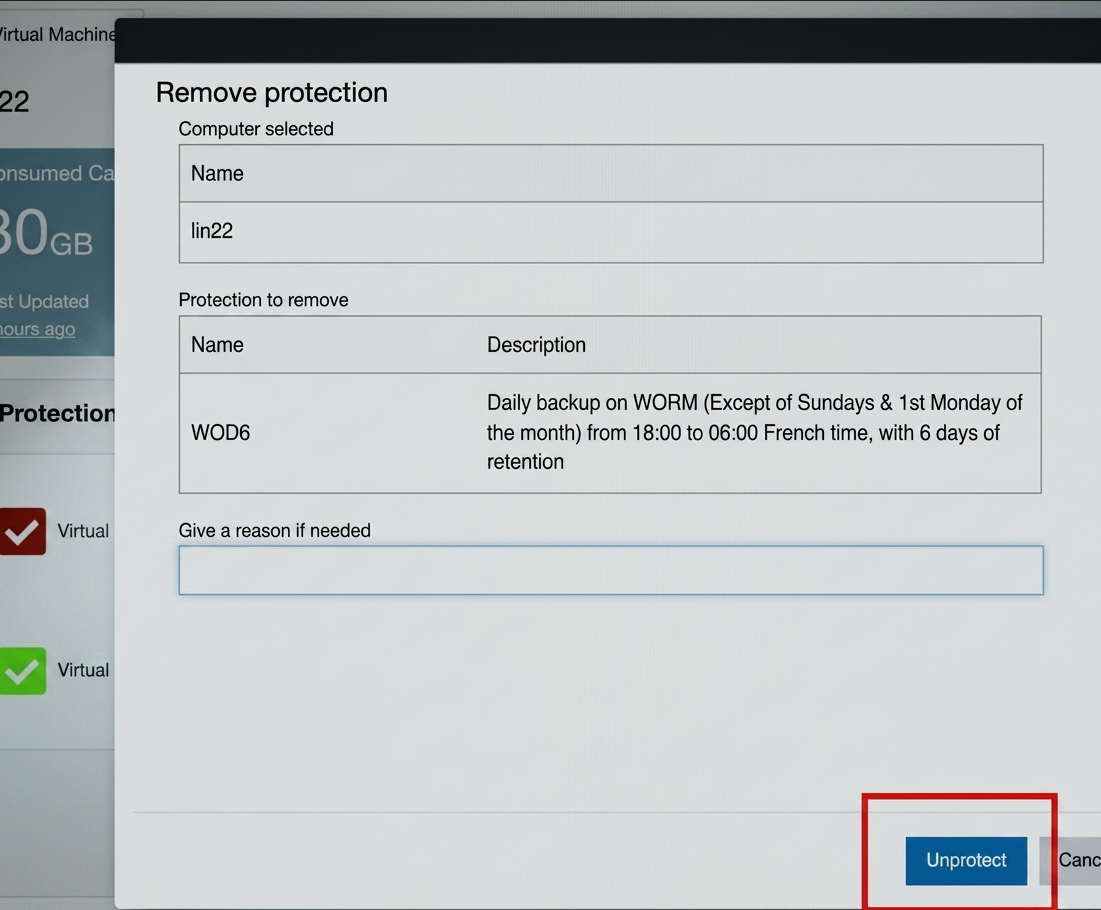
- From the activity tab you track the status of the VM activity (here modifying protection):

- From the activity tab you track the status of the VM activity (here modifying protection):
- Navigate to the target asset (e.g. VM):
- Behavior after removing the PLs
- Existing Backups:
- Remain WORM-protected.
- Can’t be modified or deleted.
- Stay locked until their retention period expires.
- New Backups:
- No new backup will be created (since PL is removed).
- Note: Removing protection does NOT affect existing WORM backups — they remain immutable until retention ends.
- Existing Backups:
- Backup Images Expiration
- After retention period expires:
- WORM-protected backups become:
- Eligible for expiration
- Automatically deleted by the netbackup system processes.
- Note: Expiration is fully system-managed — no manual deletion required.
As an example, please find below the result when trying to expire a WORM backup image:
- WORM-protected backups become:
- After retention period expires:
- Restore Data
- Navigate to Backups tab.
- From the Policy column you can check the WORM attrribute of backup images:
- Perform restore as usual (same procedure for WORM backups than for non-WORM backups):
- Select the backup image you want to restore:
- Make your choice for the other options, then select Restore VM: