Cloud Avenue Wiki
-
Overview
-
Q & A
-
Practical sheets
-
- Add a NetBackup User
- Backing up a VM
- Backup : Agent-Level B&R via NSS for IAAS offer
- Checking Backup Prerequisites
- Daily Reporting
- Deleting a VM Backup
- Identifying Your Backup Master Server
- NetBackup Portal
- NSS Home Page
- NSS Swagger APIs
- Restoring a VM
- Troubleshooting Netbackup Errors
- VM Agent Restoration Mode
-
-
- Aucun article
-
-
- Aucun article
-
-
-
- Backup : Agent-Level B&R via NSS for IAAS offer
- Backup : Create VCOD Backup
- Backup : Netbackup Agent Installation for Linux
- Backup : Netbackup Agent Installation for Windows
- Backup : Overall Design for VCOD Offer
- Backup : User's Guide for VCOD Offer
- NSX-T : Configuring a Distributed Firewall
- NSX-T : Create VPN Ipsec
- NSX-T : Creation of T1
- NSX-T : DNAT configuration
- NSX-T : How to configure a Gateway Firewall
- NSX-T : SNAT configuration
- NSX-T: Create and Configure a Geneve Overlay Segment
- NSX-T: How to configure an IPSEC solution
- Parcours Client Sauvegarde WORM pour l'Offre VCOD STD
- vCenter : Clone a VM
- VCenter : Create a new VM
- VCenter : Create a snapshot of a VM
- VCenter : Reset cloudadmin password
- VCenter : Storage Vmotion on a VM
- VCenter : Upgrade Vmware tools on a VM
- WORM Backup Customer Journey for VCOD STD Offering
-
-
Services
-
-
-
- Aucun article
-
-
- Aucun article
-
- Aucun article
-
- Aucun article
-
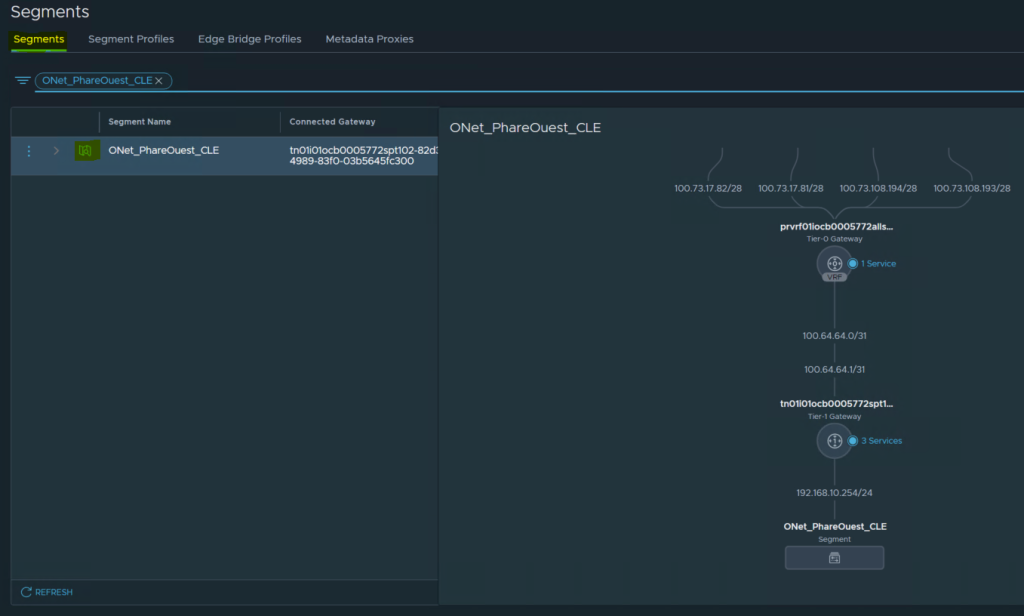
NSX-T: Create and Configure a Geneve Overlay Segment
Create a new VM
- In NSX, go to the Networking menu, Segments, and Add Segment.
- Provide the following information:
- Segment Name: Enter the name of the network to be added.
- Connectivity: Enter the T0/T1 that will be connected to the network.
- Transport Zone: Enter the type of transport to connect to the T0/T1 Gateway.
- Subnet: Enter the Subnet Gateway to be used (CIDR format).
Then click SAVE.

3. Click the icon next to the Segment name to verify connectivity.
Repeat the previous steps to recreate other Segments if necessary.