Network Storage Management Portal
Overview
The network storage management portal, also known as the “Shared Storage portal”, is a web application developed by Orange Business. This application gives customers all the autonomy they need to manage this type of storage. A detailed description of the network storage offer is available in the Service Catalogue at this address.
Complete Administrator’s Guide
The complete Shared Storage Administrator’s Guide is in pdf format and can be downloaded from the Shared Storage Portal (see below for how to connect to the portal) : shared-storage_org-admin.pdf
Login page
Access to the Shared Storage Portal is :
- from the Cloud Customer Area using an ECC login -> use the Technical consoles access.
- or directly via the url: https://storage2.cloudavenue-vdr.itn.intraorange/ (you can pre-specify your organization by adding the suffix /login?org=[your organization name])
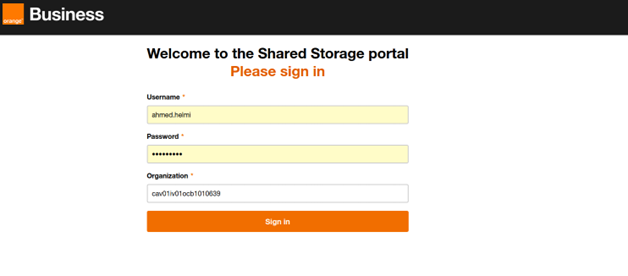
In both cases, a welcome screen appears, asking you to enter your VCD local account login/password (see “Welcome to the Shared Storage Portal” screen opposite).
Enter the name of the VCD organization configured to access the network storage management portal.
Supprimer un vApp

Warning !
Please enter your organization’s name in uppercase.
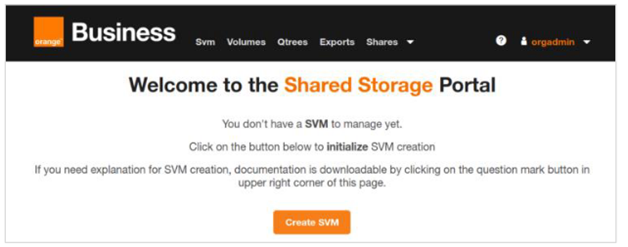
If the wrong authentication information is entered, an error page is displayed. After successful authentication, the home page is displayed.
On the very first login, if no SVM exists for the VCD organization, the portal suggests creating one.
SVM (Storage Virtual Machine) creation
This chapter describes the step-by-step creation of an SVM, using the NFS or CIFS/SMB protocol.
After clicking on

the following page appears.
Define the name of the SVM, without leaving any spaces. Choose an explicit name, as several SVMs will be created later.
By default, the NFS V3 protocol is proposed.
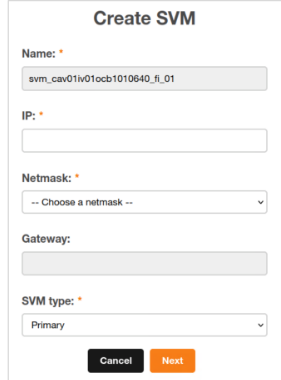
By default, the system proposes a network configuration. If the customer requires a specific network configuration, the

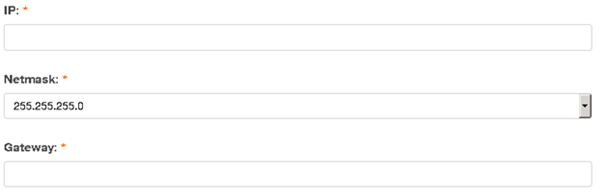
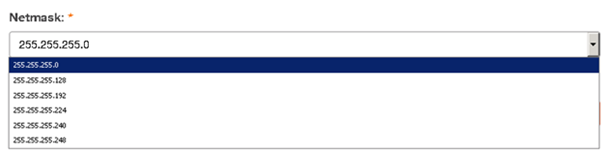
There are no restrictions on the choice of network to be connected to the SVM. However, the subnet mask must be between /29 and /24, to be chosen from a list.
To learn more about IPv4 mask management, go to: https://fr.wikipedia.org/wiki/Sous-r%C3%A9seau
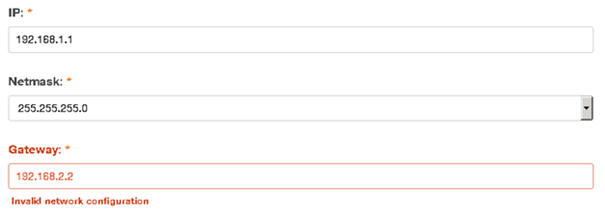
The portal performs consistency checks, in particular to ensure that the gateway is part of the subnetwork.
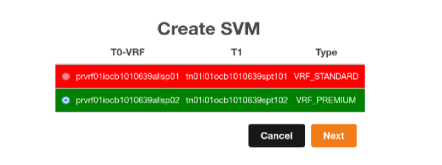
Here the portal checks if there is a valid T0 – T1 Pair with T0 type premium. If not found the portal sets up the network.
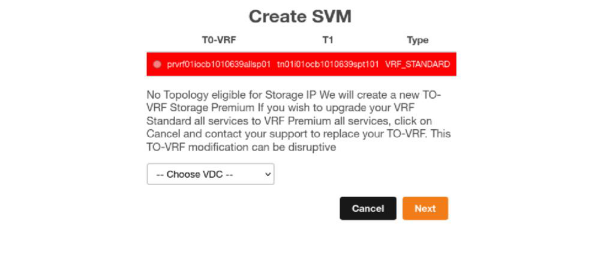
Creation is in progress. Disconnect and wait a few minutes before reconnecting, until everything has been created correctly.
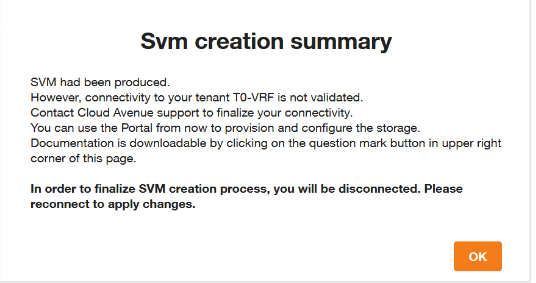
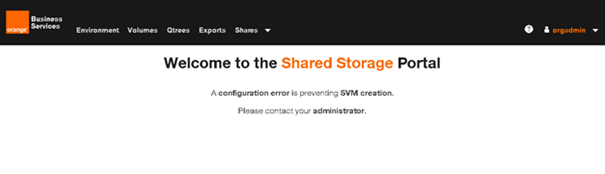
In some cases, the portal displays an error message. In this case, contact Orange support.
Portal home page
If an SVM already exists, the following page is displayed.
The menu on the top banner gives access to :
- SVM: SVM management
- Volumes: managing volumes and snapshots
- Qtrees: managing Qtrees (shares)
- Exports: manage NFS share access rules
Shares: share access management for users and groups
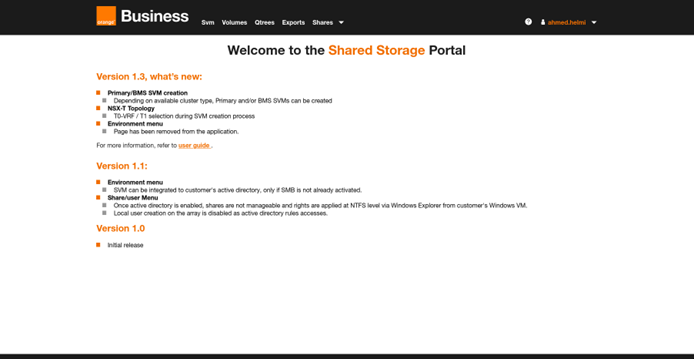
- Logout: log out of the portal, return to the login page.
Volume management
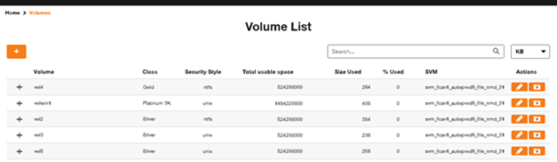
The Volume List page is accessible via the Volumes menu and displays a list of all volumes. Only compliant volumes are displayed here. By default, the list is sorted by SVM, Class and Volume.
You can select the size unit (KB, MB, GB, TB) by clicking on the icon

A search entry allows you to search for specific volumes in the list. The search is performed on all columns of the list.
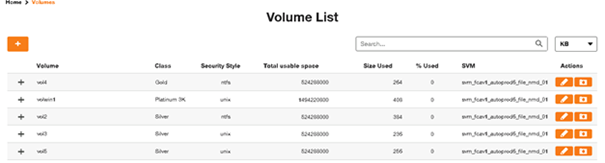
A visual alert system warns the administrator of volume saturation. The numbers turn orange when the % of use of a volume reaches 80%, and red when it reaches 95%.


Click on the + icon at the head of the line to display the detailed volume view.
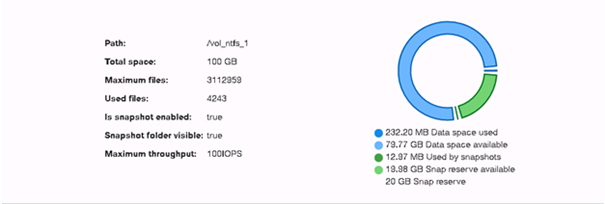
On the left-hand side of the page, you’ll see :
- Path: the volume path
- Total space: total volume space, including snap reserve space if enabled.
- Maximum files: maximum number of files that can be hosted in the volume. This value is proportional to the size of the volume.
- Used files: Number of existing files and folders.
- Is snaphot enabled: snapshot enabled or not.
- Snapshot folder visible: indique si le dossier de snapshot est visible ou non sur votre système.
- Maximum throughput: the maximum IOPS allowed on the volume. This value is calculated on the basis of storage size and class.
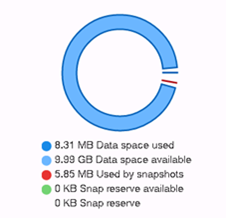
On the right-hand side of the page, a graph is displayed with the following information:
- Data space used: space used on the volume
- Data space available: the space available on the volume
- Used by snapshots: space used by snapshots
Snap reserve available: available space in the snap reserve

If there’s no snap reserve or if it’s saturated, the color will be red instead of green. This is not an error, it’s just information.
Create a new volume
If fewer than 6 volumes have been created, the

icon at the top of the volume list allows you to create a new volume.
There are several restrictions to creating volumes:
- Up to 6 volumes can be created. Once this limit has been reached, the + icon is grayed out. You need to contact Orange support to exceed this limit.
- The size of a volume is between 500 GB and 2 TB (2048 GB). To go beyond the 2TB limit, please contact Orange support. The maximum size can never exceed 8TB.
If the SMB function is not enabled on the SVM, it is not possible to create a volume with the NTFS security style.
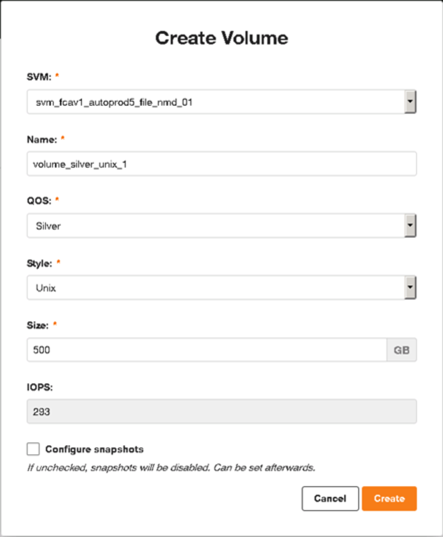
The Create Volume screen requires you to fill in the following fields:
- Svm: a unique SVM name is pre-filled
- Name: volume name, length between 3 and 25, characters allowed: a-z / A-Z / 0-9 / _
- QOS: Select service class, more information on this page
- Style: Select quota security style: Unix or NTFS. If SMB protocol is not enabled, only Unix will be available.
- Size: Size in GB, value between 500 GB and 2048 GB. If the value inserted is smaller or larger, it will be resized to the nearest limit.
- IOPS: Displays the amount of IOPS available to the volume, calculated according to size and class of service.
Configure snapshots: you can choose a snapshot policy at creation, by checking the box. If the box is not checked, the default values will be: no snap reserve and no snapshot policy. However, it is possible to configure it afterwards.
Modifying an existing volume
Each volume can be edited by clicking on the edit icon :

As long as the limit of 6 volumes is not exceeded, and each volume respects the size limits (between 500 GB and 2 TB), it is possible to modify the size and class of service of a volume.
If the number of volumes exceeds 6, all editing icons will be grayed out.
If any of the 6 volumes does not respect the above size limitation, its edit icon will be grayed out.
By clicking on the edit icon, an edit window appears, allowing you to modify only 2 values: Size and QOS.

Delete an existing volume
As deletion is definitive and cannot be reversed, this feature is deactivated. To delete a volume, please contact Orange support.
Snapshot management
At this point, it may be useful to reread the documentation on network storage and the snapshot section.
Programmed snapshots
In the volume list, at the far right of the line, the

icon gives access to the snapshot management page.

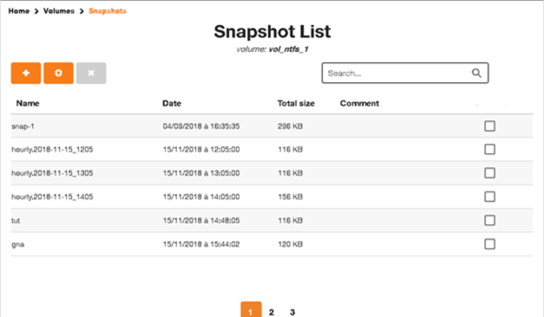
The page displays a list of existing snapshots with :
- snapshot name
- date and time the snapshot was taken
- snaphot size
- any comments, possible in the case of a manual snapshot.
The

icon in the top left-hand corner allows you to create a manual snapshot.
The

icon takes you to the scheduled snapshot configuration window.
The

icon can be used to delete one or more snapshots selected from the list (via the checkbox on the right).
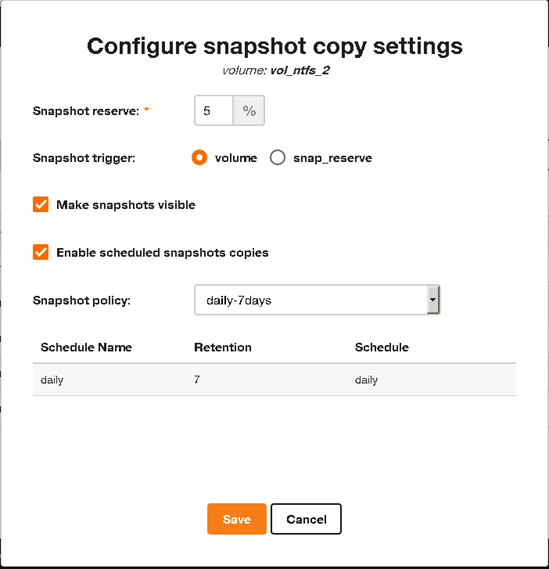
The scheduled snapshot configuration window contains a number of parameters to be filled in:
- Snap reserve: with a value between 0 and 20%.
- Snapshot trigger: this is the trigger that deletes snapshots; here you must choose which reference the trigger is based on: the volume or the snap reserve.
- Make snapshots visible: allows you to make snapshots visible on your system.
- Snapshot policy: select the snapshot policy from the list. The field is grayed out and the value set to none if Snap reserve is 0 and the trigger is set to Snap reserve.
- Schedule Name: lists the various schedules already saved, named with schedule and retention information.
Example of a program name:
- daily.2019-08-23_0010
- hourly.2019-05-03_1505
- weekly.2019-03-24_0015
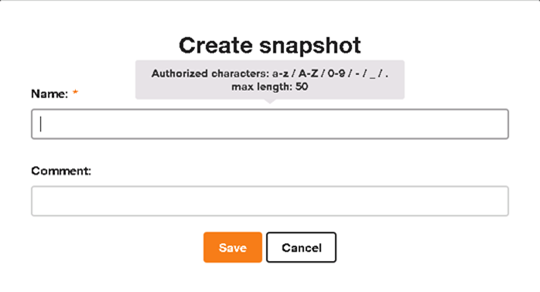
Manual snapshot creation
Click on

to open the snapshot creation window. Enter the name and any comments.
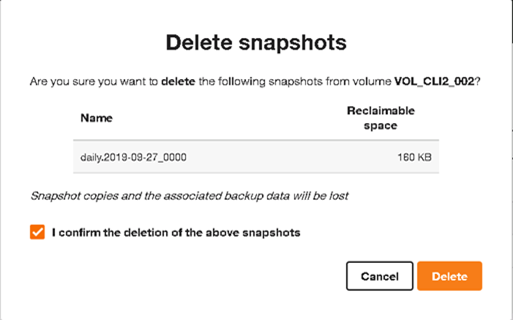
Deleting snaps
Snapshots (manual or scheduled) can be deleted at any time. Once the snapshots have been selected, click on the
icon, which changes from grey to red as soon as at least one line is selected.
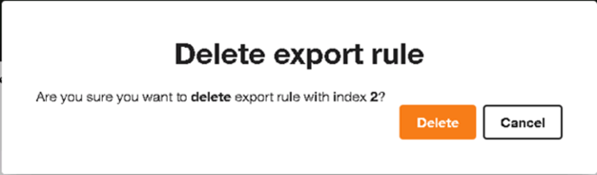
A popup window asks for confirmation of deletion.
Qtree management
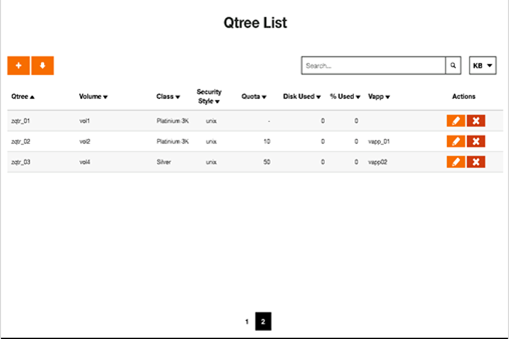
Show Qtree list
The Qtrees menu gives access to the list of shared folders (Qtree in NetApp terminology). The information displayed is organized as follows:
- Qtree: name of the Qtree / share
- Volume: volume on which the shared folder was created
- Class: storage service class
- Security Style
- Quota: the value of the quota positioned on the folder, if any
- Disk Used
- % Used: percentage of quota used, displays 0 if no quota available
- Vapp: the associated/authorized vApp on this share
At the end of each Qtree
line are two icons:

allows you to edit the properties of an existing Qtree
deletes an existing Qtree
At the top left of the page, two icons are also present:
adds a new Qtree

to download the Qtree list in csv format.
Filling alert
When a quota is set on a Qtree, the values change to :
- orange when % utilization exceeds 80%.
red when % utilization exceeds 95%.


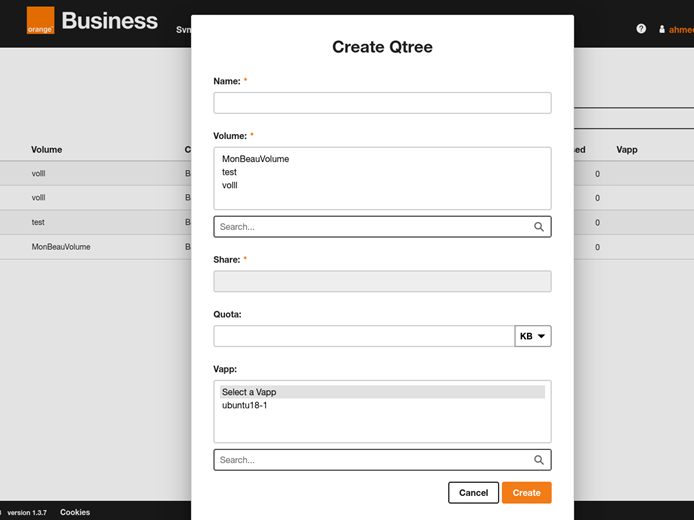
Creating a Qtree
Once you have clicked on the

icon, a page appears, asking you to enter various information:
- Qtree name, from 3 to 30 characters (a-z / A-Z / 0-9 / – / _)
- choose the Volume on which the Qtree will be created; if the number of volumes is very large, a search field can be used to refine the display.
- the Share name (SMB name), to be entered only when the selected volume has been created using the NTFS style (see creating a volume)
- Quota: a quota value if required
- vApp: allows you to associate a vApp name with a Qtree; this association is for information purposes only, as no rights are given to the vApp on the Qtree; this is done in rights management, in the next chapter.
Don’t forget to click Save to save.
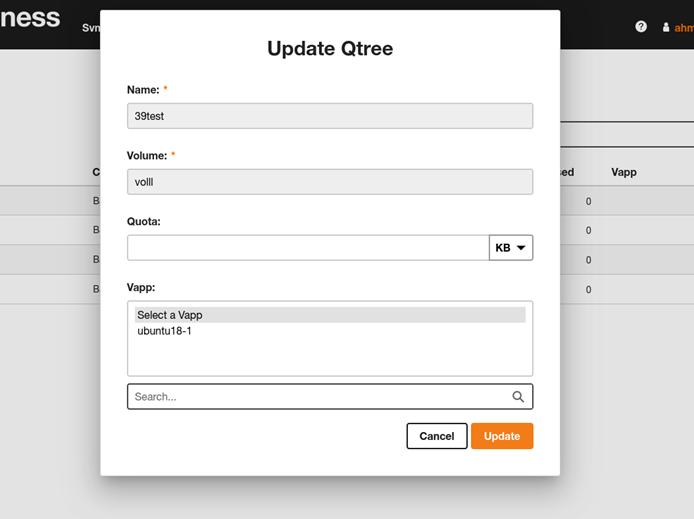
Modifying a Qtree
After clicking on the
icon, the Qtree editing page appears. Modifiable parameters are :
- the Vapp associated with this Qtree
- the value of the quota.
Remember: an empty quota field means “no limit”.
Deleting a Qtree
By clicking on the
icon, a confirmation window appears, asking you to confirm the deletion of the Qtree. All associated authorizations will also be deleted.

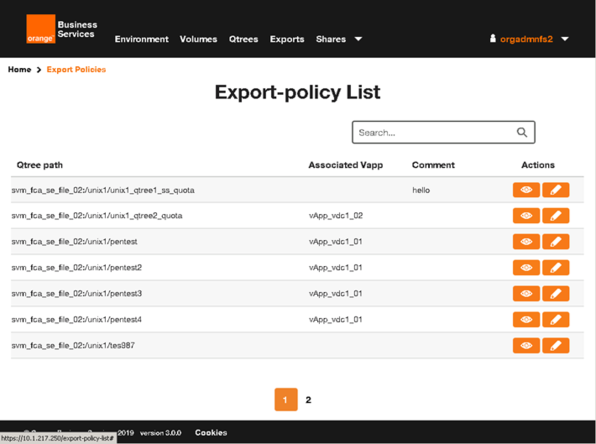
NFS export management (Linux shares)
In the main menu, the Exports option gives access to the list of sharing policies using the NFS protocol.
Each Qtree has its own export policy. There can only be one policy per Qtree.
The

icon lets you edit the rules that make up the policy. The
icon activates the new version of the policy.
Export rules are for Linux NFS shares only.
When editing the rules of an export policy (
icon), a list of existing rules is displayed. Each rule can be modified (
icon) or deleted (
icon).
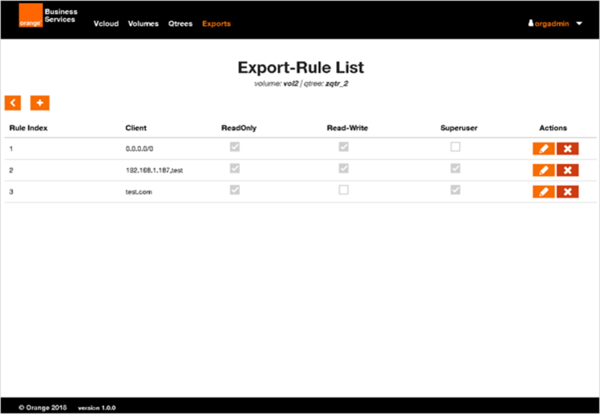
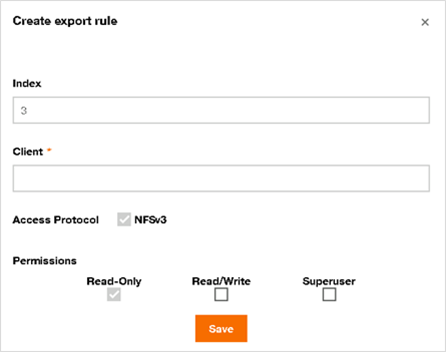
The index value is auto-incremental and does not require user input.
The Client field contains the list of systems authorized to access this share, described in several ways:
- a domain name (e.g. .mondomaine.net) authorizes all machines registered in this domain
- system name or hostname, (example: server01)
- FQDN (Full Qualified Domain Name) is the DNS name of a system (example: server01.mondomaine.net)
- IPv4 address, several can be entered, separated by a comma (example: 192.168.10.3,192.168.10.4,192.168.10.5)
- IPv4 subnet (IP/mask), example: 192.168.0.0/255.255.0.0
- other IPv4 subnet notation (IP/net mask), e.g. 192.168.1.0/24
By default, the rule gives read-only
access to the customer. By checking the Read/Write box, the Customer will have Read/Write access.
Use the
icon to delete an existing rule from the Export-Rule List.
Windows share management (SMB)
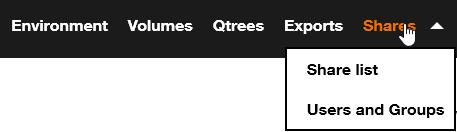
In the main menu bar, the Shares menu gives access to :
- list of shares using the SMB protocol
- the list of users and groups declared for SVM.
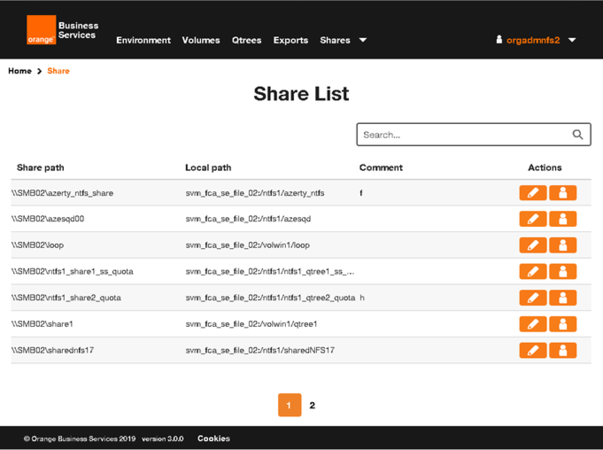
Share list page
The “Share path” column displays the name as used by client systems.
The “Local path” column displays the full path as configured on the customer’s SVM.
For each share, two action buttons are available:
to apply sharing parameters

edit user authorizations (ACL = Access Control List)
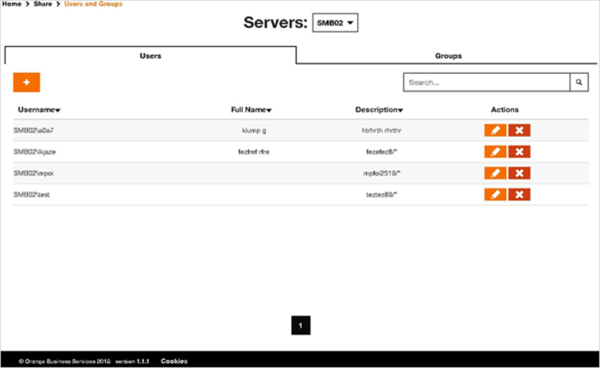
Users and Groups page
This page has 2 tabs, listing declared users and groups. Users are local, i.e. visible only to the SVM. Each user on client machines wishing to connect to the SMB share must use a user account present in this list.
Groups are used to group user populations together, to simplify the allocation of rights, in the same way as for Active Directory.
The
icon is used to create a new user, or a new group, depending on the tab you’re in.
The
icon lets you modify a user, or a group, depending on the tab you’re in.
In the Groups tab, you’ll find the
icon for managing the list of users in a group.
If several SVMs exist, the top of the page lets you choose which SVM to work on by selecting it from the list.
Each SVM has its own list of users and groups, and cannot share it with another SVM.
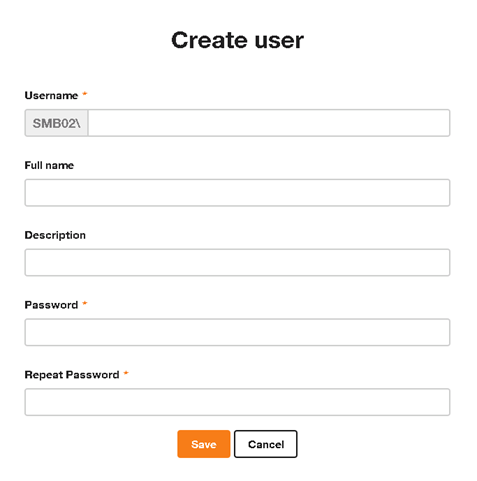
Creating a user
The user creation window requires you to fill in at least all the fields marked with an asterisk (mandatory fields).
- Username: the user name must not exceed 20 characters. All characters are allowed, except for the following: / [ ] : ; | = , + * ? < >
- Full name: optional field, maximum length: 255 characters
- Description: optional field, maximum length: 255 characters
- Password: this field has a few constraints:
- cannot contain the username
- length between 6 and 20 characters
- must contain at least 3 of the following characters:
- a tiny
- a capital letter
- a number, from 0 to 9
- a special character, such as: ~ ! @ # $ % ^ & * _ – + = `| ( ) [ ] : ; ” ‘ < > , . ? /
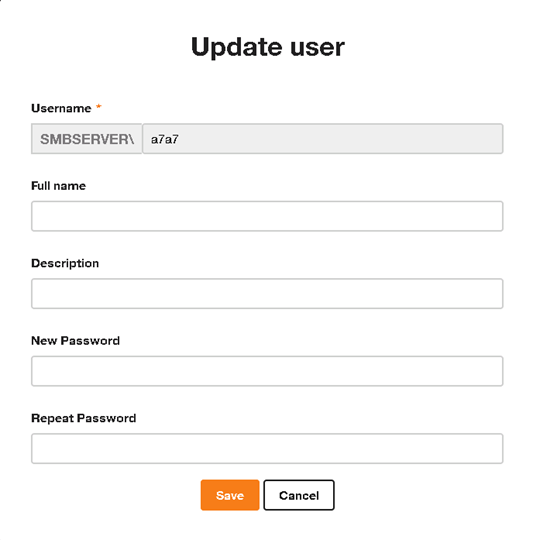
User update The user update window is identical to the user creation window, and follows exactly the same rules
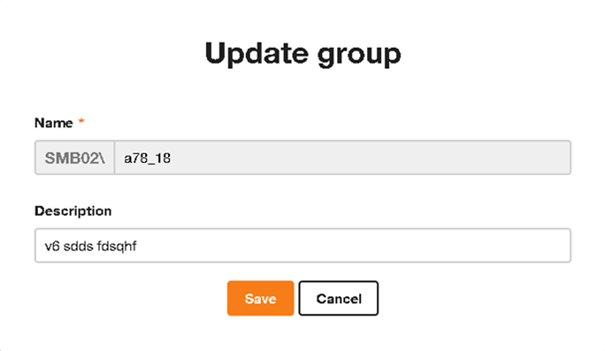
Creating / updating a group
Creating and modifying a group is very similar to creating/modifying a user, but without password management.
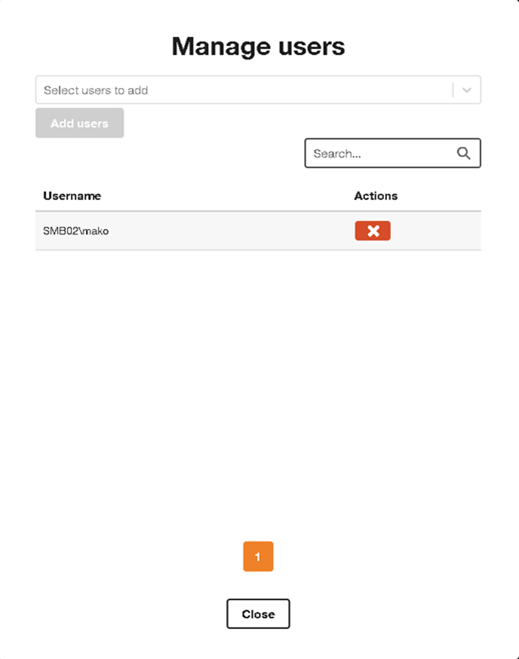
Group management From the group list, the
icon lets you manage the users belonging to this group. Users are selected naturally from the drop-down list at the top of the window, but also by using the Search field to filter the results to be displayed, in the case of a very large number of users for example.
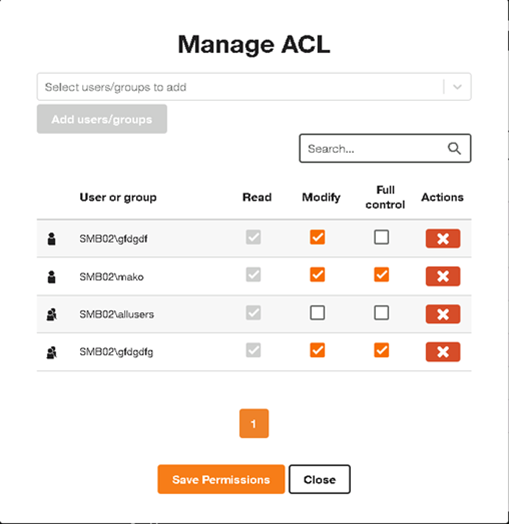
Authorization management (ACL)
By clicking on the
icon, a popup window appears, listing the various authorizations that have been set. Users and groups have already been created in the Users and Groups page.
The top field lets you add one or more users or groups at the same time for the current share (you can click on a user/group in the list or use the auto-complete function).
Selected users/groups will be added by pressing the

icon and will have “Read” permission by default.
A user/group can be deleted by clicking on the
icon on the relevant line. Modify and Full control
permissions can be modified using the checkboxes. All changes made to permissions will only be saved by pressing the

button.
Q&A
- Why is there an IP and subnet created when an SVM is created?
The reason for this is that Shared Storage is based on NetApp . When an SVM is created, it hosts several volumes, and as part of this process, an isolated network is dedicated to the customer. This ensures the proper isolation and performance of the storage services.
- Are there any restrictions on the IP chosen for the SVM?
There is no strict restriction on the IP you wish to set. However, you will be notified with the following message:
“The last three addresses in the range are reserved for routing purposes.”
For example, in a /24 subnet, the addresses ending with .252 to .254 are reserved and cannot be used.