Cloud Avenue Wiki
-
Overview
-
Practical sheets
-
-
- Aucun article
-
-
- Aucun article
-
-
-
- Backup : Agent-Level B&R via NSS for IAAS offer
- Backup : Create VCOD Backup
- Backup : Netbackup Agent Installation for Linux
- Backup : Netbackup Agent Installation for Windows
- Backup : Overall Design for VCOD Offer
- Backup : User's Guide for VCOD Offer
- NSX-T : Configuring a Distributed Firewall
- NSX-T : Create VPN Ipsec
- NSX-T : Creation of T1
- NSX-T : DNAT configuration
- NSX-T : How to configure a Gateway Firewall
- NSX-T : SNAT configuration
- NSX-T: Create and Configure a Geneve Overlay Segment
- NSX-T: How to configure an IPSEC solution
- vCenter : Clone a VM
- VCenter : Create a new VM
- VCenter : Create a snapshot of a VM
- VCenter : Reset cloudadmin password
- VCenter : Storage Vmotion on a VM
- VCenter : Upgrade Vmware tools on a VM
-
-
Q & A
-
Services
-
-
- Aucun article
-
- Aucun article
-
- Aucun article
-
- Aucun article
-
- Aucun article
-
- Aucun article
-
- Aucun article
-
-
-
- Aucun article
-
- Aucun article
-
- Aucun article
-
-
-
- Aucun article
-
- Aucun article
-
-
vCenter : Clone a VM
Clone a VM
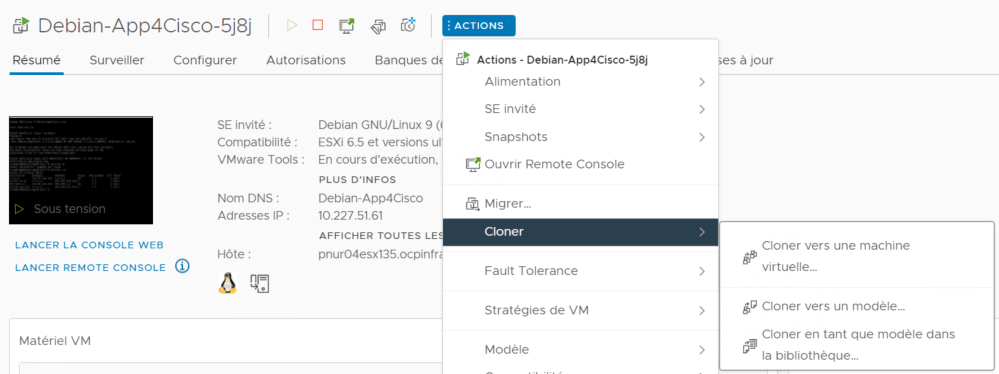
1. From the Hosts and Clusters menu, select ACTIONS then Clone.
Several options:
- Clone to Virtual Machine…: Allows you to make a copy of the original VM with the same CPU, memory resources, and the same hardware and software characteristics.
- Clone to Template…: Templates/Models are a copy of a VM that allow you to recreate ready-to-use VMs. To modify a template, it must be deployed as a VM, then make the desired software/hardware changes and recreate a template if needed.
- Clone as Template to Library…: Allows adding VM templates to a content library.
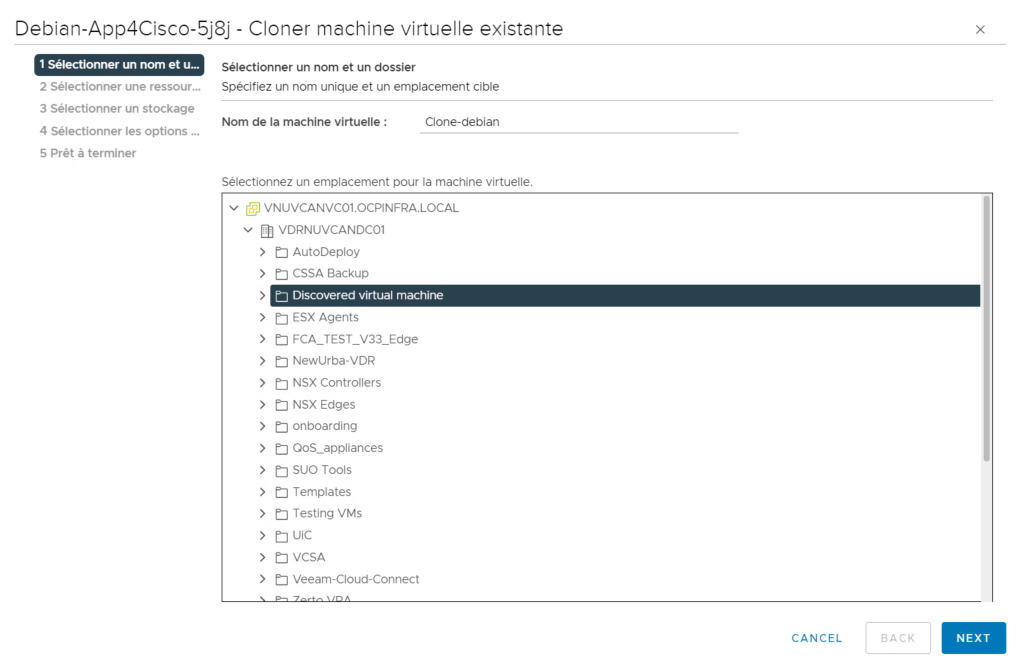
2. Enter a VM Name and the file location folder then click NEXT.
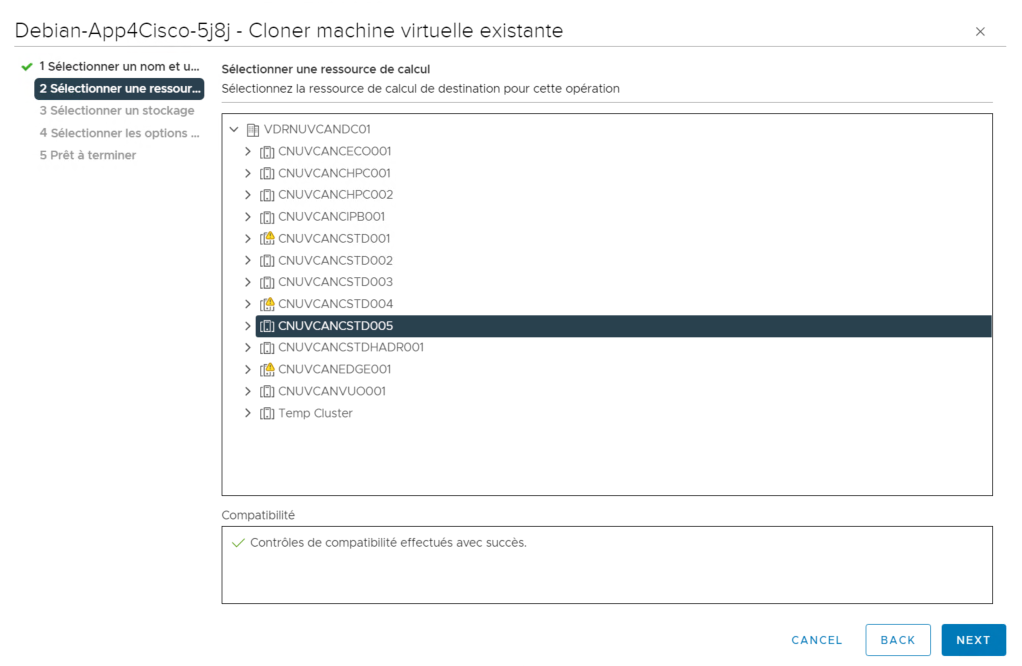
3. Select the Resources and check compatibility with the VM then click NEXT.
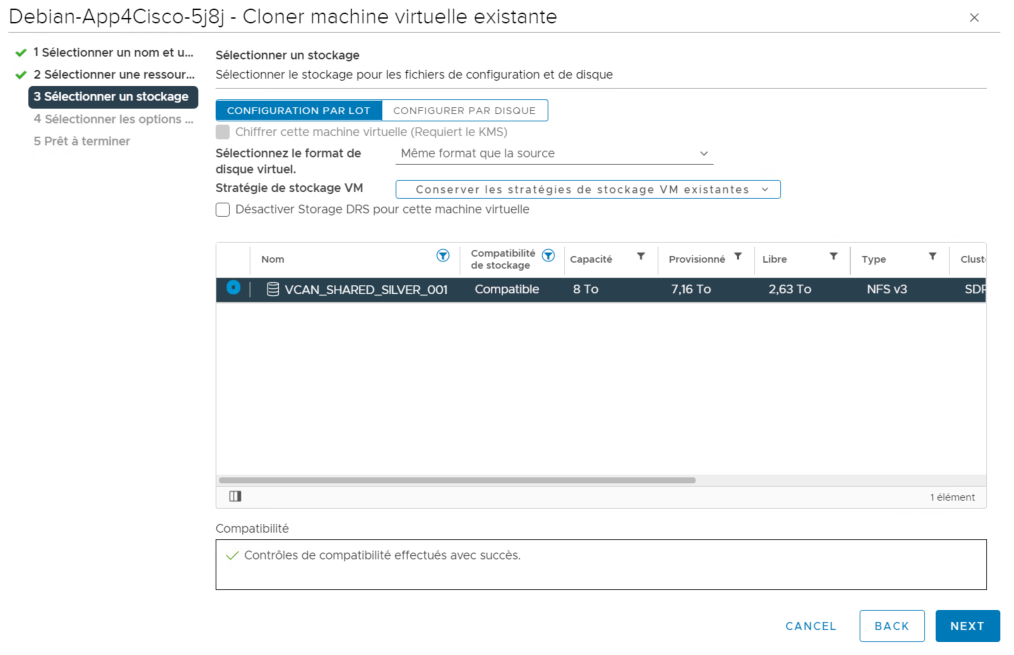
4. Choose the Storage and check compatibility with the VM then click NEXT
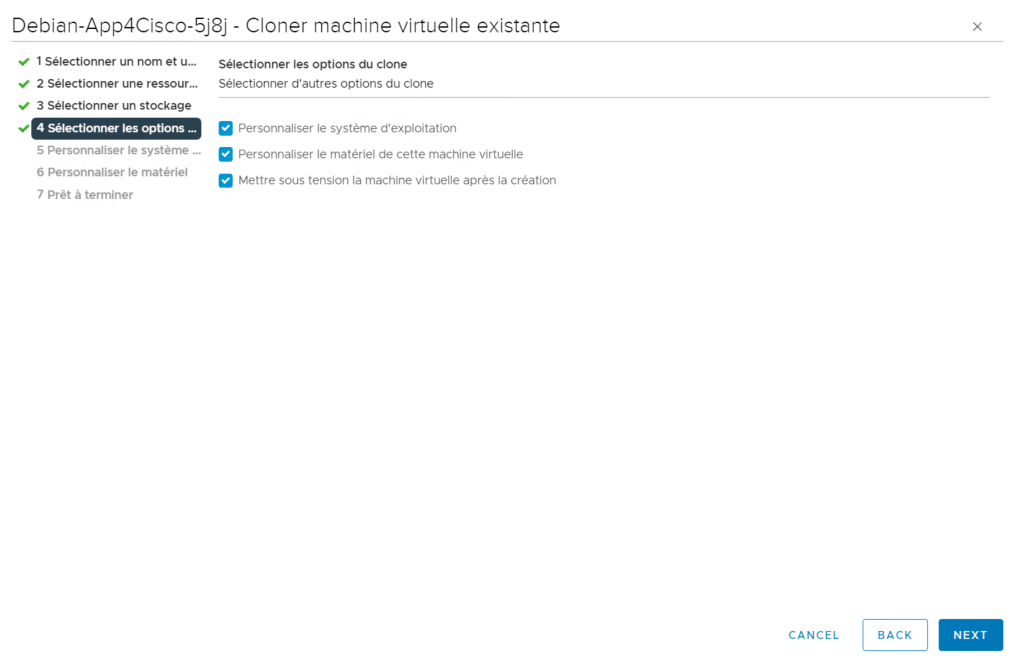
5. (Optional) Customize Guest OS: Apply a customization specification to the OS and hardware. Option to start the VM after creation.
Check compatibility then click NEXT
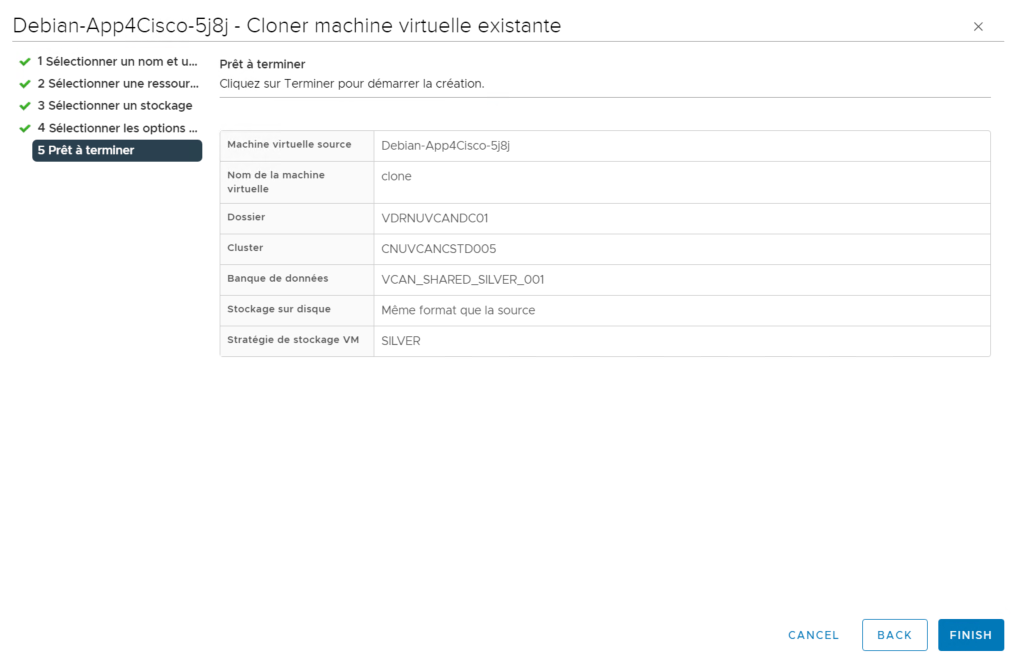
6. Review the details then click FINISH.