-
Overview
-
Practical sheets
-
-
- Aucun article
-
-
- Aucun article
-
-
-
- Backup : Agent-Level B&R via NSS for IAAS offer
- Backup : Create VCOD Backup
- Backup : Netbackup Agent Installation for Linux
- Backup : Netbackup Agent Installation for Windows
- Backup : Overall Design for VCOD Offer
- Backup : User's Guide for VCOD Offer
- NSX-T : Configuring a Distributed Firewall
- NSX-T : Create VPN Ipsec
- NSX-T : Creation of T1
- NSX-T : DNAT configuration
- NSX-T : How to configure a Gateway Firewall
- NSX-T : SNAT configuration
- NSX-T: Create and Configure a Geneve Overlay Segment
- NSX-T: How to configure an IPSEC solution
- vCenter : Clone a VM
- VCenter : Create a new VM
- VCenter : Create a snapshot of a VM
- VCenter : Reset cloudadmin password
- VCenter : Storage Vmotion on a VM
- VCenter : Upgrade Vmware tools on a VM
-
-
Q & A
-
Services
-
-
- Aucun article
-
- Aucun article
-
- Aucun article
-
- Aucun article
-
- Aucun article
-
- Aucun article
-
- Aucun article
-
-
-
- Aucun article
-
- Aucun article
-
- Aucun article
-
-
-
- Aucun article
-
- Aucun article
-
-
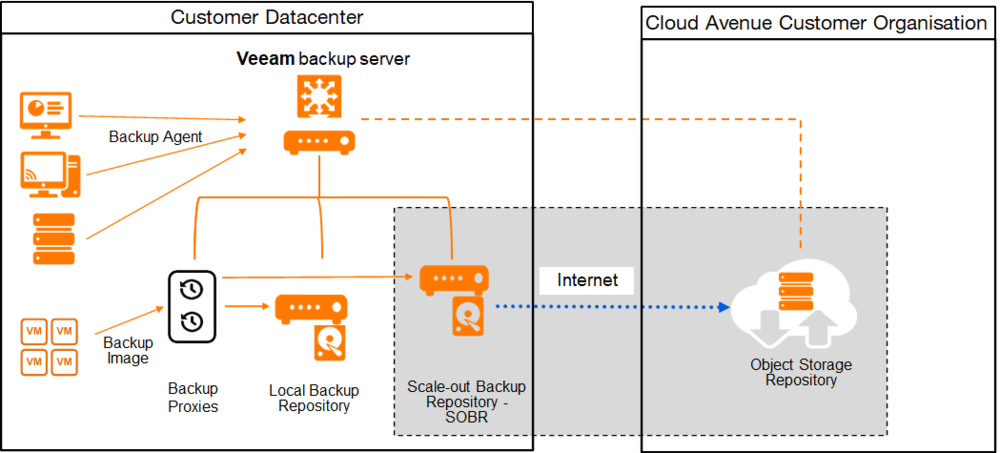
Integrating Object Storage with Veeam B&R
Overview
The purpose of this page is to explain how to configure Veeam Backup to back up/restore data to object storage.
Prerequisite
Veeam Backup and Replication must be installed and configured.
A backup repository must be created to act as a gateway.
It is not possible to back up directly from Veeam to object storage (Veeam12: direct object feature). This feature is in the roadmap.
Implementation diagram
Creating the Bucket in Object Storage
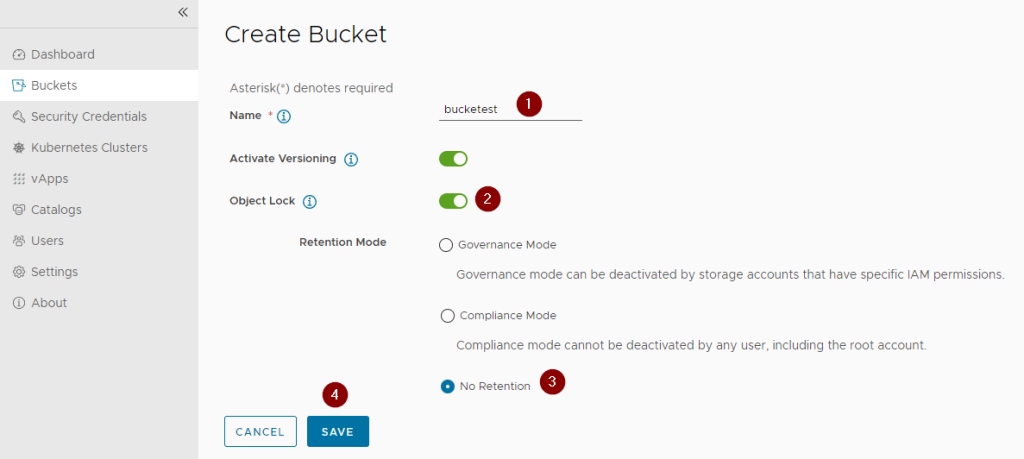
It is essential to enable Object Locking when creating the Bucket in order to use the object protection feature in Veeam (Immutable).
1- Click on Buckets
2- Click on New Bucket

1- Name the Bucket
2- Enable Object Lock
3- Select No Retention
4- Click on “Save”
If Object Lock is not required, only steps 1 and 4 need to be performed.
Veeam configuration
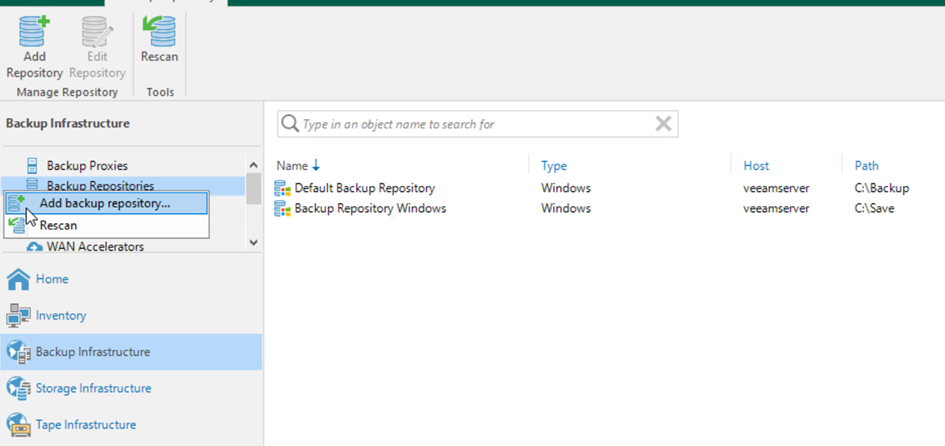
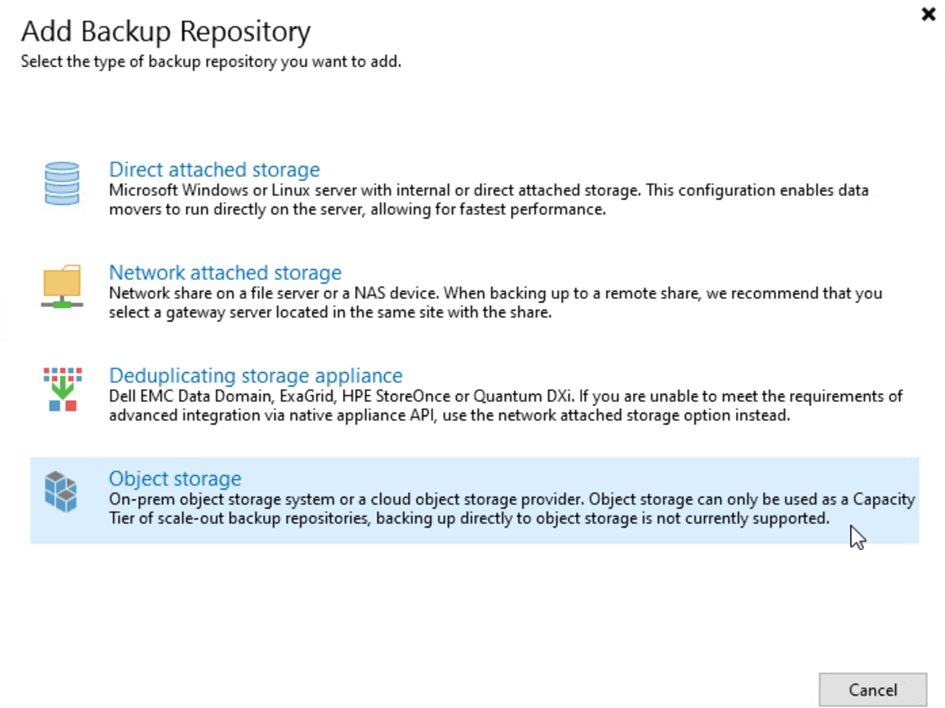
Adding a backup repository
Click on Add backup repository…
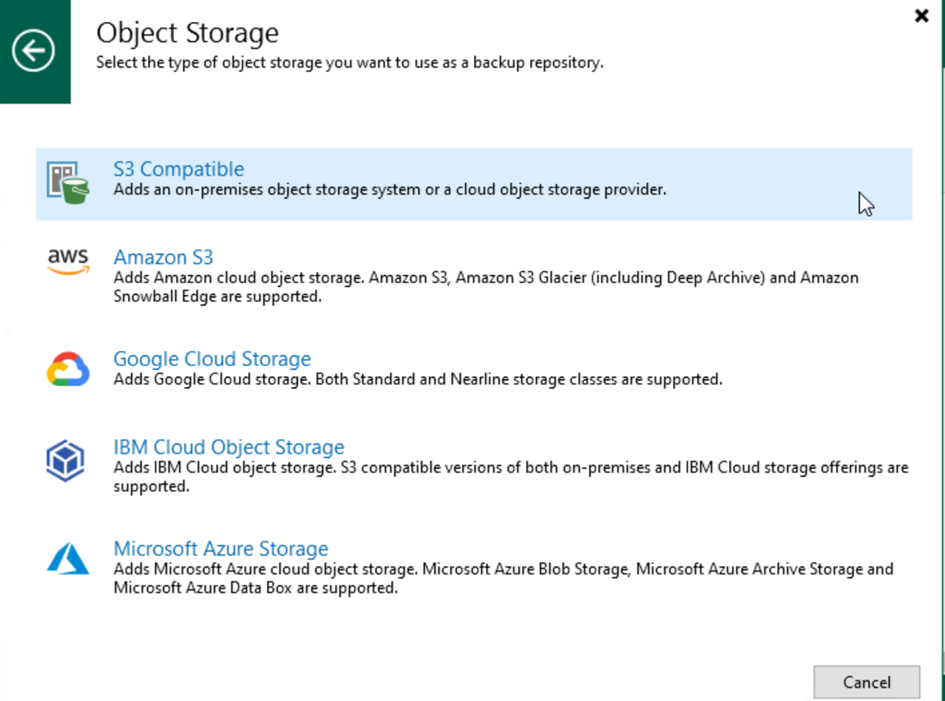
Click on Object Storage
Click on S3 Compatible
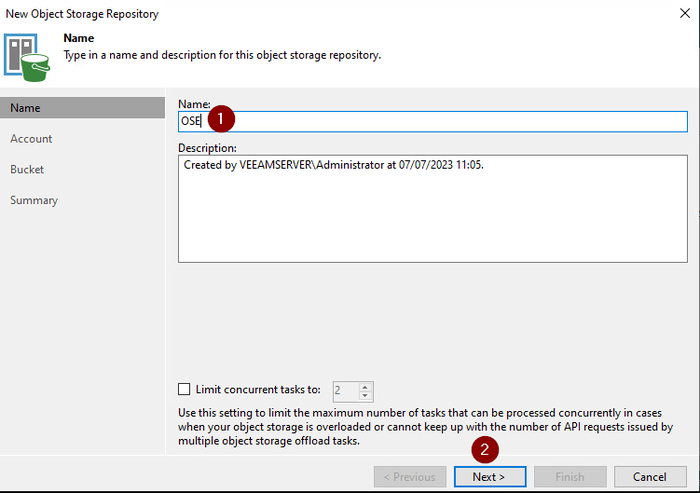
1- Provide a name for the repository
2- Click on “Next”
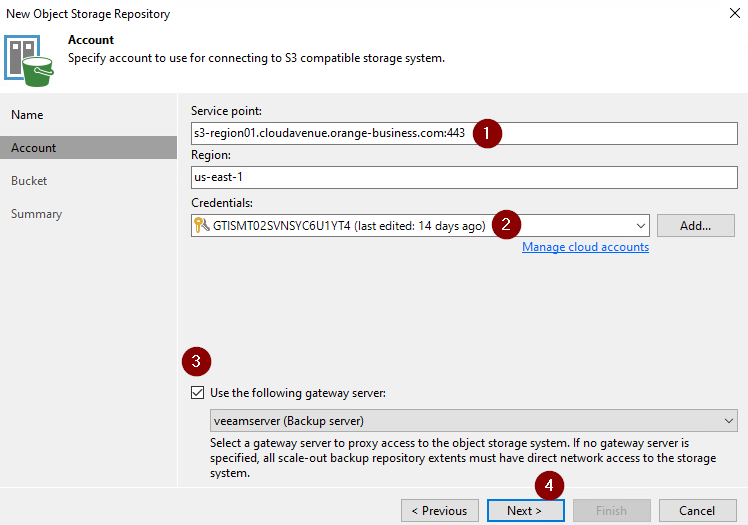
1- Define the service point.
A public DNS must be declared on the Veeam server for the service point URL to be recognized
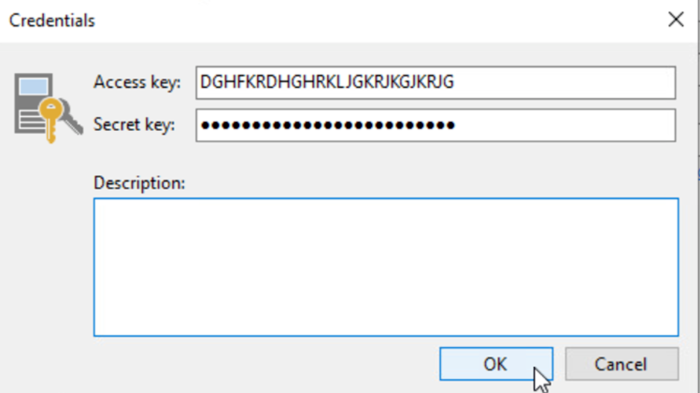
2- Select the credentials
3- Check the Use the following gateway server checkbox and select the gateway server
4- Click on “Next”
Add the keys and click on OK.
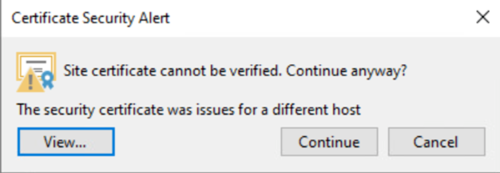
Click on Continue
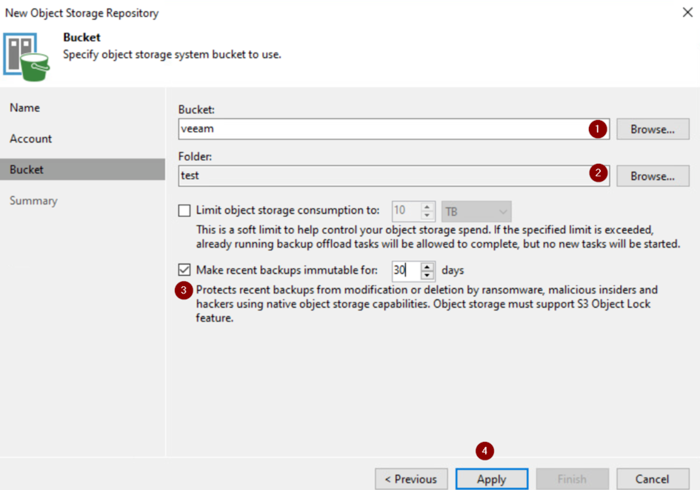
1- Click on Browse and select the Bucket.
2- Click on Browse and select the folder.
3- Check the Make recent backups immutable checkbox if you want to prevent data from being deleted for any given number of days.
Note that the maximum with Veeam is 90 days.
Also note that to enable this feature, you must configure the Bucket on the Object Storage side to activate Object Locking => see the section above on Creating a Bucket in Object Storage.
4- Click on Apply.
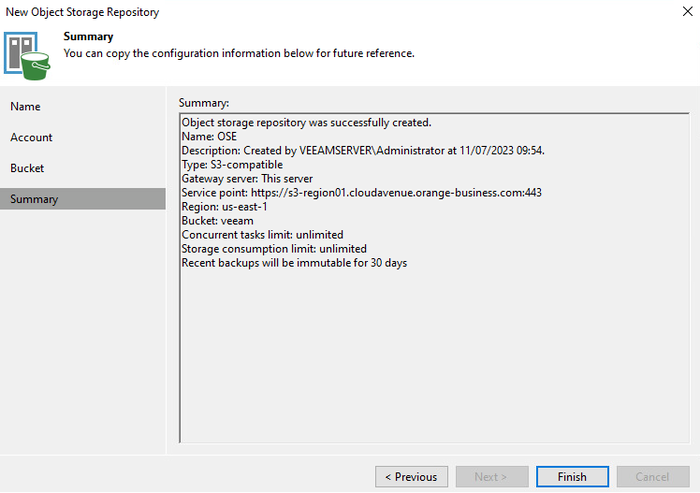
Click on Finish
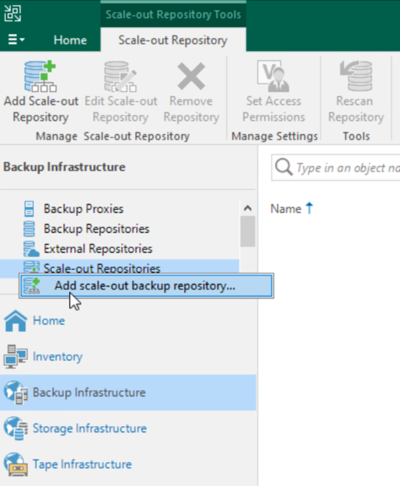
Adding a scalable backup repository (Scale-out backup repository)
Click on Add scale-out backup repository…
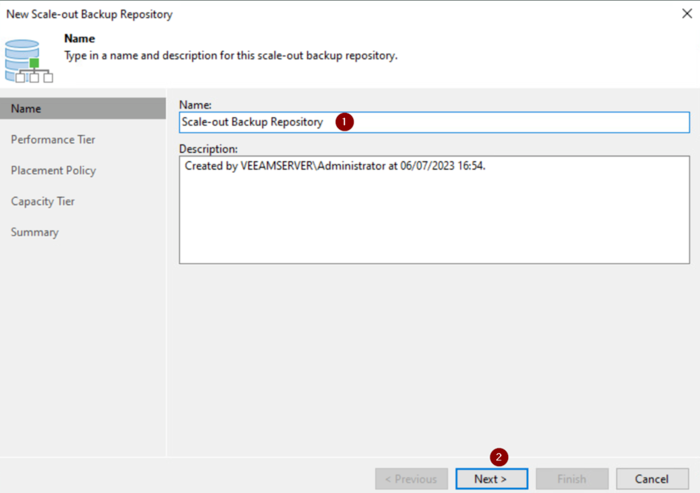
1- Provide a name for the backup repository
2- Click on “Next”
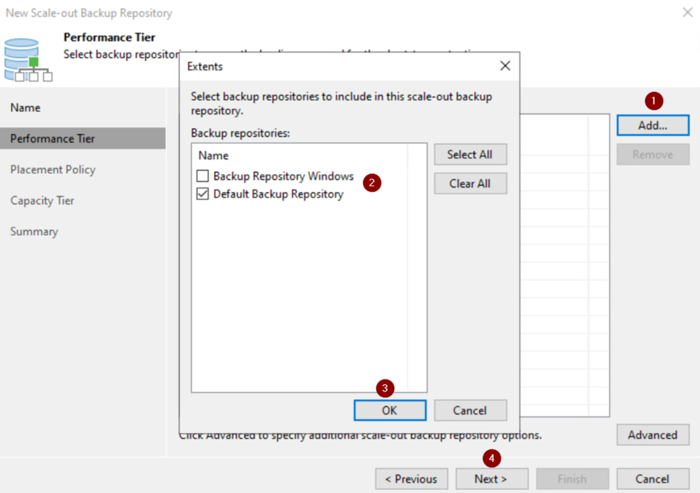
1- Click on “Add”
2- Select the backup repository
3- Click on “OK”
4- Click on “Next”
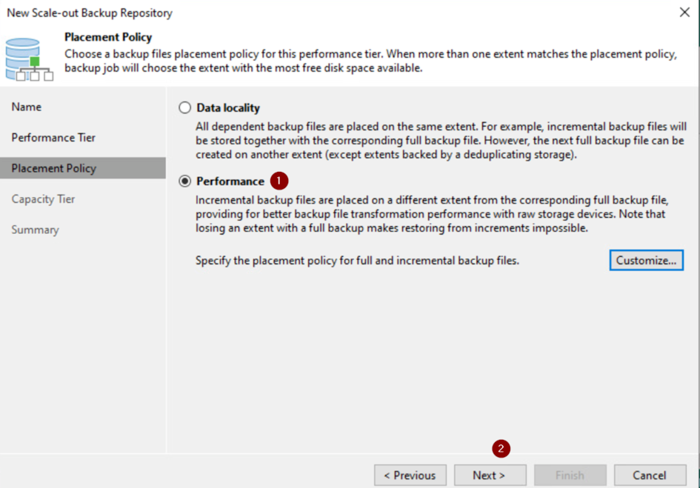
1- Select Performance
2- Click on “Next”
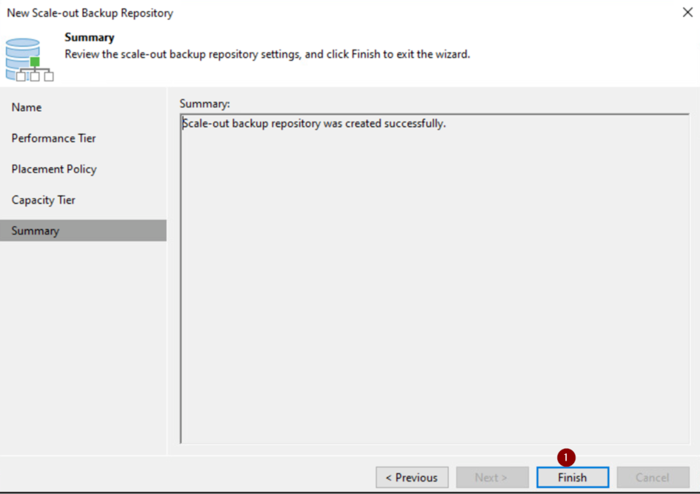
1- Click on “Finish”