Cloud Avenue Wiki
-
Overview
-
Q & A
-
Practical sheets
-
-
- Aucun article
-
-
- Aucun article
-
-
-
- Backup : Agent-Level B&R via NSS for IAAS offer
- Backup : Create VCOD Backup
- Backup : Netbackup Agent Installation for Linux
- Backup : Netbackup Agent Installation for Windows
- Backup : Overall Design for VCOD Offer
- Backup : User's Guide for VCOD Offer
- NSX-T : Configuring a Distributed Firewall
- NSX-T : Create VPN Ipsec
- NSX-T : Creation of T1
- NSX-T : DNAT configuration
- NSX-T : How to configure a Gateway Firewall
- NSX-T : SNAT configuration
- NSX-T: Create and Configure a Geneve Overlay Segment
- NSX-T: How to configure an IPSEC solution
- vCenter : Clone a VM
- VCenter : Create a new VM
- VCenter : Create a snapshot of a VM
- VCenter : Reset cloudadmin password
- VCenter : Storage Vmotion on a VM
- VCenter : Upgrade Vmware tools on a VM
-
-
Services
-
-
- Aucun article
-
- Aucun article
-
- Aucun article
-
- Aucun article
-
- Aucun article
-
- Aucun article
-
- Aucun article
-
-
-
- Aucun article
-
- Aucun article
-
- Aucun article
-
-
- Aucun article
-
- Aucun article
-
-
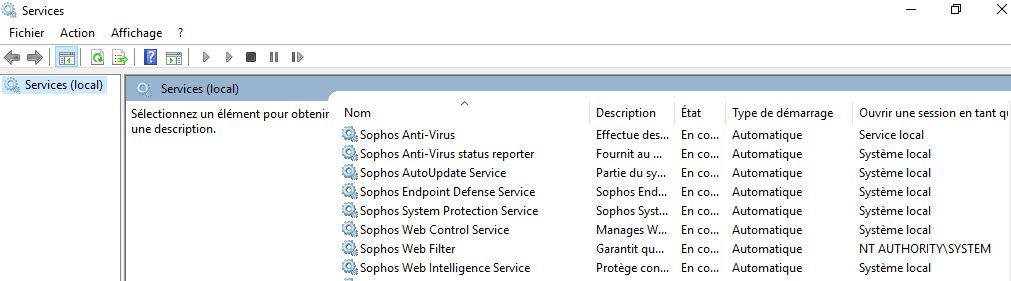
Uninstalling the SOPHOS Agent
Uninstall SOPHOS
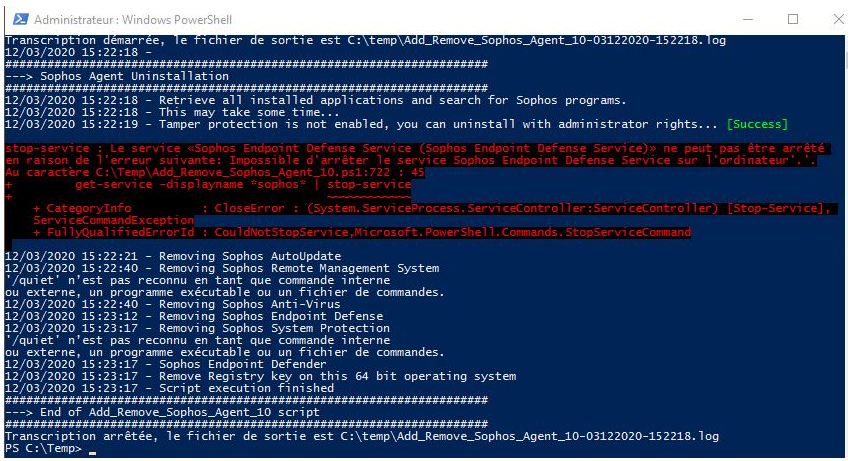
Solution 1
The following entry should exist in your C:\Windows\System32\drivers\etc\hosts file:

and a route to reach the 57.199.209.192/27 network via your admin interface. Download the Sophos file and put it in the C:\Temp folder (ask support for this file).

Reboot the VM to ensure all DLLs have been removed.
Check the log file in C:\Temp and verify, using the Control Panel, that there are no more SOPHOS programs.
Solution 2
Via Add/Remove Programs in Windows: If an update is in progress, wait for it to complete before continuing.
Then, in Windows Services, right-click Sophos AutoUpdate Service and click Stop.
Uninstall Sophos components in this order:

And remove following folders :