Installation and Configuration of TREND MICRO
Overview
Description of Trend Micro Deep Security Antimalware and Web Reputation Services
Trend Micro Deep Security is a comprehensive security platform designed to protect physical, virtual, and cloud servers. It integrates several protection modules to provide a multi-layered defense. Among these essential modules are Antimalware and Web Reputation.
Antimalware and Web Reputation are the two modules available on Cloud Avenue Security Solution.
1. Antimalware Service
The Antimalware module in Trend Micro Deep Security is designed to detect and neutralize malicious software on servers. It offers robust protection against a wide range of threats.
- Primary Objective: To protect systems against viruses, worms, Trojans, spyware, ransomware, and other types of malicious software.
- Advanced Detection Methods:
- Signature-based Detection: Identifies known threats by comparing files against a constantly updated database of malware signatures.
- Heuristic Analysis: Detects new or unknown threats by analyzing suspicious file and process behavior, even without a specific signature.
- Behavioral Analysis: Monitors application and system activities to identify abnormal behaviors that could indicate an infection.
- Machine Learning: Uses machine learning algorithms to identify emerging and sophisticated threats with high accuracy.
- Real-time Protection: Scans files upon access, modification, or execution to block threats before they can cause damage.
- Remediation Actions: Upon detection, the module can quarantine infected files, clean them, delete them, and notify administrators.
- Performance Optimization: Designed to minimize impact on server performance through optimized scanning techniques and scan deduplication in virtualized environments.
2. Web Reputation Service
The Web Reputation module in Trend Micro Deep Security protects servers and users against web-based threats by evaluating the trustworthiness of websites.
- Primary Objective: To prevent access to malicious websites, including those hosting malware, phishing attempts, exploits, or undesirable content.
- How it Works:
- Reputation Database: Relies on Trend Micro’s global Smart Protection Network database, which contains reputation information for billions of URLs and IP addresses.
- Reputation Scores: Each website is evaluated and assigned a reputation score based on factors such as domain age, threat history, known vulnerabilities, and hosted content.
- Real-time Analysis: Checks the reputation of URLs in real-time when servers attempt to access web resources.
- Protection Against Web Threats:
- Phishing: Blocks access to phishing sites designed to steal credentials.
- Malware Hosting Sites: Prevents unintentional download of malicious software.
- Command and Control (C&C) Sites: Disrupts communications between infected systems and attacker control servers.
- Undesirable Content: Can be configured to block access to specific categories of websites.
- Actions: The module can block access to low-reputation sites or display warnings to users before they proceed.
The antivirus solution on offer is Trend Deep Security – https://help.deepsecurity.trendmicro.com/20_0/on-premise/welcome.html
Activating Trend Deep Security
By default, Trend Deep Security is not activated on your organization. You must activate it manually using your Cloud Customer Area.
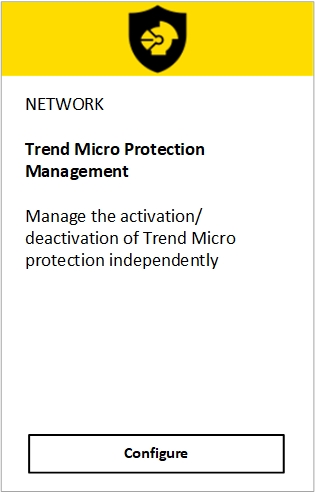
Go to the Service Catalog and look for the “Trend Micro Protection Management” tile.
Click on Configure.
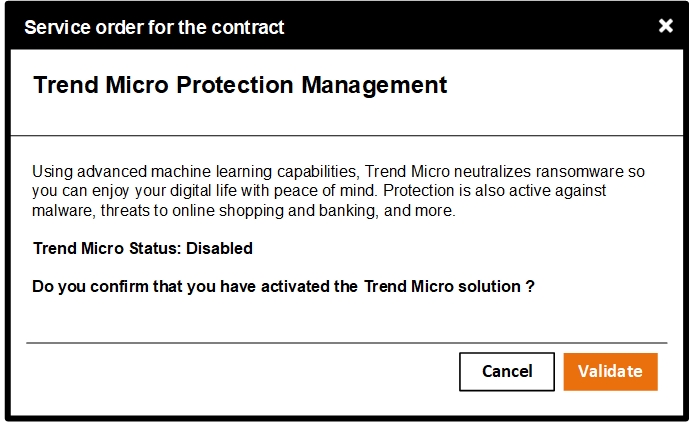
Activate your Trend Micro tenant by clicking on Validate
Go to your Trend Micro portal. Your portal address depends on your organization.
| Organization identifier prefix | Trend Micro portal |
| cav01 | https://antivirus1.cloudavenue.orange-business.com:4119 |
| cav02 | https://antivirus2.cloudavenue-vdr.itn.intraorange:4119 |
| cav04 | https://antivirus1.cloudavenue.orange-business.com:4119 |
| cav05 | https://antivirus2.cloudavenue-vdr.itn.intraorange:4119 |
If you wish to access the portal from a VM in a cav05 organization, you must use this URL: https://antivirus5.cloudavenue-cha.itn.intraorange:4119
Click on Forgot password ?
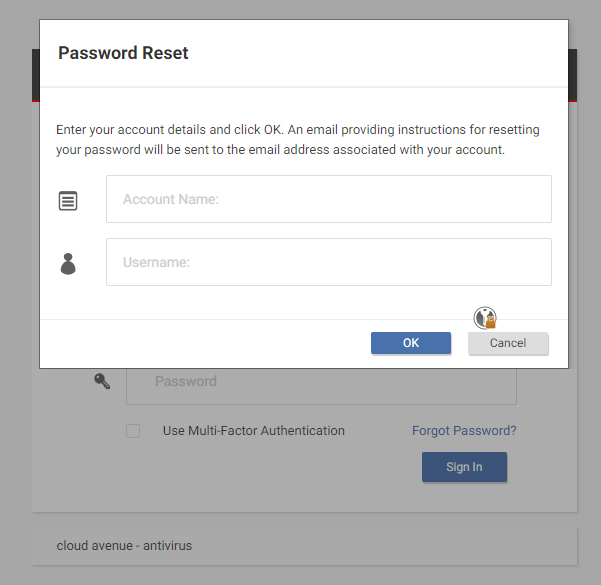
Enter Account Name (your cavxxxxxxocbxxxxxxx organization identifier) and Username (your e-mail address), then click on Ok.
You’ll receive an e-mail within a few minutes with instructions on how to set your password.
Portals
- Portal : https://antivirus1.cloudavenue.orange-business.com:4119/SignIn.screen?tenantAccount=CUSTOMER_ORG_VCD&username=CUSTOMER_ACCOUNT
- Update Source : https://avrelay1.cloudavenue.orange-business.com:4122
- Public IP : 195.25.13.11
Network configuration
Service area
Raccordement réseau à la zone de services (NGP)
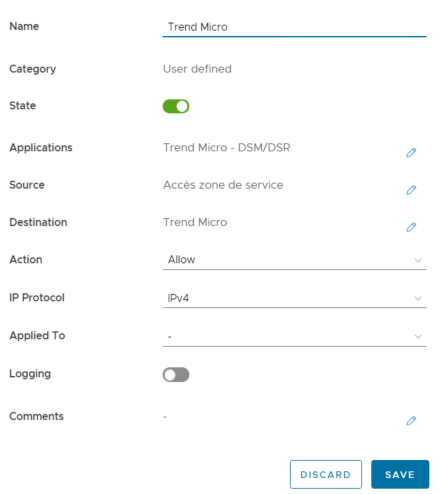
Trend
For connectivity to Trend, you need to configure your Edge Gateway.
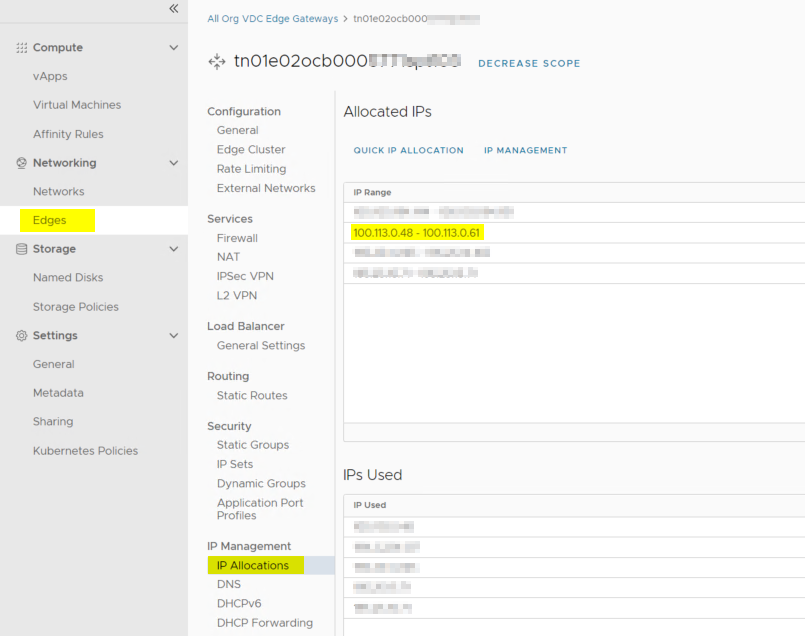
From the Edge Gateways tab > IP address allocations Locate the pool of IP addresses available to you starting with 100.113 (for VDR) or 100.114 (for CHA). Write it down somewhere.
Create an initial IPSET containing the networks that will access Trend (or use the one already created for the Admin Zone).
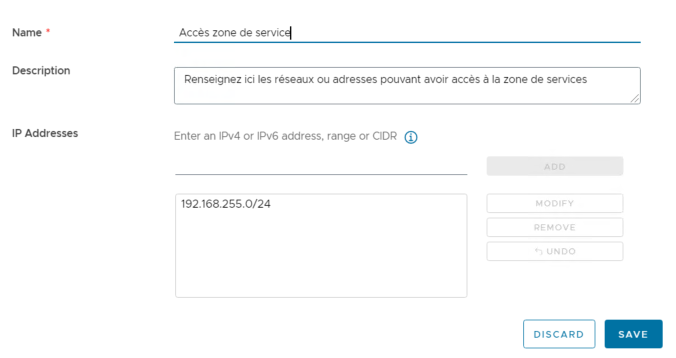
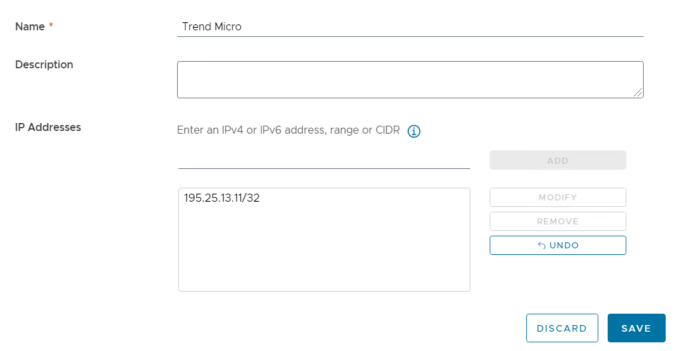
Create a second IPSET containing Trend’s IP: 195.25.13.11/32
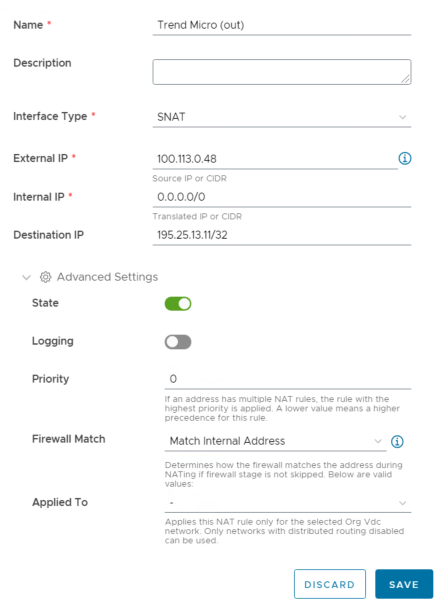
Create a NAT rule (SNAT)
The external IP must correspond to an IP address available on the IP address pool seen previously, in 100.113
The internal IP must correspond to an address or network created by you.
Enter the following “destination IP address”: 195.25.13.11/32
Set the priority to 0.
This rule must have a higher priority than the one enabling you to access the Internet, as the route taken is the same:
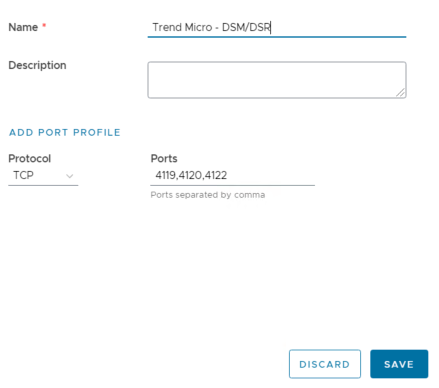
Check that you have an Application Port Profile for the ports used by Trend:
4119
4120
4122
Create a Firewall rule
Authorize your networks’ IPSET to access Trend’s IPSET using the Ports configured in the Port Profile
To validate if the network configuration is successful, try resolving (195.25.13.11)
antivirus1.cloudavenue.orange-business.com
avrelay1.cloudavenue.orange-business.com
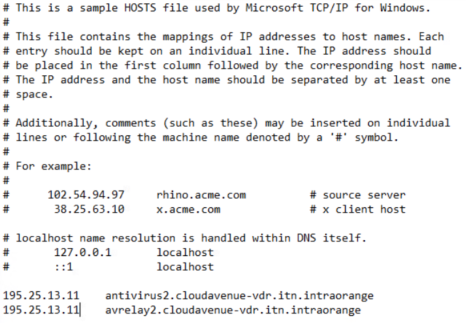
If this fails, add the addresses to your hosts file:
195.25.13.11 antivirus1.cloudavenue.orange-business.com
195.25.13.11 avrelay1.cloudavenue.orange-business.com
Network configuration

Warning !
First Connection Trend Micro Console – Before deploying your Trend Micro agents, it is imperative to consult the lists of recommended scan exclusions for your VMs (Real-Time, Manual and Scheduled). Exclusions are essential to avoid potential performance or functionality problems.
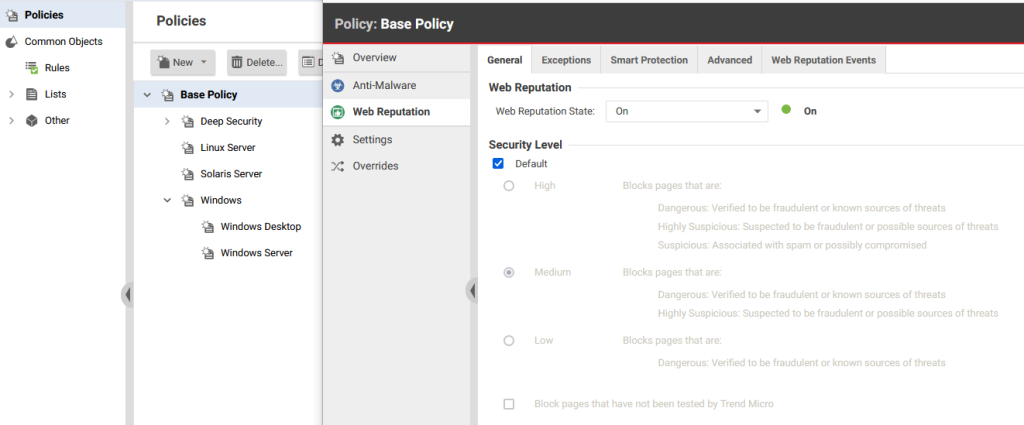
On Base Policy, check that the Anti-Malware and Web Reputation modules are enabled. These are the only free services. Other Trend services/modules are not free of charge.

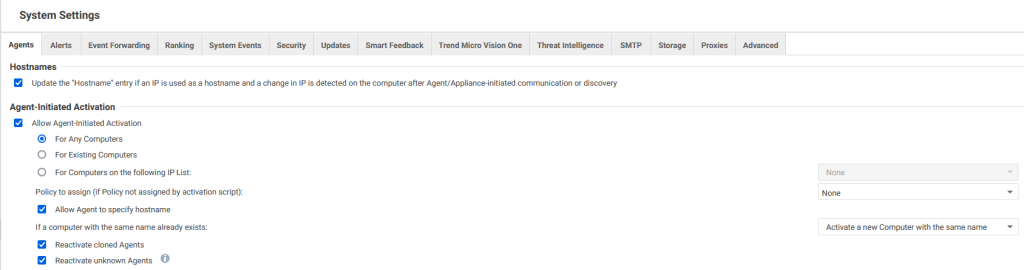
In System Settings –> Agents,
Cochez la case „ Aktualisieren Sie den Eintrag für den Hostnamen, wenn eine IP als Hostname verwendet wird und eine Änderung der IP auf dem Computer nach einer vom Agenten / der Appliance initiierten Kommunikation oder Erkennung festgestellt wird “.
Sélectionnez ” Wenn bereits ein Computer mit demselben Namen existiert: Aktivieren Sie einen neuen Computer mit demselben Namen “, dies ist obligatorisch, um Probleme mit VMs mit gleichem Namen oder gleicher SID zu vermeiden.
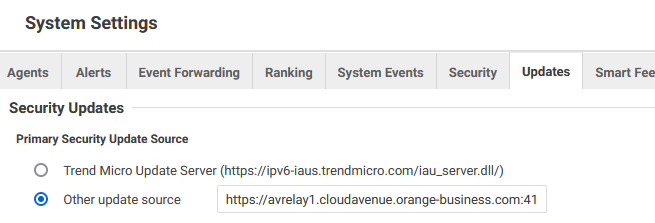
In System Settings –> Updates
Check that the primary source selected is “Other update source”:
https://avrelay1.cloudavenue.orange-business.com:4122
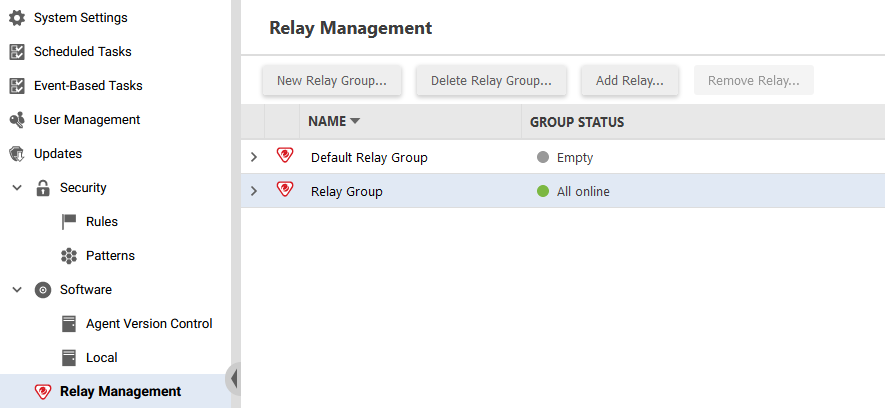
Créez Relay Group, cliquez sur New Relay Group
Deploy Trend Micro
Agent installation process for different OS – https://help.deepsecurity.trendmicro.com/20_0/on-premise/agent-install.html
Installation script
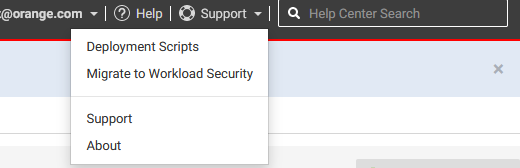
Create the installation script by clicking on Support in the top right-hand corner, then on Deployment Scripts :

Choose the platform that corresponds to your VM’s OS, your Security Policy, Computer Group and the Relay Group you’ve created.
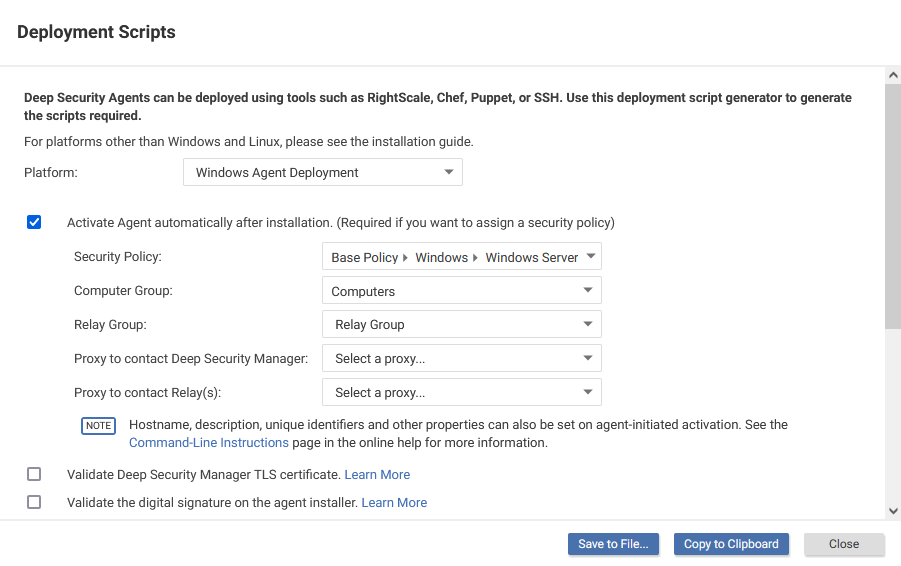
Scroll down to see the deployment script, click on Save to File or Copy to Clipboard :
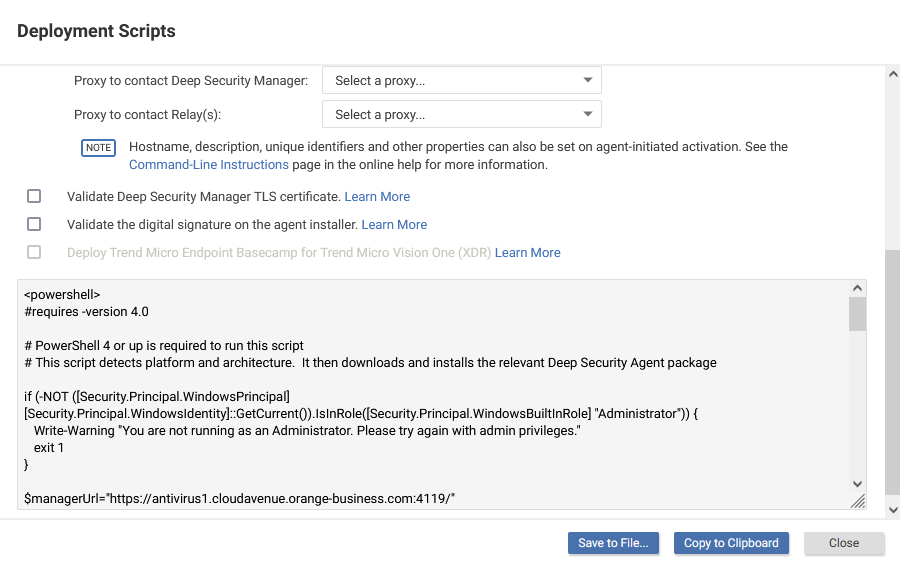
Copy and run the command as Admin on your first VM, which will be the Relay. After a few minutes, the VM will appear on your DSM console, under Computers.
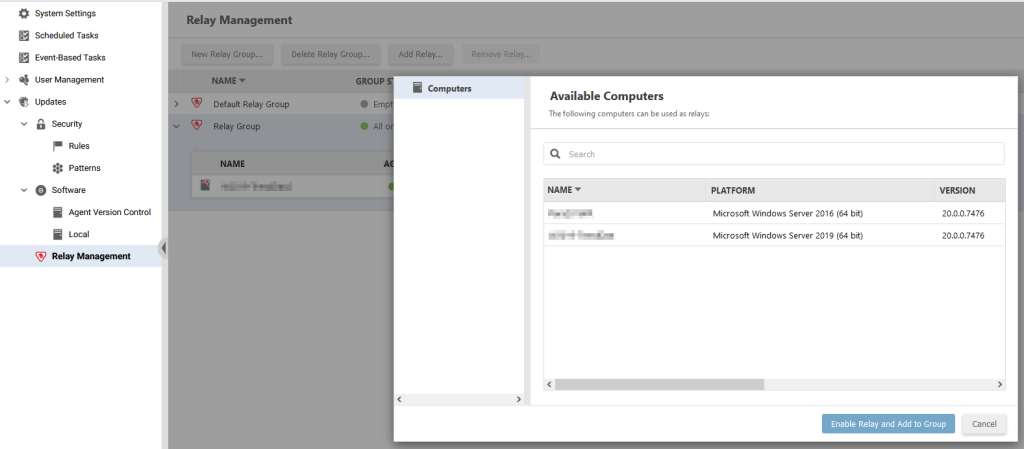
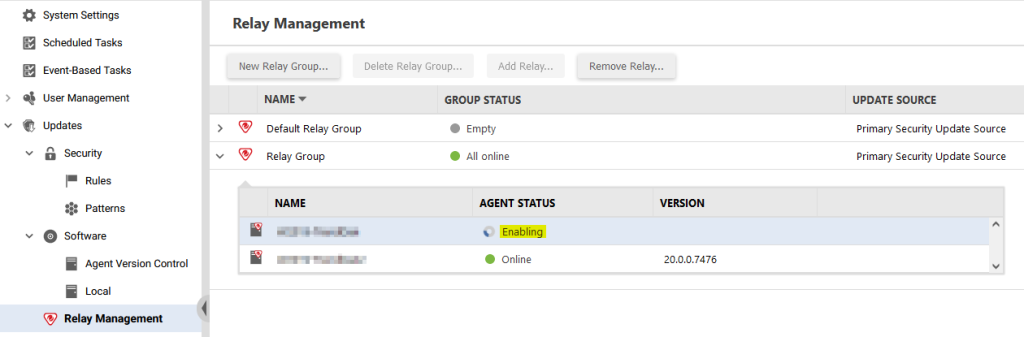
Click on Administration -> Updates -> Relay Management. Select the new Relay Group created at the top, then click on Add Relay. Your VM should appear, select it and click on Enable Relay and Add to Group
The VM will appear under the Relay Group with a status of Enabling :
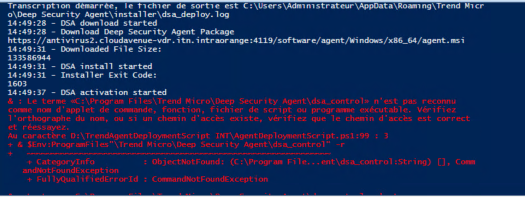
To speed up relay deployment, on the VM, from the installation location
Windows: default C:Program FilesTrend MicroDeep Security Agent
Linux: default /opt/ds_agent/
Run the following command:
dsa_control -m
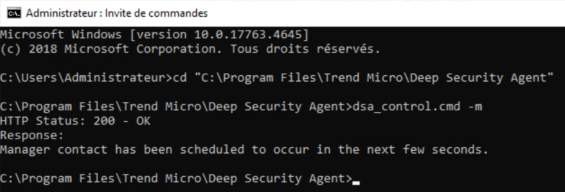
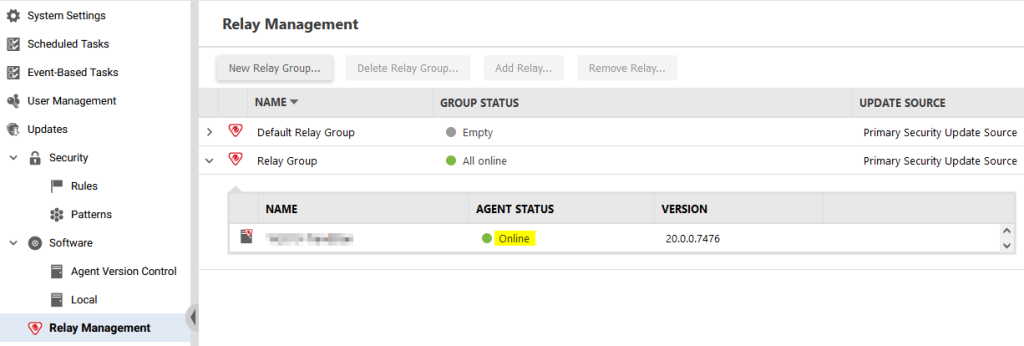
The command forces the update and installation of the Relay role on the VM. The VM will now switch to Online status :
Deploying Trend Agents
From Deployment Scripts, create a new installation script for your VMs according to their OS/role and choose the Security Policy, Computer Group and Relay Group created.
If several VMs share the same OS (2K12, 2K16…) and have the same scan exclusions, you can deploy the same script on these VMs.
Create your own deployment scripts :
Run the script on your machines.
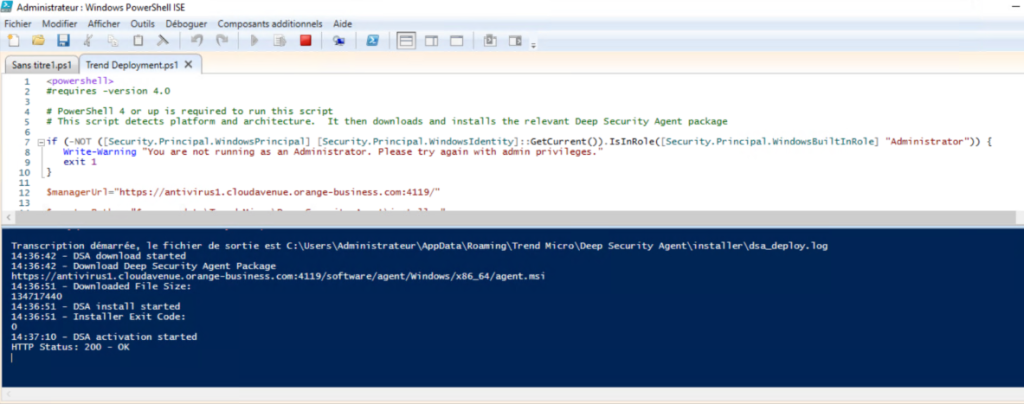
The script downloads, installs and activates the VM

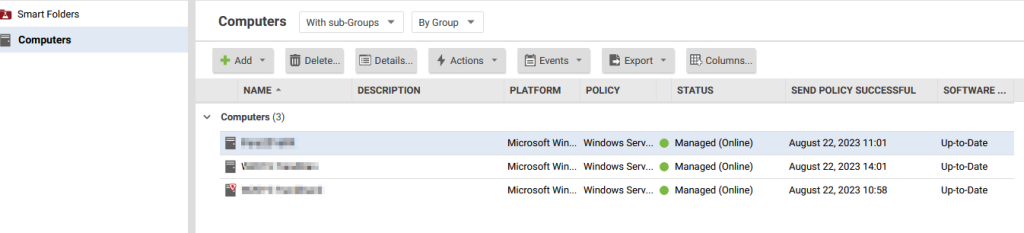
Your machine will then appear in the Trend Micro console

Known problems
1) If the Windows VM is not up to date, the agent installation may fail. The solution is to update Windows.
For Windows Server 2016/2019, check that the following KBs are installed:
KB5005112: https://www.catalog.update.microsoft.com/Search.aspx?q=KB5005112
KB5005625: https://www.catalog.update.microsoft.com/Search.aspx?q=KB5005625
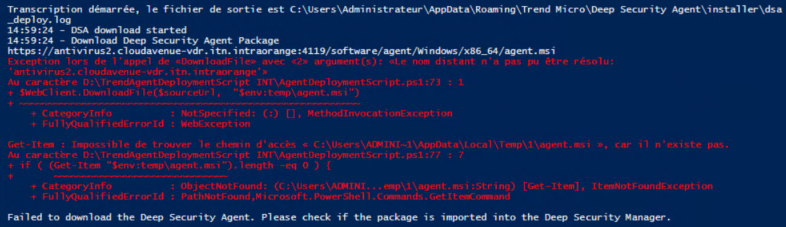
2) Agent installation error when Trend URLs are not resolved
Add the URLS to your hosts file (Windows, and /etc/hosts on Linux)
195.25.13.11 antivirus1.cloudavenue.orange-business.com
195.25.13.11 avrelay1.cloudavenue.orange-business.com
3) Trend agent installation/activation error – “Anti-malware driver is offline or not installed”. This is linked to the absence of VeriSign, DigiCert, USERTrust RSA certificates…
For other agent installation/activation problems, please consult the Trend Help Centre.
https://help.deepsecurity.trendmicro.com/20_0/on-premise/agent-issues.html