-
Overview
-
Practical sheets
-
-
- Aucun article
-
-
- Aucun article
-
-
-
- Backup : Agent-Level B&R via NSS for IAAS offer
- Backup : Create VCOD Backup
- Backup : Netbackup Agent Installation for Linux
- Backup : Netbackup Agent Installation for Windows
- Backup : Overall Design for VCOD Offer
- Backup : User's Guide for VCOD Offer
- NSX-T : Configuring a Distributed Firewall
- NSX-T : Create VPN Ipsec
- NSX-T : Creation of T1
- NSX-T : DNAT configuration
- NSX-T : How to configure a Gateway Firewall
- NSX-T : SNAT configuration
- NSX-T: Create and Configure a Geneve Overlay Segment
- NSX-T: How to configure an IPSEC solution
- vCenter : Clone a VM
- VCenter : Create a new VM
- VCenter : Create a snapshot of a VM
- VCenter : Reset cloudadmin password
- VCenter : Storage Vmotion on a VM
- VCenter : Upgrade Vmware tools on a VM
-
-
Q & A
-
Services
-
-
- Aucun article
-
- Aucun article
-
- Aucun article
-
- Aucun article
-
- Aucun article
-
- Aucun article
-
- Aucun article
-
-
-
- Aucun article
-
- Aucun article
-
- Aucun article
-
-
-
- Aucun article
-
- Aucun article
-
-
NGP IPSec
The IPSec VPN supports establishing a virtual private network between an NSX Edge instance and remote sites. Certain prerequisites are required for its implementation:
- Have IPSec NSX compatible equipment (a free test client is available here: https://strongswan.org/)
- Have the ports udp-500 (port dedicated to the IPSec service) / udp-4500 (if behind a NAT address) and ICMP open
These flows are normally implemented in the FW rules when the IPSEC service is activated.
More details HERE

Note !
You must have an account with the Organization Administrator Advanced role to set up this configuration.
There are two types of IPSec tunnels that can be set up on Cloud Director:
- Policy Based: configuration based on local and remote IPs, easy to configure for P2P connections where few subnets must be connected
- Route Based: Creates a VTI (Virtual Tunnel Interface) for the VPN, traffic is routed via routing tables.
Policy Based IPSec VPN
Go to the Networking / Edge Gateways / IPSec VPN menu then click NEW.

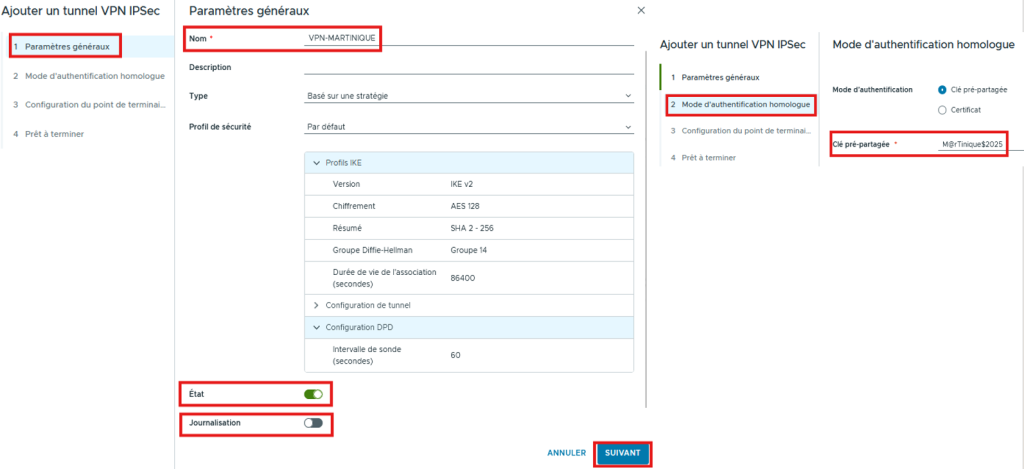
- In the General settings section:
- Name your IPSec VPN
- Type:
- Policy Based (Policy Based)
- Enable IPSec and Logging* if needed then click NEXT
- * for Logging, request the logs through your Support
- In the Peer authentication mode section:
- Enter the shared key or the certificate then click NEXT
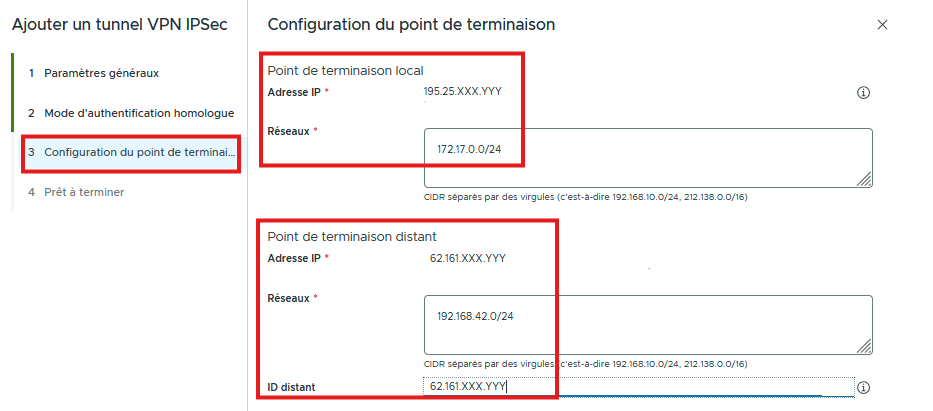
In the Endpoints configuration, specify the Public IPs and the Subnets to be shared between the 2 Sites:
- Local endpoint : Public IP and Cloud Avenue Subnet
- Remote endpoint : Incoming IP of the Remote Site (EndPoint) with the Site(s) Network(s)
- Click NEXT
- Check the Summary at the last step and click FINISH
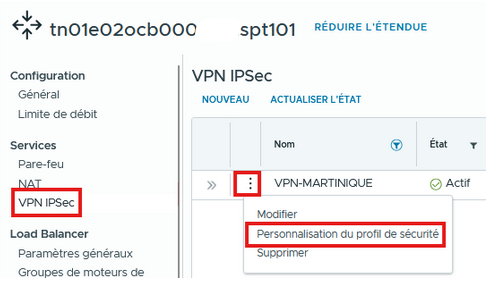
- On the main menu, choose SECURITY PROFILE CUSTOMIZATION:
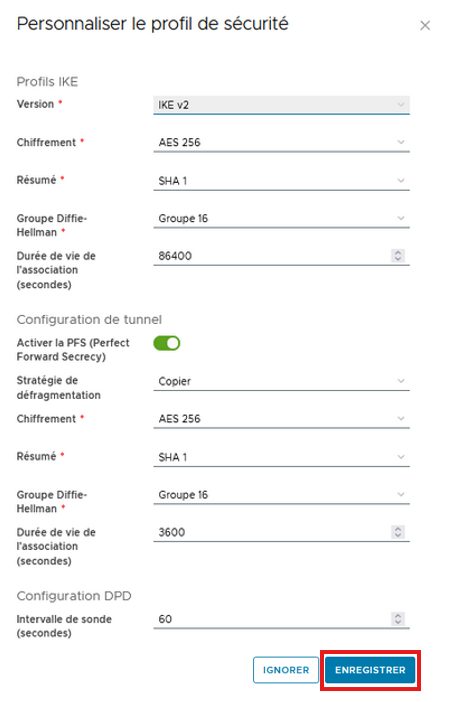
Define the Encryption characteristics and Phases 1&2 then click SAVE
- IKE Profile / Phase1: This phase refers to the stage where the 2 VPNs will create a secure and authenticated channel to communicate through a key exchange using the IKEv1 or IKEv2 protocol (Internet Key Exchange)
- Tunnel configuration / Phase2: The purpose of phase 2 is for the 2 peers to agree on parameters that define the type of traffic to pass through the VPN (Local & Remote Endpoint) and how to encrypt and authenticate the traffic.

Warning !
On the Remote Site, the configuration will be reversed.
- The Local Endpoint will be the Remote Endpoint
- the local Subnets will become the peer Subnets.
In the Firewall section, also remember to open the A/R flows on both FWs between the interconnected networks
- 10.10.10.0/24 to 192.168.10.0/30
- 192.168.10.0/30 to 10.10.10.0/24
Route Based IPSec VPN
In the General settings section, specify the Type “Route Based” then select the desired authentication mode
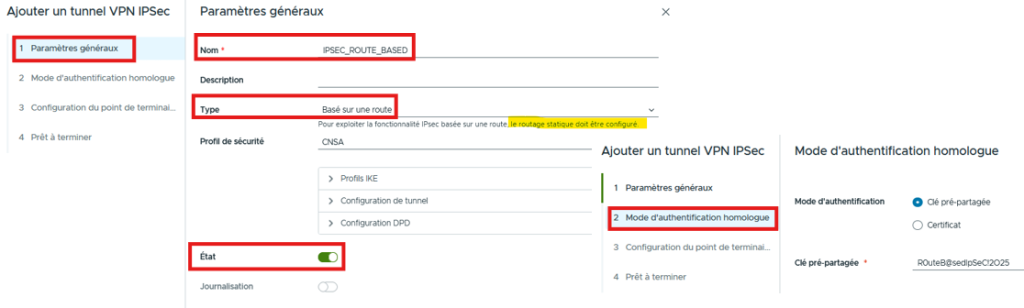
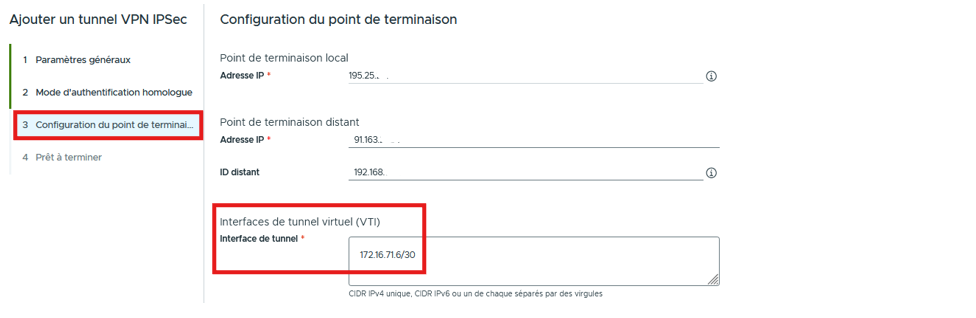
In this section, we will define the local Public IP, the remote Public IP and the local IP of the VTI interface
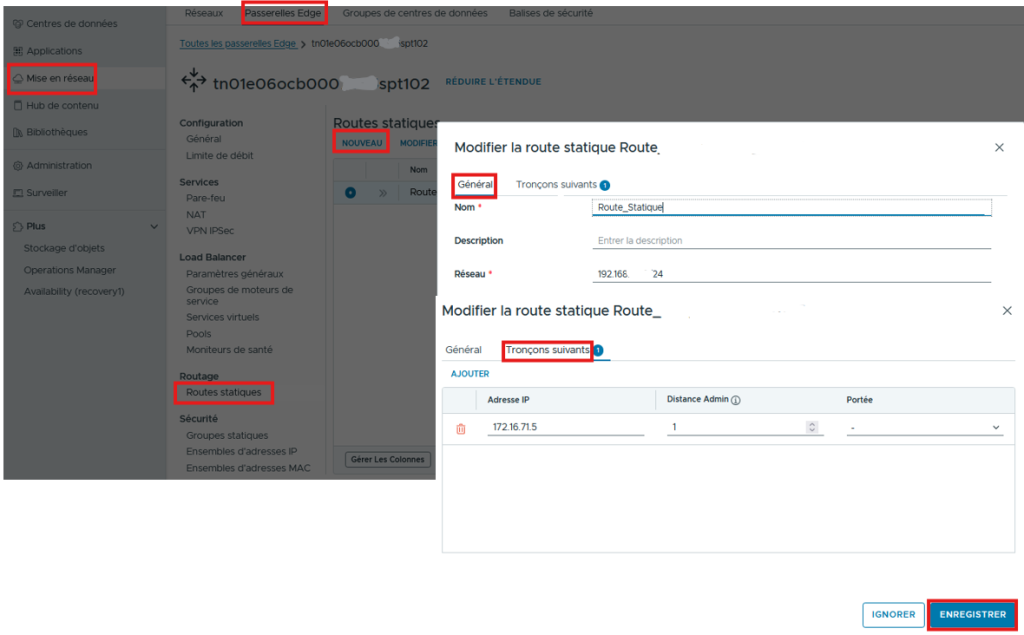
Validate the final summary step then in the “Edge Gateway“/”Networking“/”Routing“/”Static Routes” section, add the Remote Network to be reached by specifying as the Next Hop the IP of the VTI then click “SAVE“
On the main menu, check that the VPN is Active and that there is indeed Incoming/Outgoing Traffic.
