-
Overview
-
Practical sheets
-
-
- Aucun article
-
-
- Aucun article
-
-
-
- Backup : Agent-Level B&R via NSS for IAAS offer
- Backup : Create VCOD Backup
- Backup : Netbackup Agent Installation for Linux
- Backup : Netbackup Agent Installation for Windows
- Backup : Overall Design for VCOD Offer
- Backup : User's Guide for VCOD Offer
- NSX-T : Configuring a Distributed Firewall
- NSX-T : Create VPN Ipsec
- NSX-T : Creation of T1
- NSX-T : DNAT configuration
- NSX-T : How to configure a Gateway Firewall
- NSX-T : SNAT configuration
- NSX-T: Create and Configure a Geneve Overlay Segment
- NSX-T: How to configure an IPSEC solution
- vCenter : Clone a VM
- VCenter : Create a new VM
- VCenter : Create a snapshot of a VM
- VCenter : Reset cloudadmin password
- VCenter : Storage Vmotion on a VM
- VCenter : Upgrade Vmware tools on a VM
-
-
Q & A
-
Services
-
-
- Aucun article
-
- Aucun article
-
- Aucun article
-
- Aucun article
-
- Aucun article
-
- Aucun article
-
- Aucun article
-
-
-
- Aucun article
-
- Aucun article
-
- Aucun article
-
-
-
- Aucun article
-
- Aucun article
-
-
Load Balancing
NSX enables load balancing (Load Balancing) at layer 4 (TCP or UDP) or layer 7 (HTTP or HTTPS):
More details HERE and on the presentation of the services HERE.
Note !
You must have an account with the Organization Administrator Advanced role to set up this configuration.
On a shared T1, it is possible to configure 20 VIPs and 200 VIPs on a dedicated T1.
Load Balancer Configuration
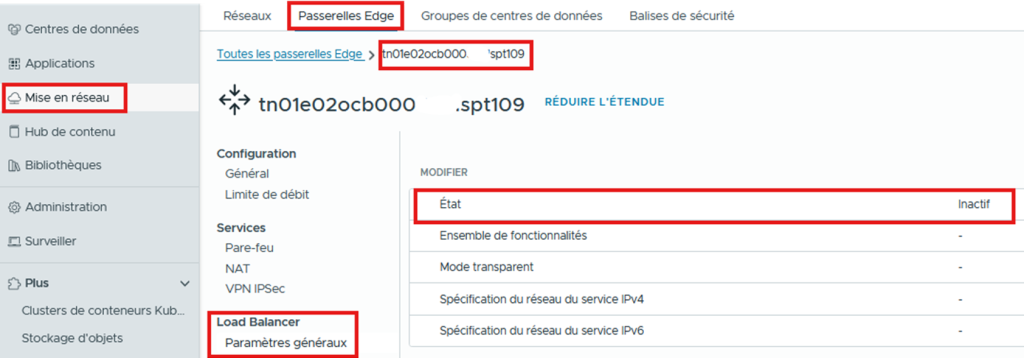
Go to the Networking / Edge Gateways / Load Balancer menu.
By default, the Load Balancing feature is not active. You must contact Support via a ticket request to have it activated:
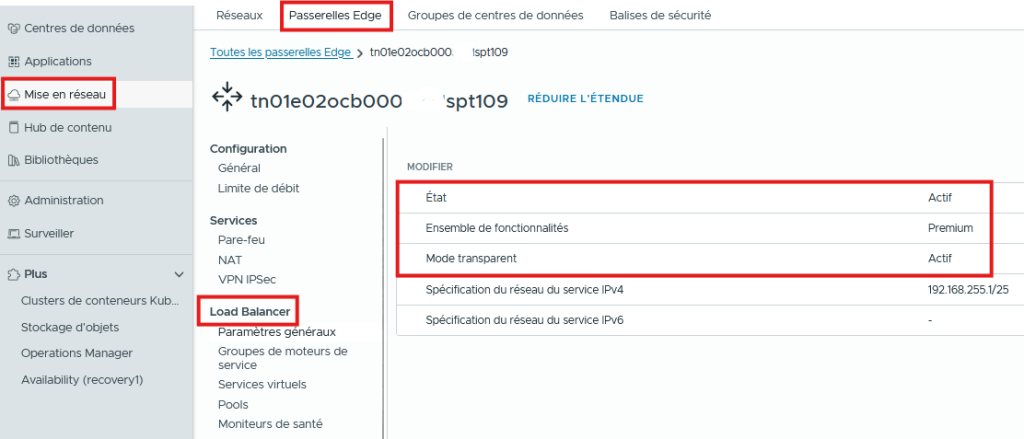
If you want to keep the client IP in “Preserve IP” mode, ask Support to tick “Transparent Mode” when enabling the LB with a Service engine group (Segment Profile) “ACTIVE:STANDBY / PREMIUM“:
- Activation is not under the customer’s control for licensing and billing reasons.
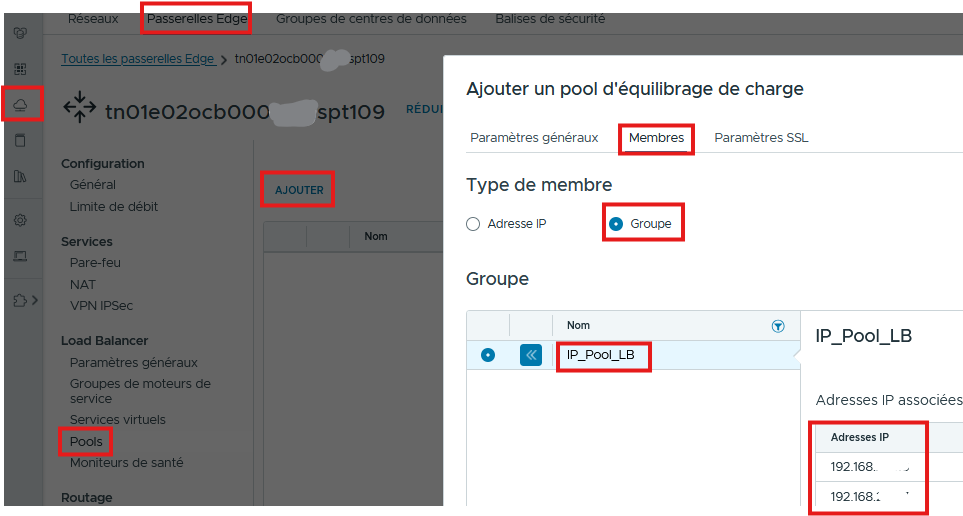
Create an IP Group that will group together the VMs of your pool. In our example, we named it IP_Pool_LB.
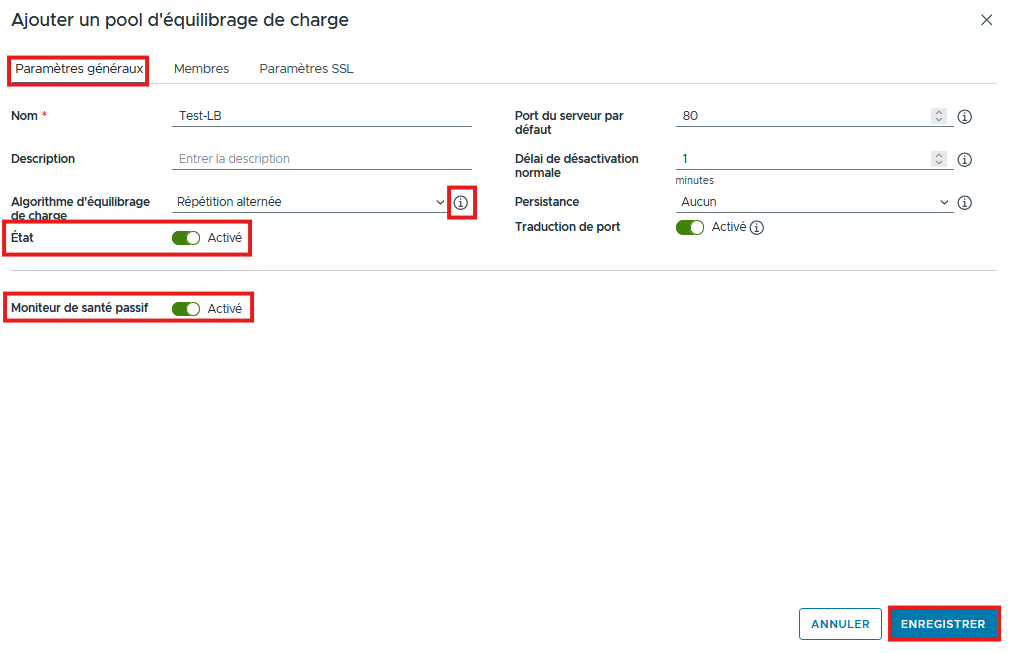
Then create the VM pool that will carry the services in the LB from the “Edge Devices“/”Pool“/”Members“/”Group“/”ADD” menu; we will:
- Pools / Members: The VMs that will host the application
- Pools / General settings: The algorithm that will manage the connections to the pool members, the listening port
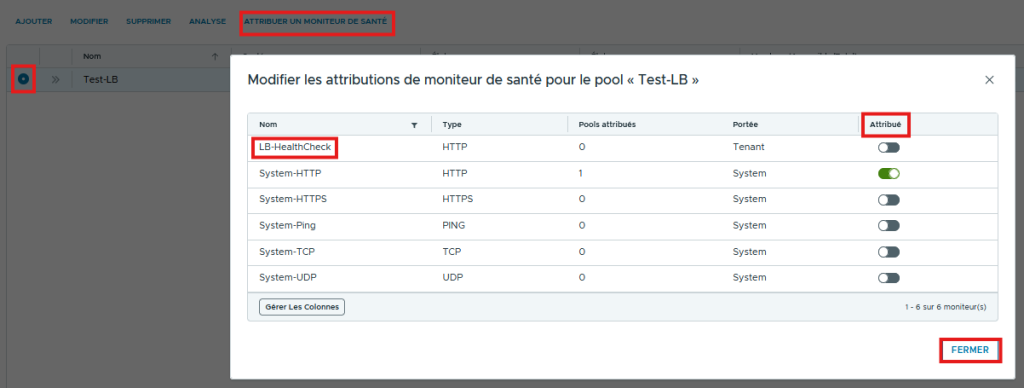
Then assign a Health Check by selecting the pool and clicking “ASSIGN HEALTH MONITOR“, which will allow you to monitor the state of the Pool members.
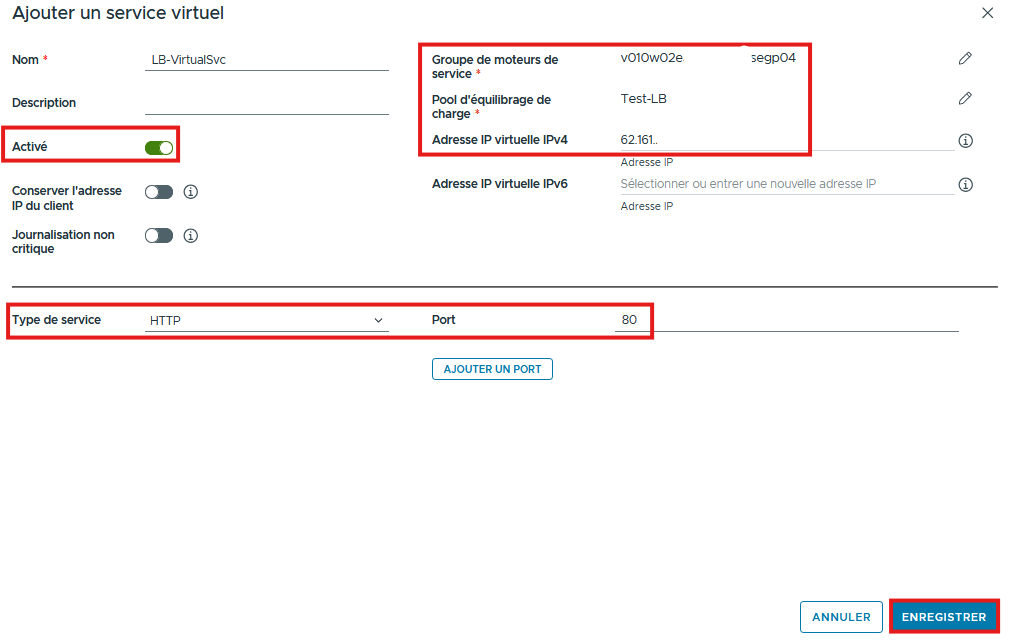
Associate a Virtual Service in order to listen and redirect traffic to the VM pool:
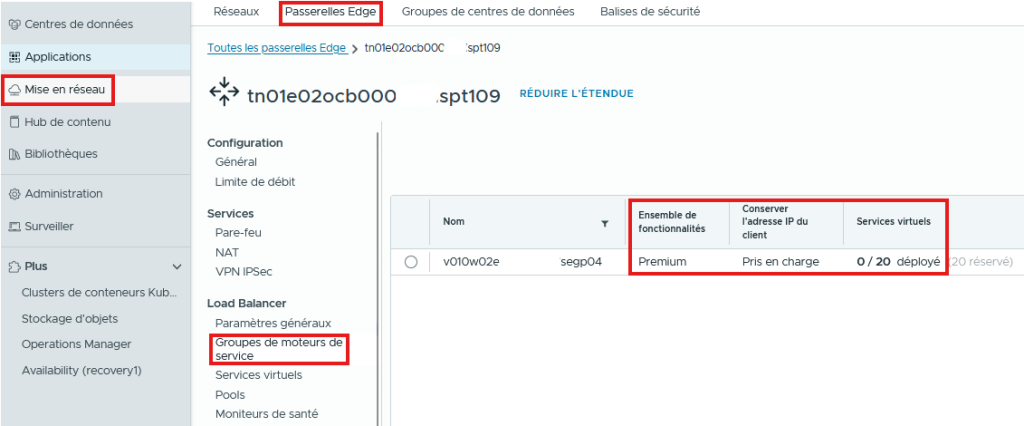
- Choose the Service engine group (SEG) and the associated Pool.
- Enable the feature by ticking “Enabled“
- If the IP address that carries the service is already NATed, you will get this message. The exposed Virtual IP must not be used.

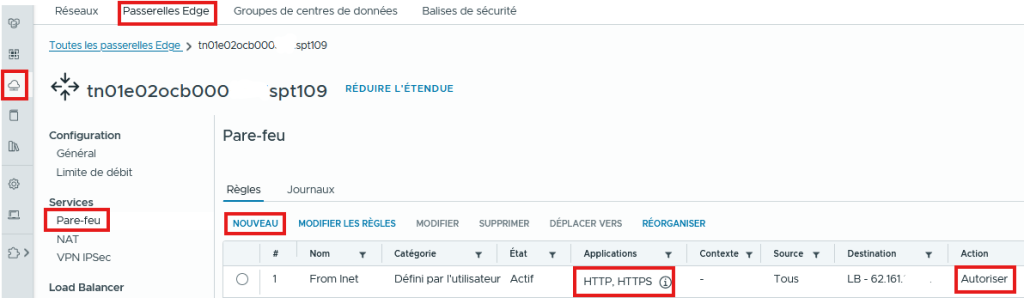
Check that the flows are open on the T1 Edge and test access to the service from a browser.