Cloud Avenue Wiki
-
Overview
-
Practical sheets
-
-
- Aucun article
-
-
- Aucun article
-
-
-
- Backup : Agent-Level B&R via NSS for IAAS offer
- Backup : Create VCOD Backup
- Backup : Netbackup Agent Installation for Linux
- Backup : Netbackup Agent Installation for Windows
- Backup : Overall Design for VCOD Offer
- Backup : User's Guide for VCOD Offer
- NSX-T : Configuring a Distributed Firewall
- NSX-T : Create VPN Ipsec
- NSX-T : Creation of T1
- NSX-T : DNAT configuration
- NSX-T : How to configure a Gateway Firewall
- NSX-T : SNAT configuration
- NSX-T: Create and Configure a Geneve Overlay Segment
- NSX-T: How to configure an IPSEC solution
- vCenter : Clone a VM
- VCenter : Create a new VM
- VCenter : Create a snapshot of a VM
- VCenter : Reset cloudadmin password
- VCenter : Storage Vmotion on a VM
- VCenter : Upgrade Vmware tools on a VM
-
-
Q & A
-
Services
-
-
- Aucun article
-
- Aucun article
-
- Aucun article
-
- Aucun article
-
- Aucun article
-
- Aucun article
-
- Aucun article
-
-
-
- Aucun article
-
- Aucun article
-
- Aucun article
-
-
-
- Aucun article
-
- Aucun article
-
-
VM Agent Restoration Mode
Open a session on the NetBackup Portal
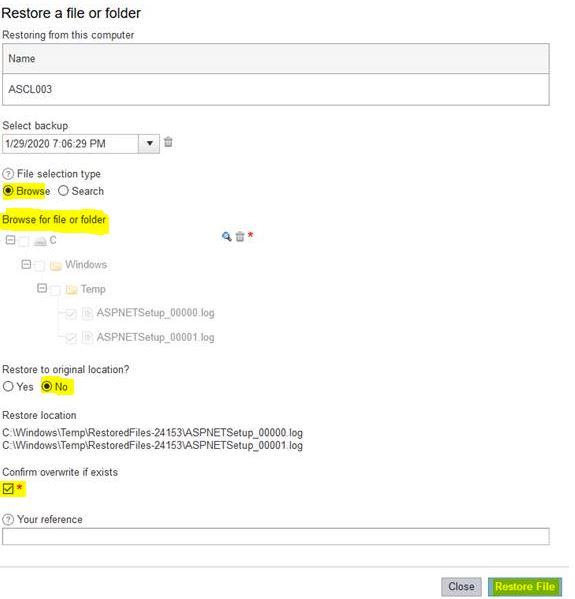
Select the VM and click on the Action button, then choose Restore File.

Choose the files to restore by expanding the directory tree of your VM, and restore your files to the same location or to a different location.
Confirm and click on RestoreFile.
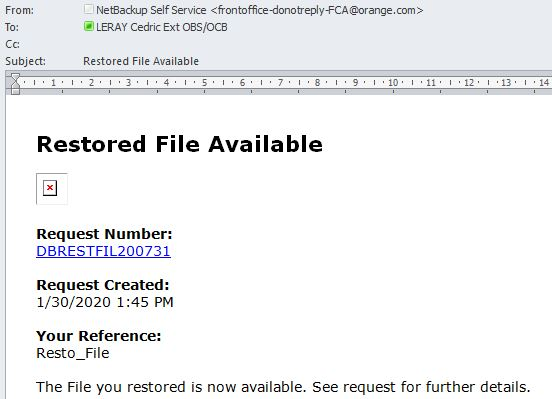
You will receive a confirmation email.
If the operating system of your virtual machine is listed in the table below, you can proceed with file restoration as described above:
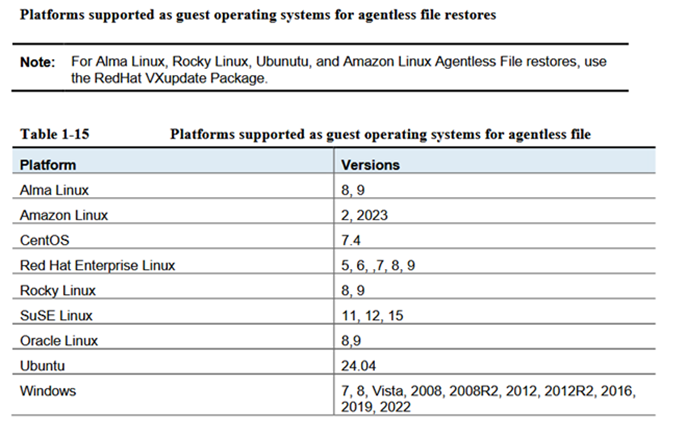
Otherwise, file restoration will be possible through the installation of a NetBackup agent. or a complete VM restoration.