Cloud Avenue Wiki
-
Overview
-
Practical sheets
-
-
- Aucun article
-
-
- Aucun article
-
-
-
- Backup : Agent-Level B&R via NSS for IAAS offer
- Backup : Create VCOD Backup
- Backup : Netbackup Agent Installation for Linux
- Backup : Netbackup Agent Installation for Windows
- Backup : Overall Design for VCOD Offer
- Backup : User's Guide for VCOD Offer
- NSX-T : Configuring a Distributed Firewall
- NSX-T : Create VPN Ipsec
- NSX-T : Creation of T1
- NSX-T : DNAT configuration
- NSX-T : How to configure a Gateway Firewall
- NSX-T : SNAT configuration
- NSX-T: Create and Configure a Geneve Overlay Segment
- NSX-T: How to configure an IPSEC solution
- vCenter : Clone a VM
- VCenter : Create a new VM
- VCenter : Create a snapshot of a VM
- VCenter : Reset cloudadmin password
- VCenter : Storage Vmotion on a VM
- VCenter : Upgrade Vmware tools on a VM
-
-
Q & A
-
Services
-
-
- Aucun article
-
- Aucun article
-
- Aucun article
-
- Aucun article
-
- Aucun article
-
- Aucun article
-
- Aucun article
-
-
-
- Aucun article
-
- Aucun article
-
- Aucun article
-
-
-
- Aucun article
-
- Aucun article
-
-
Certificate Library
Overview
Note!
In vCloud Director, the “Certificate Library” expects certificates in PEM format (Base64), like this:
—–BEGIN CERTIFICATE—–
…
—–END CERTIFICATE—–
Accepted formats for Certificate Import: .pem or .crt / .cer files in Base64 (PEM content)
Formats not usable in the Library:
- PFX / PKCS#12 (.pfx, .p12): must be converted to PEM before import (OpenSSL)
- DER binary (.cer): likewise, convert to PEM.
More details HERE
Import a Certificate
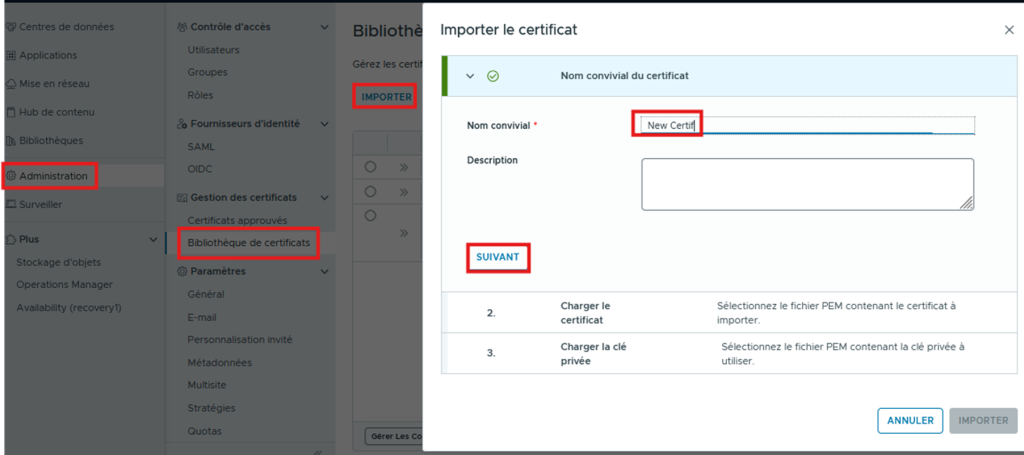
From the view “Administration” / “Certificates Library”, select IMPORT. Give your Certificate a Name and click NEXT.
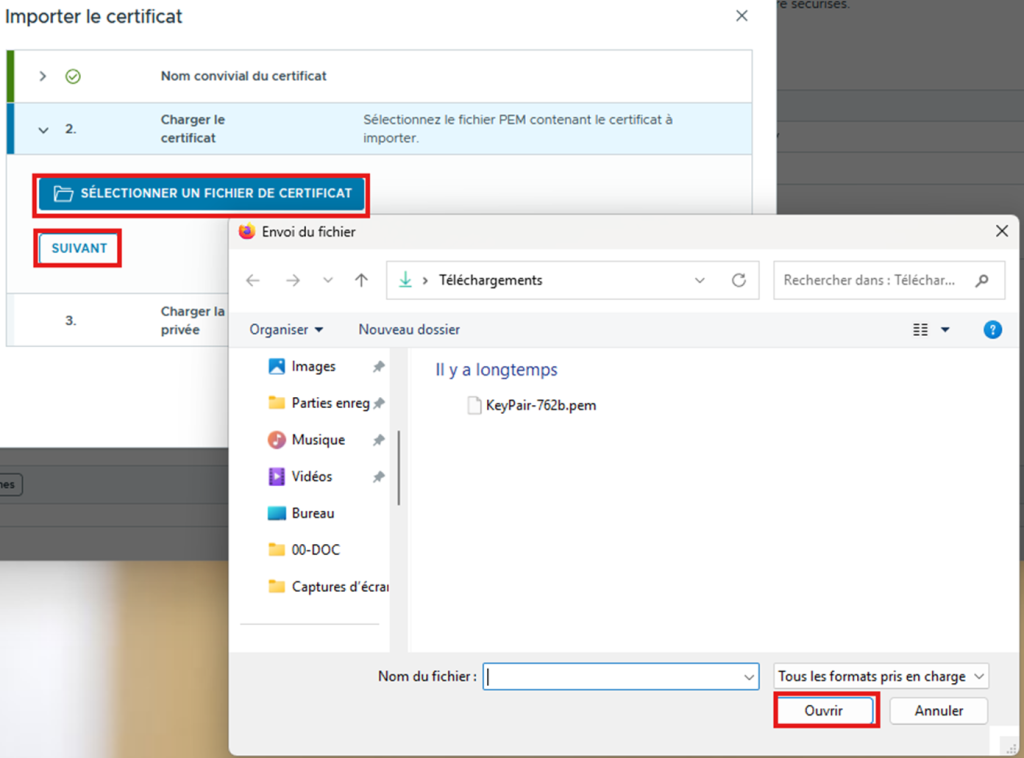
Next, select the .pem certificate file and the Private Key file to upload, then click NEXT.
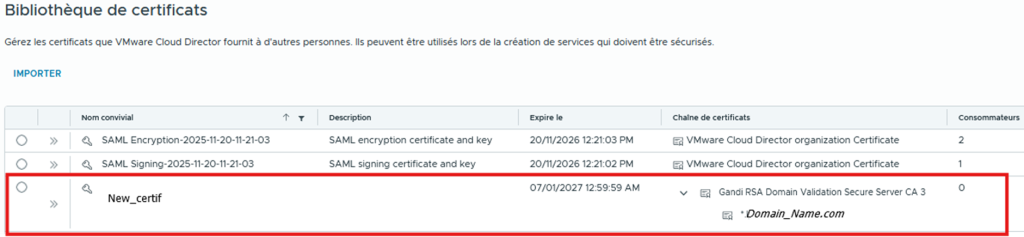
Click on IMPORT at the last step, then verify that the Certificate has been successfully uploaded to the Library.