Using the Object Storage Service – Cyberduck
Presentation
Cyberduck is free software (GNU GPL license) developed by iterate GmbH. This software allows users on Windows and Mac to transfer files using a variety of protocols, including Amazon S3.
All this with a modern graphical interface. It also offers a feature for synchronizing local directories with S3 storage.
It should be noted that Cyberduck does not offer any IAM (identity and authorization) features.
Configuration
Prerequisites: Have the current version of Cyberduck installed (on Windows and Mac). See https://cyberduck.io/download/
Minimum configuration procedure:
▶ Select Edit/Preferences and the Language tab, choose English, and restart Cyberduck
▶ Select Edit/Preferences,
- Select the General tab, choose Amazon S3 as the default Protocol
- Select the S3 tab
⇒ Choose USA East (Northern Virginia) as the default geographic location
⇒ Choose Amazon S3 Standard Storage as the default storage class
- Close the Preferences window
▶ Click on the Action icon, then New Bookmark in the drop-down menu
▶ Select the dialog box that appears, then modify:
- Nickname with a value of your choice (e.g., “Cloud Avenue”)
- Server with the hostname present in the access URL
- Access key ID with the access key
- Secret access key with the secret key
▶ Close the window (the changes are displayed next to the bookmark icon)
▶ Select the bookmark with a mouse click and press Enter; after a short delay, the Browser view appears and displays the Buckets
Examples of use
The following examples are indicative. It is entirely possible to perform the same actions by other means, such as using keyboard shortcuts.
For more information, consult the software help.
Using a Bucket
After connecting to the server (see prerequisites), the Browser view displays the list of Buckets.
In the example, there are two Buckets (comp1 and comp2).

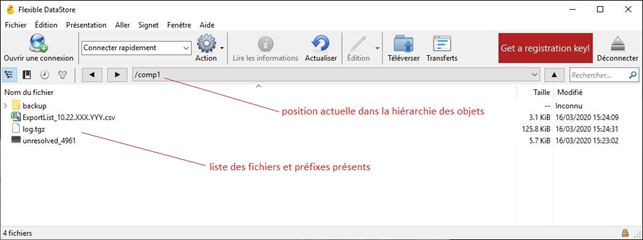
Listing Buckets
Double-click on the Bucket
In the example, the Bucket comp1 contains 3 files and a prefix (or folder) named backup.
The contents of the folder are not listed here.
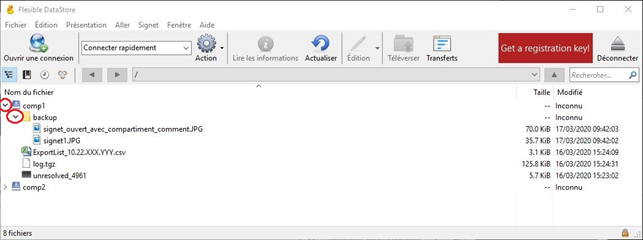
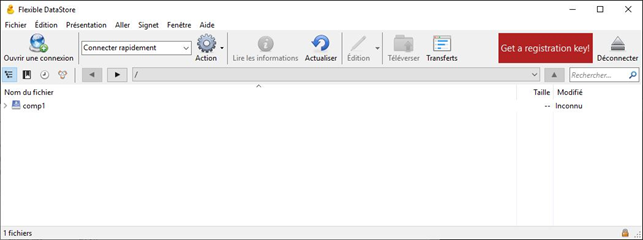
Recursively listing the contents of a Bucket
Cyberduck does not provide any means of recursively listing all objects.
However, for occasional needs, it is possible to view the contents of a hierarchy.
To do this, you must “open” the desired Buckets and prefixes by clicking on the “greater than” (>) symbol
to the left of each Bucket and prefix.
In the example, the entire contents of Bucket comp1 are displayed.
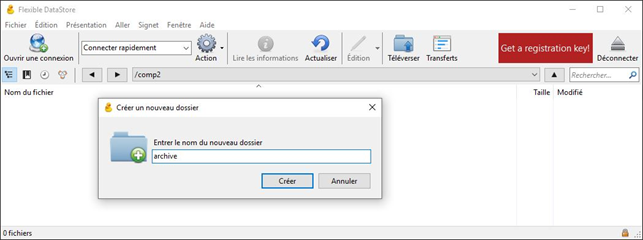
Creating a Bucket or a prefix.
- Go to the desired Bucket or prefix.
- Right-click.
- Click New Folder in the drop-down menu.
- Enter the name and confirm.
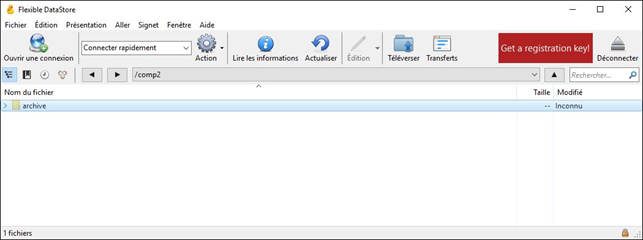
In the example, the prefix (or folder) archive is created in the comp2 Bucket.
Note: to create a Bucket your mouse must hover above the desired target hierarchical list of items

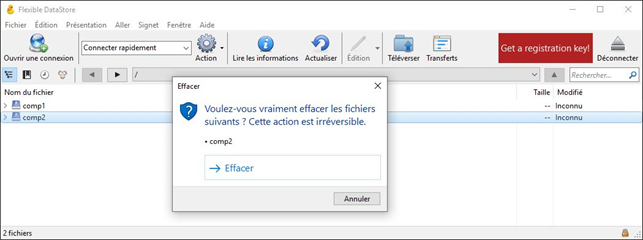
Deleting a Bucket or a prefix
- Right-click on the object
- Click Delete in the drop-down menu
- Confirm by clicking (recursive deletion is performed)
In the example, the Bucket comp2 is deleted.
Using Objects
Copy one or more local files to a Bucket or prefix :
- Go to the desired Bucket or prefix (if it does not exist, create it first)
- Right-click
- Click on Upload in the drop-down menu
- Select the desired file(s) (or directories) and confirm (the copy is made)
Renaming an object:
- Select the desired object (object, prefix, or Bucket)
- Right-click
- Click Rename in the drop-down menu
- Enter the change (input)
- Confirm by clicking (renaming is performed)
Move an object :
- You may simply move objects using the drag-and-drop feature
Delete a single object :
- Right-click on the object
- Click on Delete in the drop-down menu
- Confirm by clicking (deletion is performed)
Note: unlike Buckets and prefixes, only the selected object is deleted.
Delete multiple objects:
- Select multiple objects.
- Right-click on the selection.
- Click Delete in the drop-down menu.
- Confirm by clicking (deletion is complete).
Synchronization
Cyberduck offers a local directory synchronization feature. This makes it possible to quickly copy an entire directory tree to Cloud Avenue object storage.
Points to note:
- It is not necessary to create Buckets beforehand.
- Local subdirectories are automatically converted into Buckets or prefixes.
- Missing files are copied automatically.
- Files that are not up to date are overwritten (recopied).
- Files present on the target but missing locally are left unchanged.
To synchronize the contents of a local directory:
- Go to the desired Bucket or prefix (or / for the entire storage file system).
- Right-click.
- Click Synchronize.
- Select a source directory and confirm.
- In the window that appears, click Continue to synchronize everything.