Create VDC
Preview
This page describes how to order a new virtual data center (vDC).
Prerequisites
- Have access to the Cloud Customer Space.
- Understand the concepts of vDC availability class, check this page : Virtual Datacenter
- Understand the financial impacts resulting from the various creation parameters (cf. see Cloud Avenue Contractual documents Documents Contractuels )
Operating mode
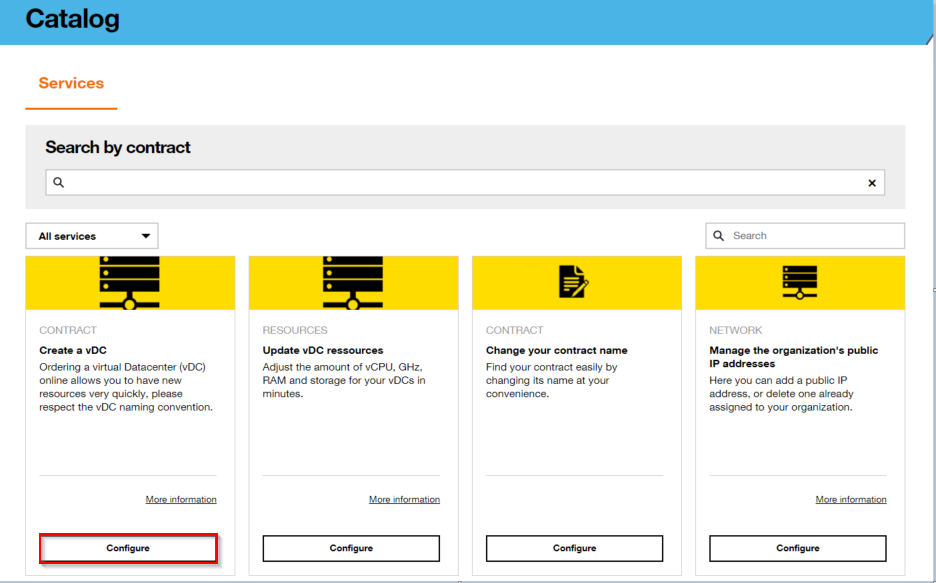
Go to the customer portal ( selfcare ) space
- Catalog tab
- Select Configure of the Create a VDC
A popup window opens
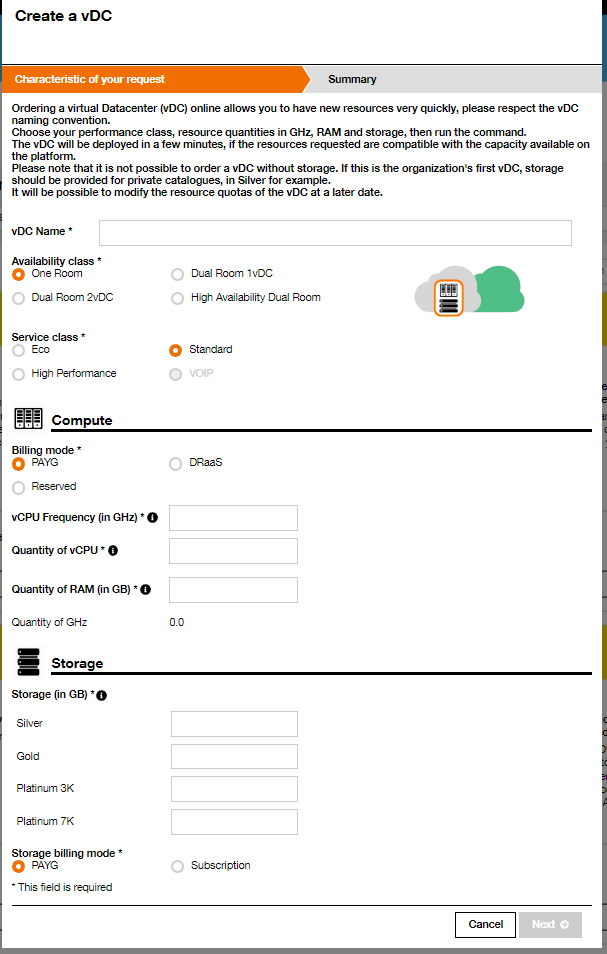
The first information to enter is the name of the vDC.
The name is limited to the following characters : [a..z],[A..Z],[0..9] [ _- ]
At thes stage it wil be intersting to chosse a name which will be easy to identify the site which it is deployed
Thi swill facilitates identification during a two-site configuration.
Select the Avalability class and the Service class
Here we have chosen a One Room vdc, which will be deployed in room A or room B.

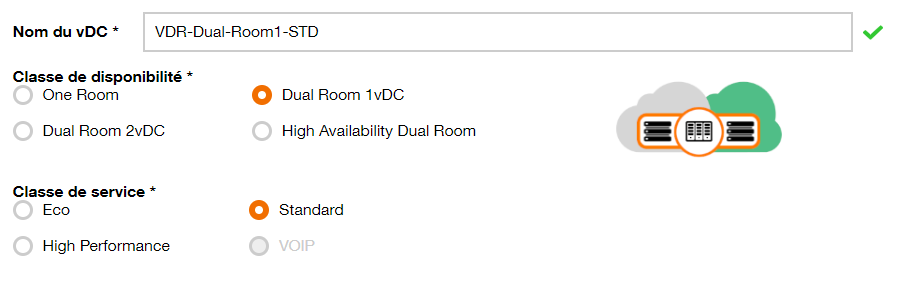
By chosing a Dual Room 1vDC, we obtain a vDC with 2 storage policies
: room A and room B.
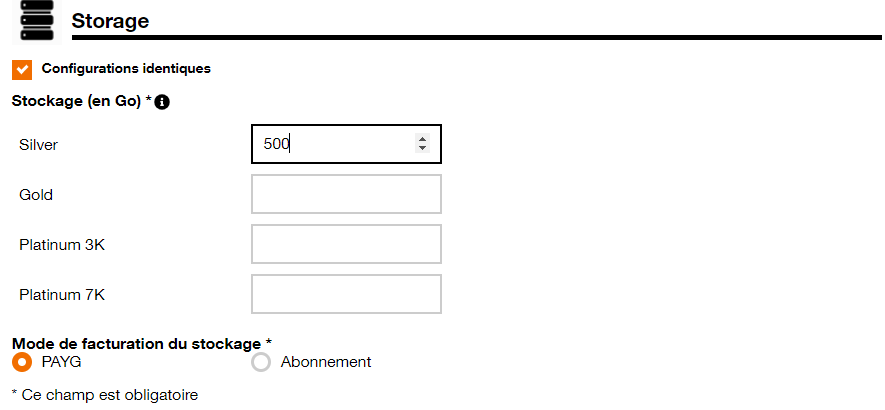
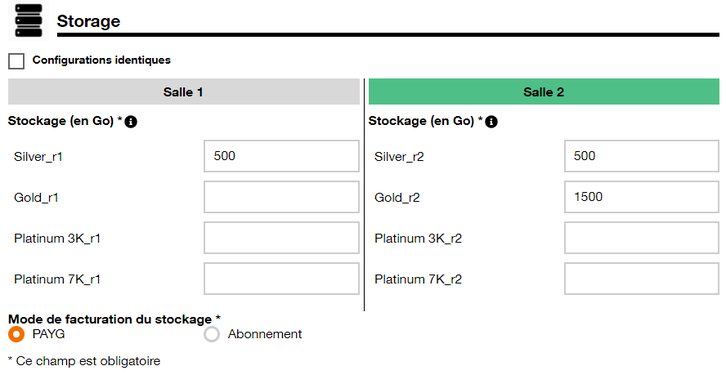
On storage side you can choose to have an identical storage configuration in the 2 rooms, or a different configuration depending on the room
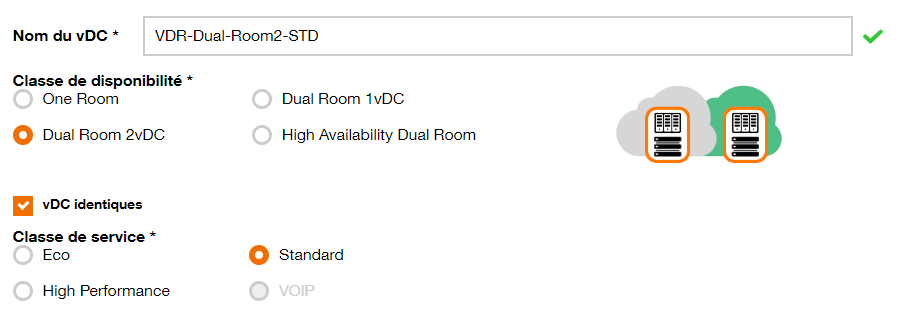
By choosing a Dual Room 2 vDC, we obtain two vDC each with a storage policy in each room : room A and room B
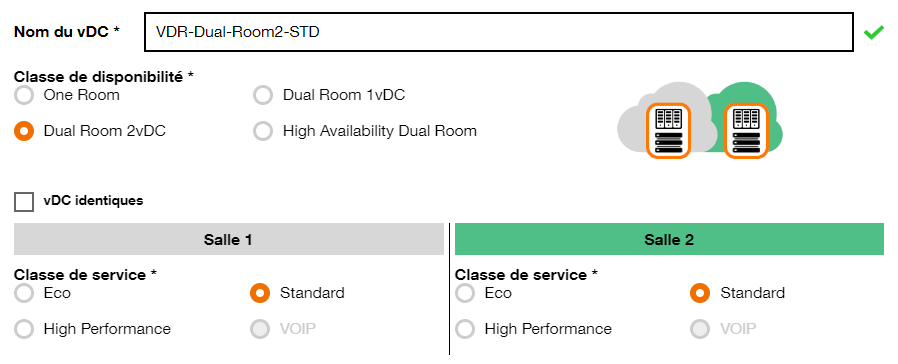
We can choose to have 2 vDC configured identically, or with different configuration, depending on the needs
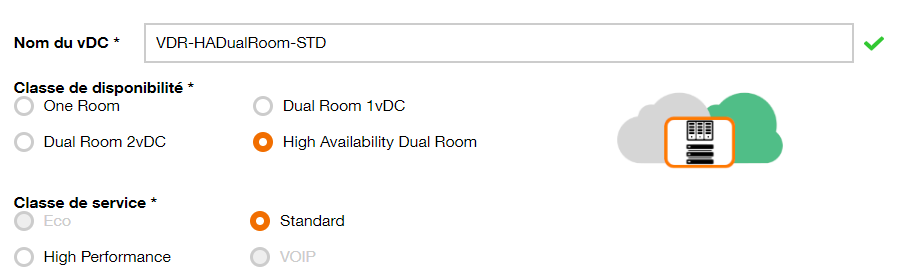
By choosing HA Dual Room we obtain a vDC deployed on an extended cluster, with storage also clustered on the 2 rooms.
This deployment mode makes it possible to support the loss of a room with automatic restart of lost VMs
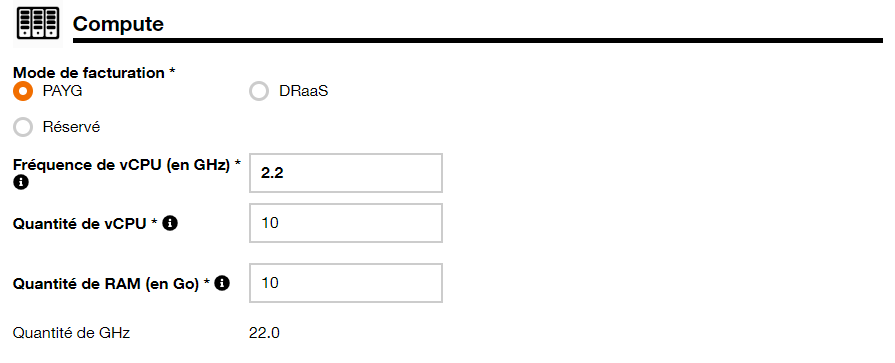
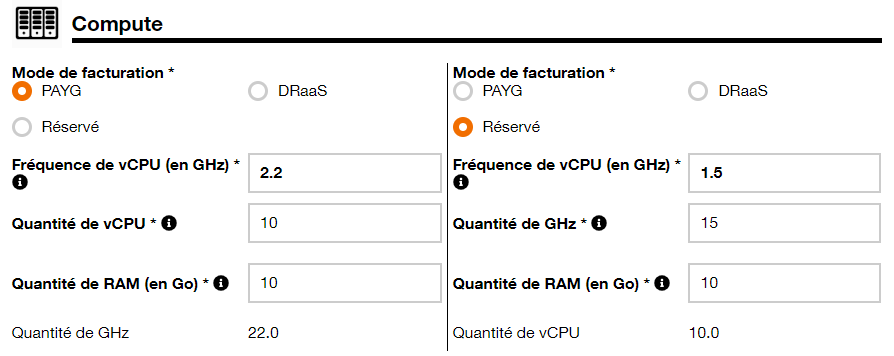
You will then need to choose the biling method : PAYG , DRaas ( equivalent to PAYG ) or Reversed
Depending on the case, invoice will be :
- the vCPU and RAM allocated to start VMs (PAYG, DRaaS)
- the resources (GHz and RAM) allocated to the vDC (Reserved).
These values can be changed later, from the customer portal or using API
To remember
In PAYG billing, the frequency of the vCPU is fixed and identical to the phisical server.
In Reserved billing, it is possible to select a vCPU frequence lower than the nominal frequency of the phisical server.
This is a way to optimize the necessary allocation of CPU resources, this allow to have more vCPU available on a vDC, and then to qstart more Vm simultaneously.
The calculation is done as foolow :

Even if the vCPU frequency is low ( the limit is 1,2 GHz for ECO and STANDARD).
It does not restrict the vCPU at all, which will be able to use all the available power of a phisical core of necessary.
Cette page this page explains the resource management mechanisms according to the ressource allocation method.
Here,in Dual Room 2 vDC, we will deploy two resource pools with different characteristics, which could allow a PRA between the 2 rooms with VCDA.
For Dual Room 2 vDC, there are two possible configuration for the storage of each room.
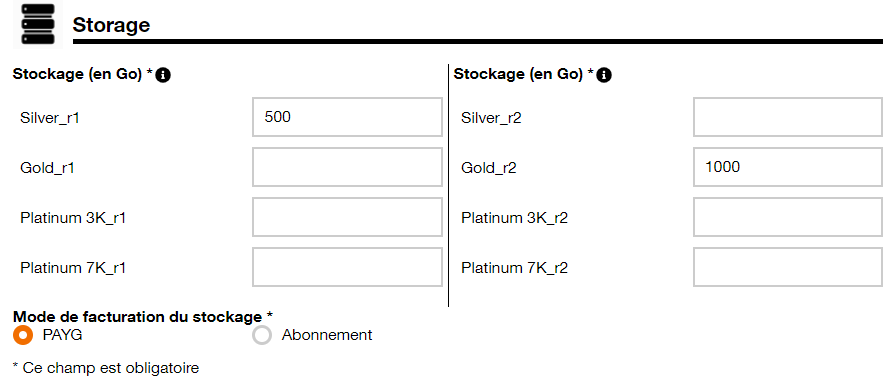
For Dual Room 1 vDC, you can choose :
– an identical storage configuration fot eh 2 rooms
– a specific configuration for each room.
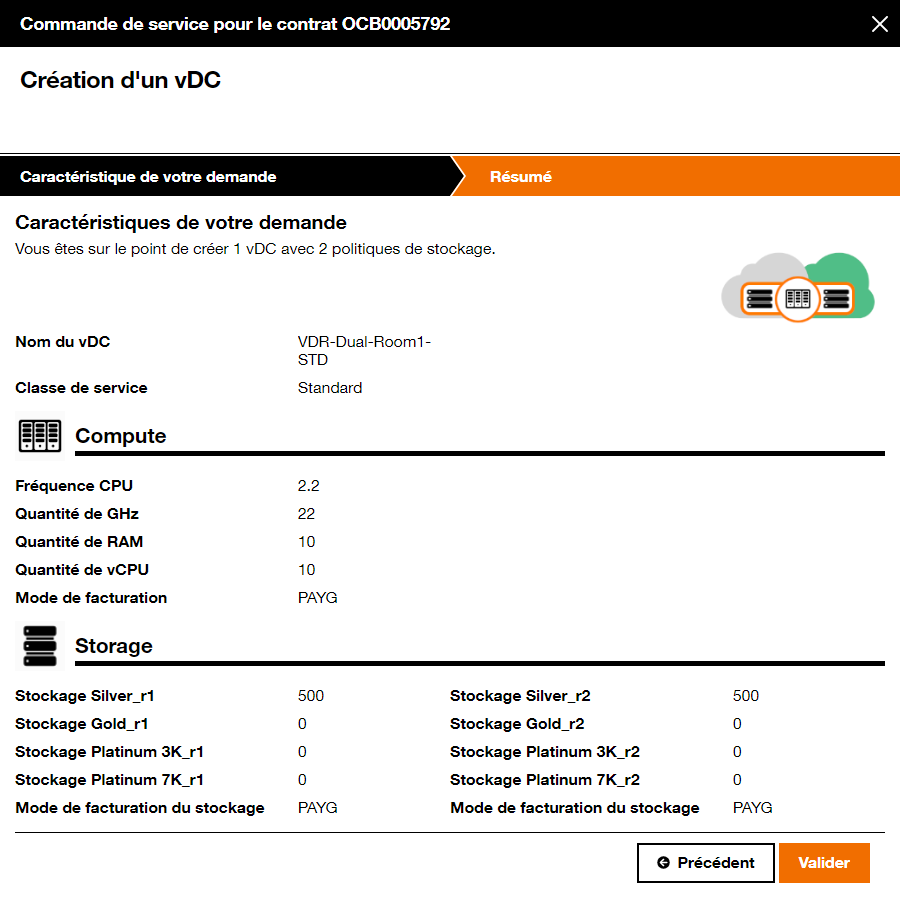
Before the validation of the vDC, there is a summary of the parameters selected in the first part of the form.
Then you can validate the creation
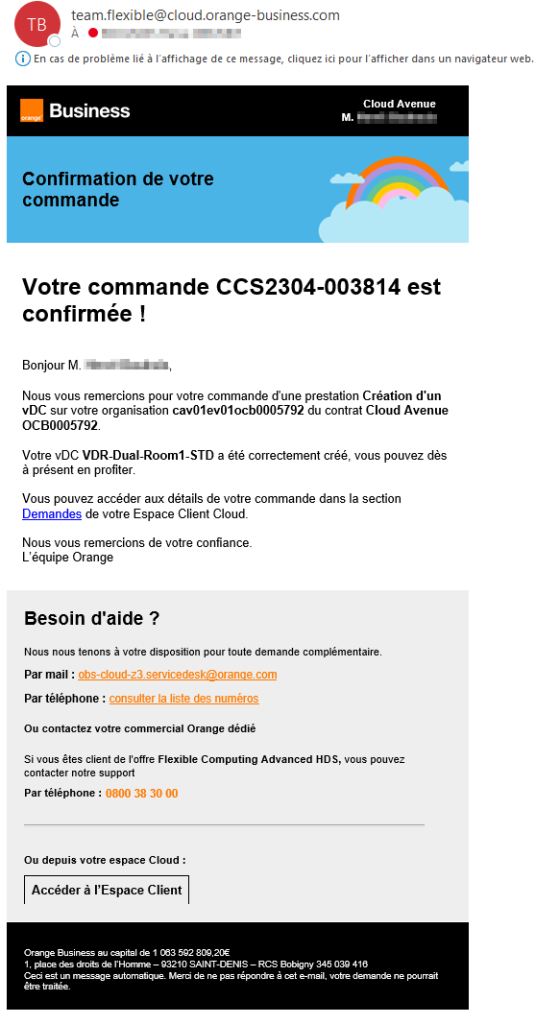
An email is send to the operator to confirm completion of the request.
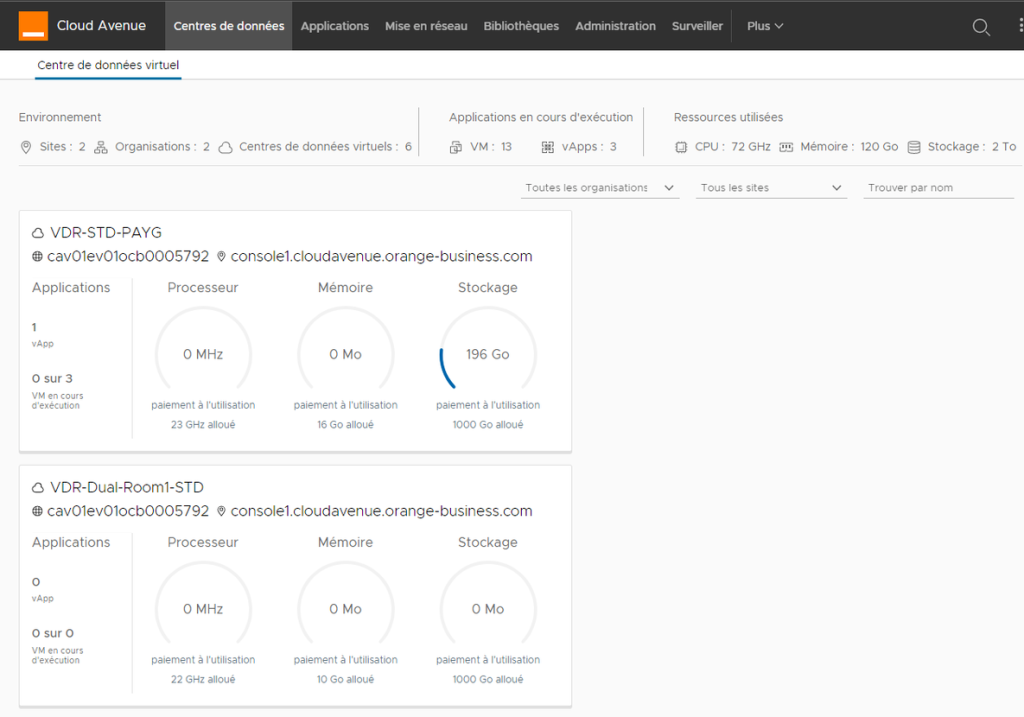
The vDC newly created appears in the VCD portal.
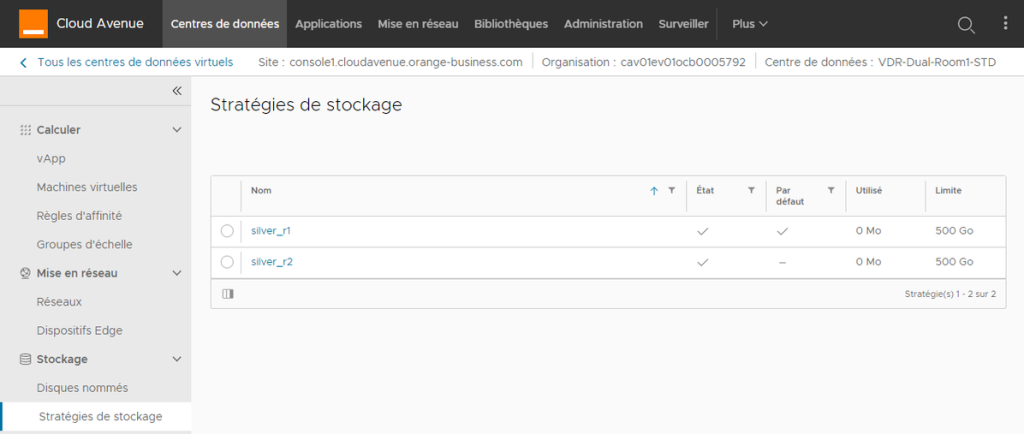
Here we can see its storage policies per room (R1 for Room 1, R2 for Room 2).