Backup : Agent-Level B&R via NSS for IAAS offer
Introduction
This draft explains the customer journey to activate Agent-Level Backup & Restore services via NSS for the IAAS offer
Technical Procedure
NSS Side
Registering for Agent-Level B&R
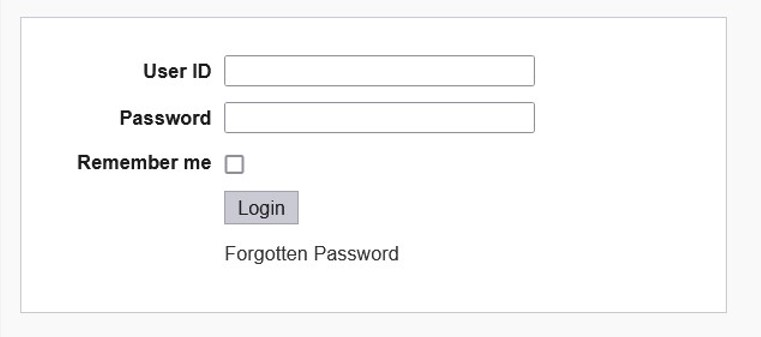
Login to the NSS using the tenant`s credentials
| Customer | DC | URL | Notes |
|---|---|---|---|
| Internal | VDR | https://backup2.cloudavenue.orange-business.com | |
| CHA | https://backup5.cloudavenue-cha.itn.intraorange | ||
| External | VDR | https://backup1.cloudavenue.orange-business.com | |
| CHA | https://backup4.cloudavenue.orange-business.com |
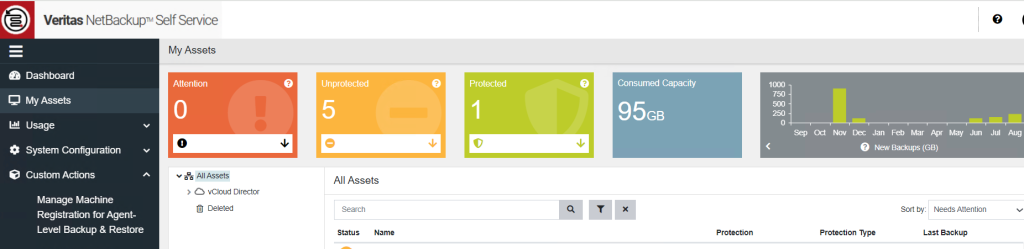
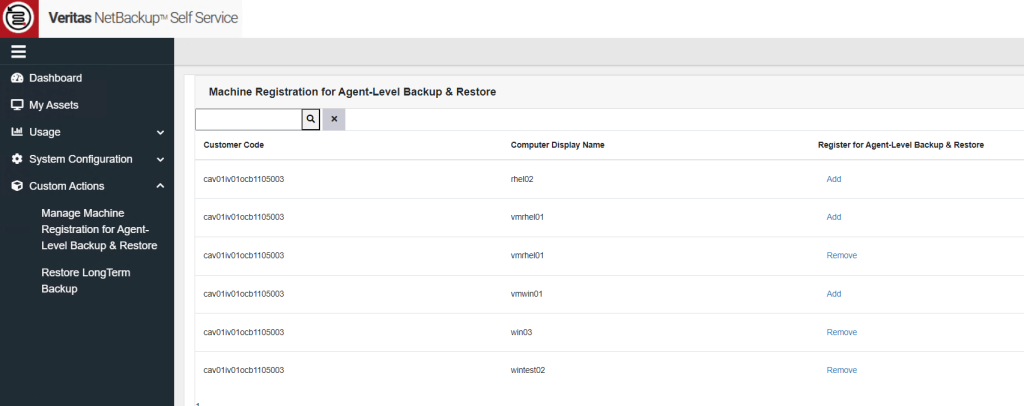
Click on Custom Actions from left pane

Expand the Custom Actions and click on “Manage Machine Registration for Agent Level Backup & Restore”
Search & click on Add Button next to machine which machine (VM/BMS) needs to be registered/un-registered for Agent-Level Backup & Restore.
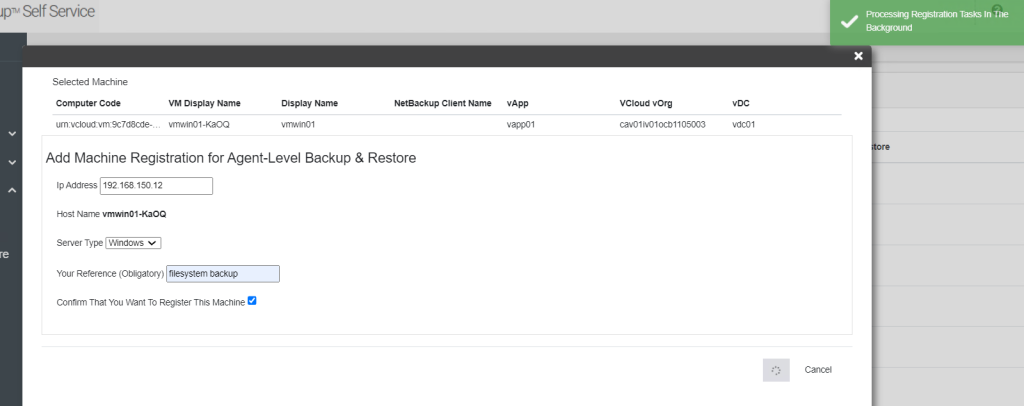
Fill-in the forum with the private IP which is configured on the VM/BMS OS level,
select the “Server Type”, Fill Your reference, Confirm and submit the request

Wait till the submitted request being finished successfully
to be able installing/configuring the agent on the VM/BMS OS level

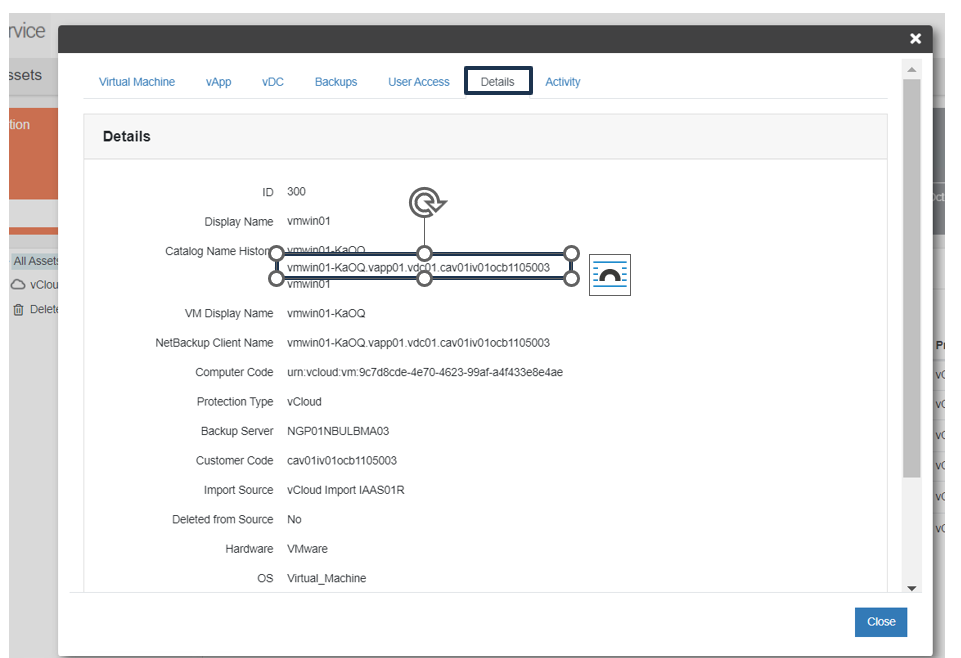
Once the submitted request finished successfully,
click on the machine (“Details” tab) to get the “Netbackup Client Name”
which will be used during Agent installation
Machine Side
Prerequisites
Common Prerequisites
Add the required entries (FQDN & short names) to the hosts file :
| Customer | DC | Master Server | Additional Servers | Notes |
|---|---|---|---|---|
| Internal | VDR | 57.203.214.113 ngp01nbuprma02.ngp.infra ngp01nbuprma02 | ngp01nbuprme06.ngp.infra ngp01nbuprme06 ngp01nbuprme12.ngp.infra ngp01nbuprme12 | |
| CHA | 57.203.214.121 ngp02nbuprma06.ngp.infra ngp02nbuprma06 | 57.203.214.122 ngp02nbuprme12.ngp.infra ngp02nbuprme12 | ||
| External | VDR | 57.203.214.115 ngp01nbuprma03.ngp.infra ngp01nbuprma03 | 57.203.214.116 ngp01nbuprme07.ngp.infra ngp01nbuprme07 ngp01nbuprme08.ngp.infra ngp01nbuprme08 ngp01nbuprme13.ngp.infra ngp01nbuprme13 ngp01nbuprme19.ngp.infra ngp01nbuprme19 | |
| CHA | 57.203.214.123 ngp02nbuprma03.ngp.infra ngp02nbuprma03 | 57.203.214.124 ngp02nbuprme07.ngp.infra ngp02nbuprme07 |
If the firewall is activated on the OS level, make sure that the required ports are already opened in bi-direction
| Source/Desitnation | Destination/Source | Service Name | Port |
|---|---|---|---|
| Machine (VM/BMS) | Backup Env | BKP_TCP_bpcd | 13782 |
| BKP_TCP_bprd | 13720 | ||
| BKP_TCP_spad | 10102 | ||
| BKP_TCP_spoold | 10082 | ||
| BKP_TCP_veritas_pbx | 1556 | ||
| BKP_TCP_vnbmqbroker | 13781 | ||
| BKP_TCP_vnetd | 13724 | ||
| BKP_TCP_ portmapper | 111 | ||
| BKP_TCP_ nbfsd | 7394 |
For better performance, it is recommended that the MTU Size = 8872
Windows-Based OS Prerequisites
No prerequisites, up-till-now
Linux-Based OS Prerequisites
| The following libraries are needed: libnsl libnsl.so.1 | yum install libnsl yum install libnsl.so.1 | Needed for: RHEL CentOS |
Agent Download
The following procedure can be used at both VDR & CHA DCs
Windows-Based OS
Agent Download for Windows-Based OS
Login to the machine (VM/BMS) where the agent will be installed
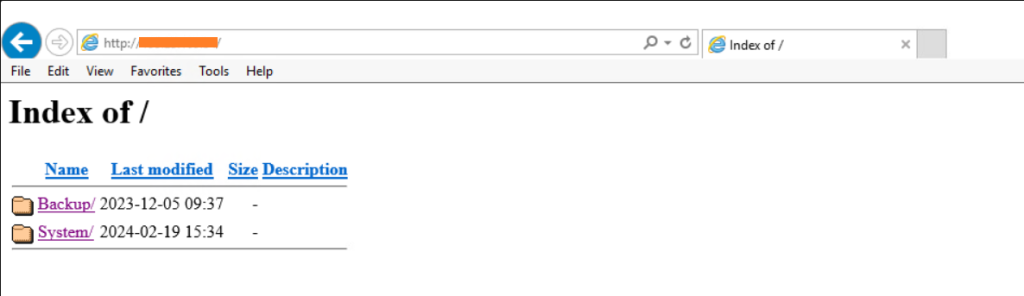
Open a web browser and go to “http://57.199.209.213“
Click on Backup > Agent_File to download the required agent
Linux-Based OS
Agent Download for Linux-Based OS
Login to the machine (VM/BMS) where the agent will be installed
Enter the command: wget “http://57.199.209.213/Backup/Agent
Agent Installation
Windows-Based OS
Extract the contents of the source Zip file
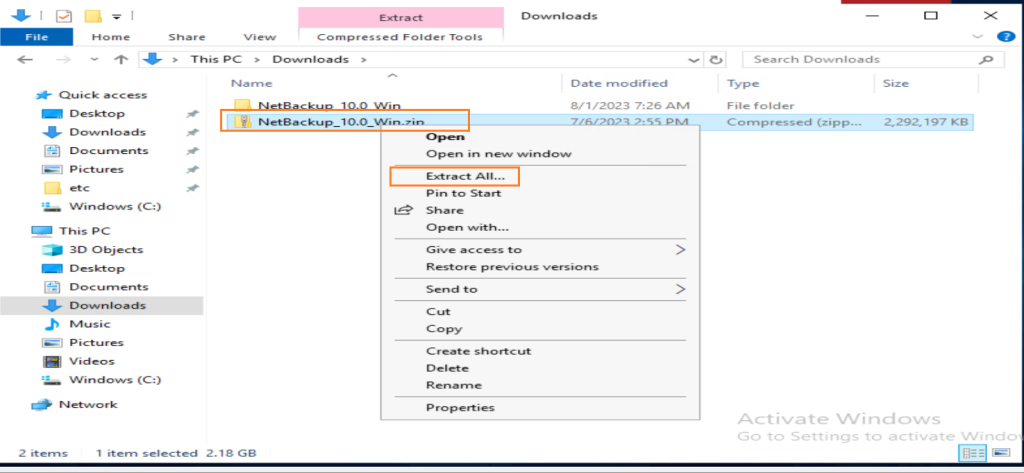
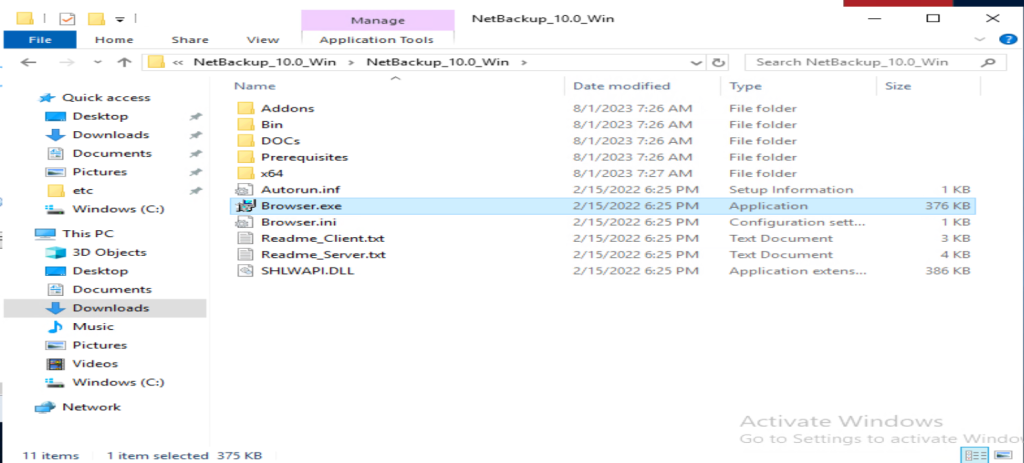
Open the extracted folder and run Browser.exe
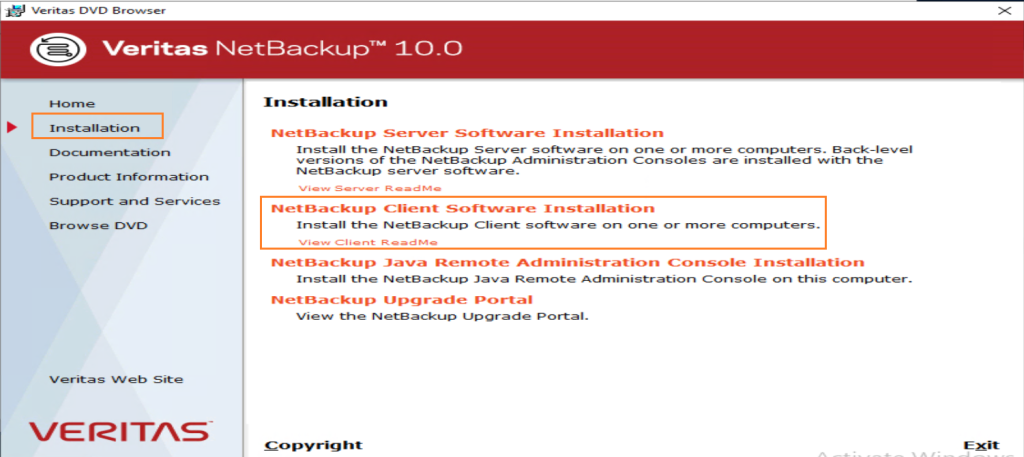
Click on Installation > Netbackup Client Software Installation
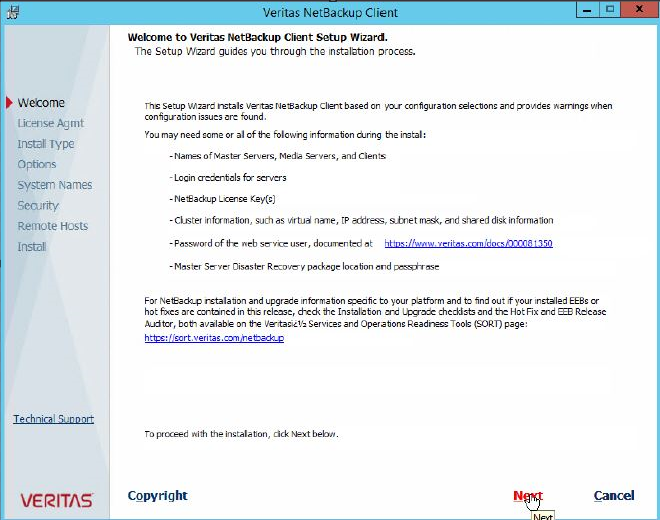
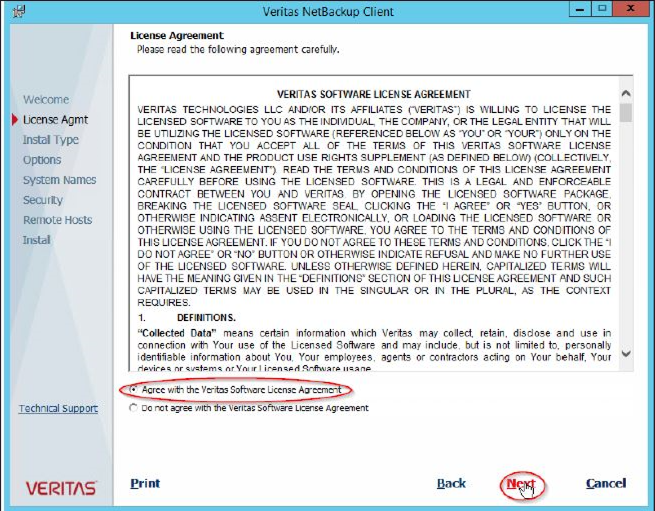
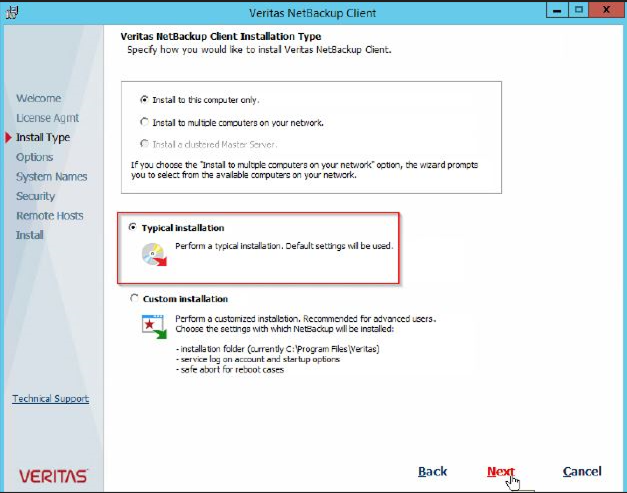
Click Next to Accept the Agreement and select Typical Installation
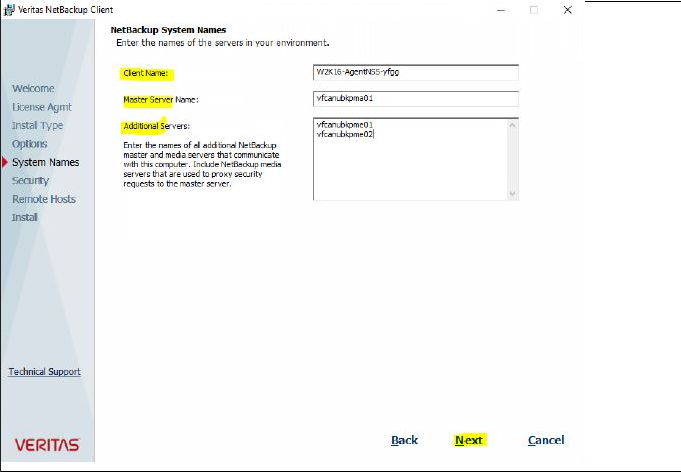
Enter the names of the servers in your environment as per the following table, then click Next
| Attribute | Variable | Notes |
|---|---|---|
| Client Name | Backup: Agent-Level B&R via NSS for IAAS offer#Registering for Agent-Level B&R | Netbackup Client Name |
| Master Server Name | Backup: Agent-Level B&R via NSS for IAAS offer#Prerequisites | Master Server |
| Additional Servers | Backup: Agent-Level B&R via NSS for IAAS offer#Prerequisites | Additional Servers |
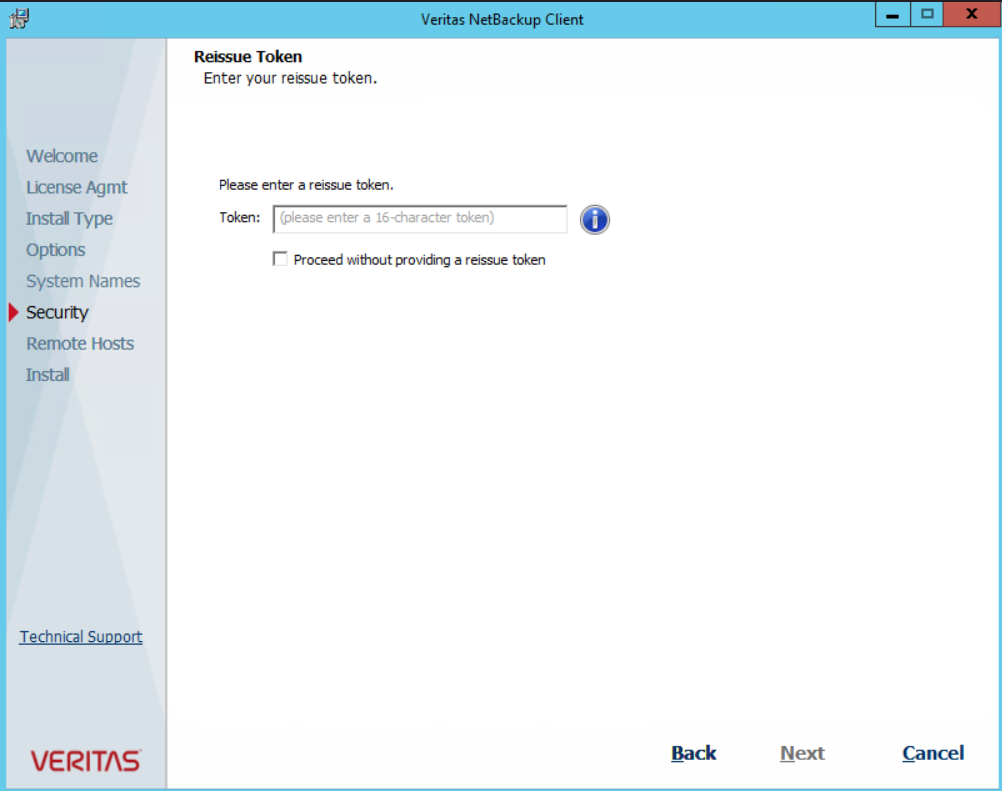
In case of:
- Agent New Installation: A token maybe needed as per the following table:
| Customer | DC | Master Server | Token |
|---|---|---|---|
| Internal | VDR | ngp01nbuprma02.ngp.infra | JJERTUCFGBVPYKWE |
| CHA | ngp02nbuprma06.ngp.infra | BGMWKGPXANJMWPUG | |
| External | VDR | ngp01nbuprma03.ngp.infra | MWFLCLSWTBFVNLEY |
| CHA | ngp02nbuprma03.ngp.infra | UXRPGDMVKAPGPNGA |
- Agent Re-Installation: A re-issue token will be needed by contacting the Service Desk (SD) to submit a SWAN or Ocean request to ATQIIZ to generate it
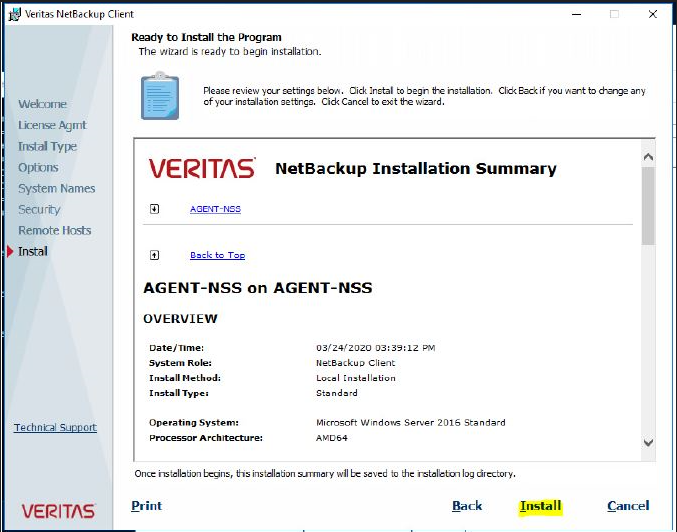
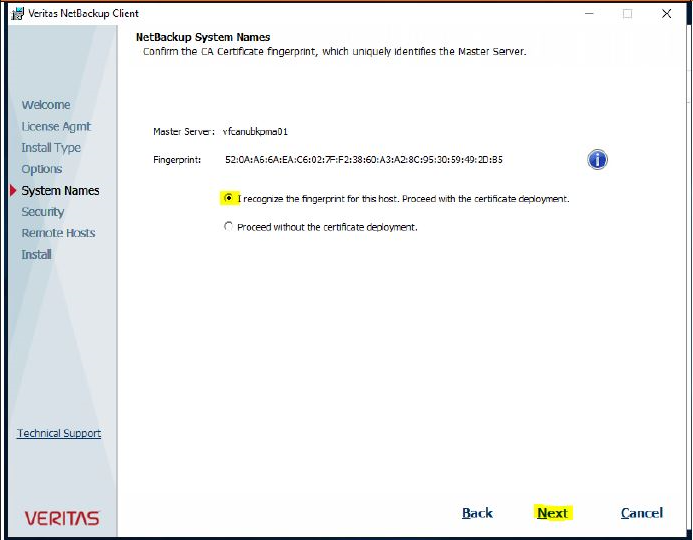
Confirm the CA certificate which has been retrieved from the Backup server, then click Next
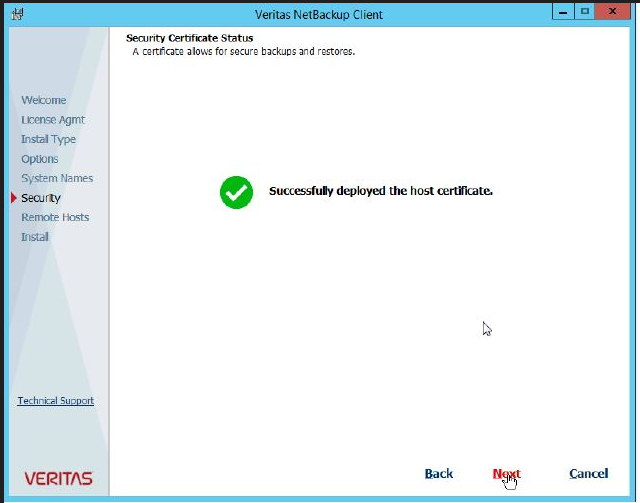
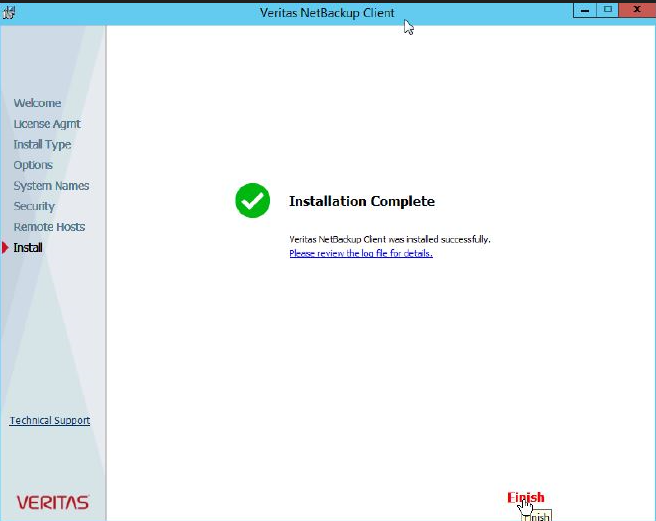
Select Install after reviewing the installation summary, then click Finish once the installation completed successfully