Connecting Apache Superset with MRS cluster Hive tables
Scenario
This section describes how to connect an apache superset with MRS cluster to visualize Hive tables.
Apache Superset:
Apache Superset It is a modern data exploration and visualization platform. It has powerful functions, there are many types of data supported, Easy to use, Easy to expand, Rich visualization ability and many other advantages.
1. Creating an MRS Cluster:
From the FE Console create MRS Cluster by specifying the needed services, either by doing a QuickConfig or a CustomConfig.
Make sure to use a well-known VPC, because it will be needed in the next step when creating an MRS client.
Make sure to disable Kerberos authentication (it’s highly recommended)

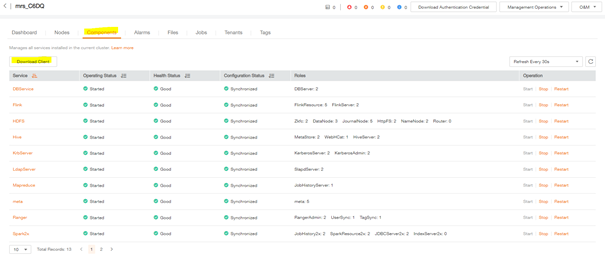
The creation process can take longer sometimes depending on the services selected, wait until all the services are established.
And, synchronize IAM users. (This synchronization will create all IAM users to the MRS cluster)
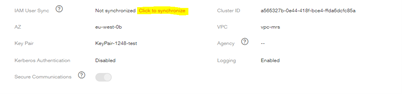
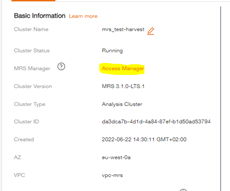
And connect to the MRS Manager of your cluster,
From the ECS instances list, select the master node 1 of the cluster.
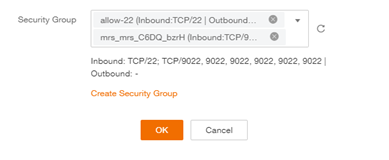
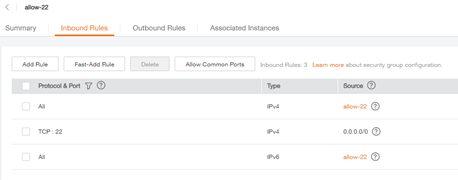
You must allow Port number 22 on the security group on the master node 1,
This step is important, because it will allows to the ECS instance to connect to the MRS cluster.
2. Creating an ECS VM:
From FE Console, create ECS instance, an instance of 1vCPU and 2GB of RAM sufficient.
And Centos OS recommended.
Make sure to select the VPC recently used for the MRS cluster,
This will give us a local network connectivity, without the need of EIP addresses.
Select a Security group to allow SSH port 22 on inbound
Select an EIP, in order to access the public network internet.
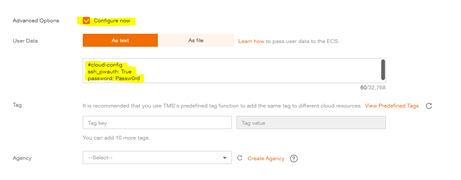
To facilitate the access to the VM, we will setup the following Cloud Init script,
This will create a Linux user “cloud” with the password “Passw0rd”
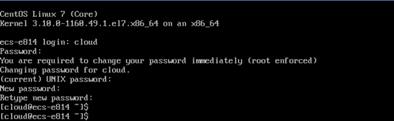
Remote Login to the ECS instance,

And use your credentials to connect to it.
Configure DNS, and update the system.
- sudo vi /etc/resolv.conf // configure DNS
- sudo yum update // update the system
- yum groupinstall “GNOME Desktop” // install Gnome GUI
- startx // start Gnome GUI
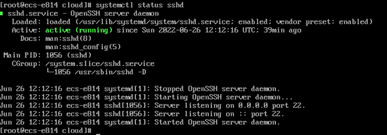
Check the SSH server listening status.
- sudo systemctl start sshd // start SSH server
- sudo systemctl status sshd
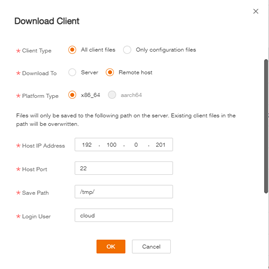
3. Downloading and installing MRS Client:
From the FE Console, Select the MRS Cluster,
Enter the private IP address of ECS instance, port 22, save path, and credentials.
This will be executed as an SCP command with SSH protocol.
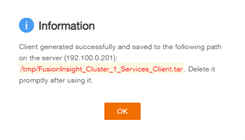
From the ECS instance, Extract tar files
- cd /tmp
- tar xvf FILE.tar
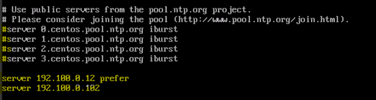
Setup NTP:
Ntp client must be installed and setted correctly
- yum install ntp
192.100.0.12 Master 1 IP address
192.100.0.102 Master 2 IP address
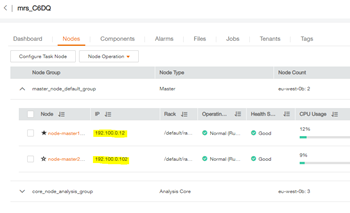
Enter the IP addresses of the master nodes.
- vi /etc/ntp.conf
- systemctl start ntpd
- systemctl enable ntpd
And execute the installation bash script
- ./install.sh /opt/client

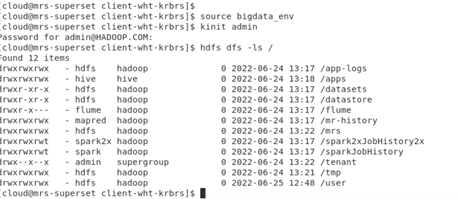
After the successful installation of the MRS Client,
- cd /opt/client
- source bigdata_env
- kinit admin
Check the connectivity with the cluster, if the hdfs command successfully retrieves the output of the ls command on the root path /
- hdfs dfs –ls /
We can move to the next step, which is the installation of the superset tool.
4. Installing Apache Superset on ECS VM:
Install the following packages using the yum package manager:
- sudo yum install gcc gcc-c++ libffi-devel python-devel python-pip python-wheel openssl-devel cyrus-sasl-devel openldap-devel
Also, you need to upgrade pip:
- pip3 install –upgrade pip
Python Virtual Environment:
We highly recommend installing Superset inside of a virtual environment
- pip install virtualenv
You can create and activate a virtual environment using
- python3 -m venv venv
- . venv/bin/activate
Perform the following installation python Dependency package
- pip install dataclasses
- pip install pyhive[hive]
- pip install pyhive[presto]
Installing and Initializing Superset:
First, start by installing apache-superset:
- pip install apache-superset
Then, you need to initialize the database:
- superset db upgrade
Create an admin user in your metadata database
- export FLASK_APP=superset
- superset fab create-admin
Create default roles and permissions
- superset init
Finally, run the superset server on the appropriate
- superset run -p 8000 -h 0.0.0.0 –with-threads –reload –debugger
5. Connecting Superset with MRS Cluster:
If the installation of superset done successfully, you should be able to access to the superset Web UI with the following port number.
From Web UI, Select Data – Databases
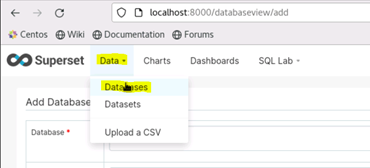
Click Plus + button to add new Database,

Select Hive, for MRS HiveServer, the database name is “Hive” (fixed doesn’t change)
192.100.0.12 : IP address of the master 1 node
default : default database name created in hive
(note: when you create a new DB, you can add it here in this field)
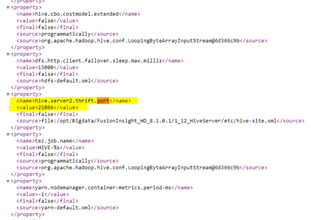
21066 : default port number of Hive
The port number used can be found in hive-site.xml file under hive.server2.thrift.port property
( /opt/Bigdata/FusionInsight_*/*_HiverServer/etc/hive-site.xml )
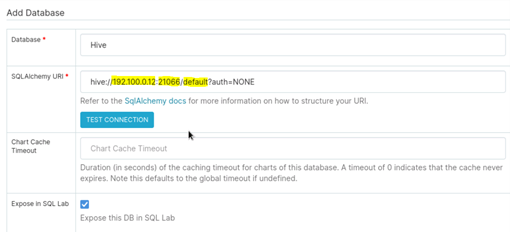
Make “Expose in SQL Lab” true,
And, Click Save button
Select SQL Lab – SQL Editor,
And Select Hive Database, and the schema.
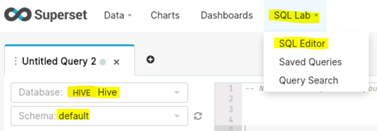
Finally, if everything is setted correctly, you can perform your SQL visualization queries on your SQL tables. And create dashboards with superset tool.