Step 4 – Creation of Security Group
Step 4 will allow you to create and configure the Security Group. Attached to a machine, the Security Group allows the passage of network flows. It can be seen as a simplified firewall
It is accessed through the Security Group menu from the Network Console area (Network Menu > Virtual Private Cloud > Access Control > Security Groups). The screen lists the existing security groups. For a first connection, only the default rule “default” exists.

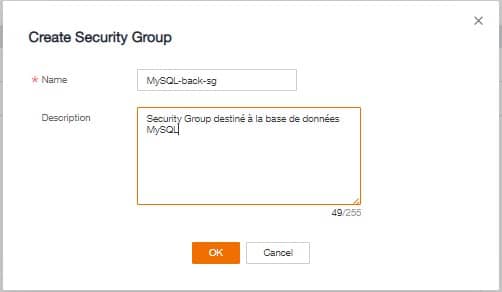
We are going to create 2 new Security Groups for the guide to secure our machines in the back and front area. Click on Create Security Group at the top and simply enter a name:
- 1st : web-front-sg, for our web server
- 2nd : MySQL-back-sg, For the MySQL data base
After creation, the new security groups should be displayed in the list. It is possible to see the details by clicking on the Security group concerned (it is indicated by an arrow and a name at the beginning of the line) to display all the rules. The two default rules will be displayed for each of our new Security groups in the Inbound Rules and Outbound rules tabs
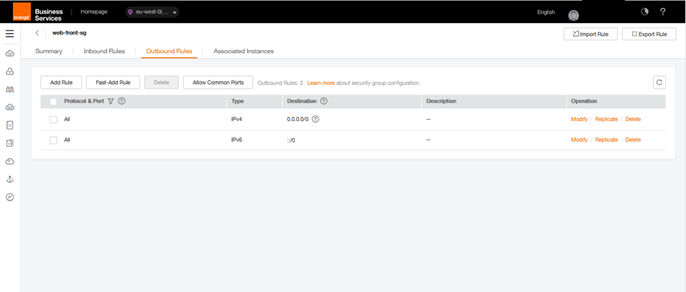
Security group Web-front-sg Inbound & Outbound
An entry contains several parameters:
- Transfer Direction : Inbound for incoming flows and Outbound for outgoing flows
- Type : IPv4 ou IPv6
- Protocol : TCP/UDP/ICMP/ANY
- Port range/ICMP Type : The port number used for TCP & UDP. It is possible to allow only certain types of ICMP like echo, reply, etc.
- Remote End : indicates the authorized target in the case of an Outbound and indicates the authorized sender for an Inbound
Thus the 2 routes present by default are interpreted as follows:
- Inbound / IPV4 / ANY / any / itself: allows machines in the group to communicate with each other.
- Outbound / IPV4 / ANY / any / 0.0.0.0/0: allows machines in the group to exit on all networks.
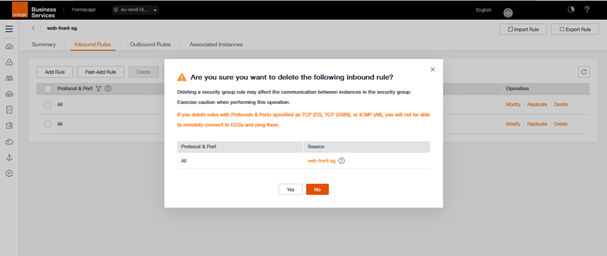
Since we don’t need this Inbound rule since each machine will be alone on its subnet, we are going to delete it on our two Security Groups (Be careful! In most cases, this rule is essential).
By clicking on delete at the end of the line to be deleted, a warning message will be displayed. Only after validation of the pop-up by clicking on OK, the rule will be deleted.
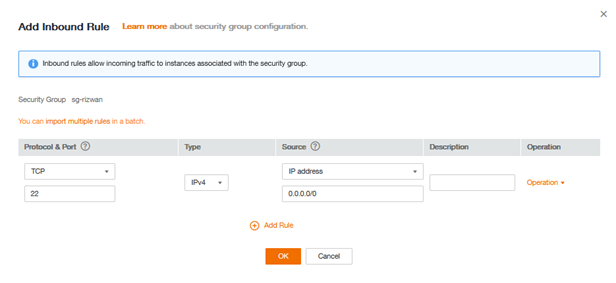
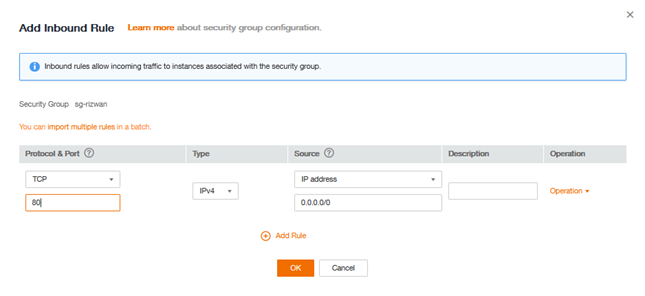
For the good functioning of our application, it will be necessary to add several rules. We are going to make our future web server accessible to everyone in SSH (TCP 22) and HTTP (TCP 80). It will be in web-front-sg.
Attention! For simplification reasons we allow here SSH connection from any Internet. In practice it is strongly recommended to open the SSH port only to authorized machines.
To add a rule, click on Add Rule above the list of feeds in the Security group web-front-sg. Create the two rules with this information:
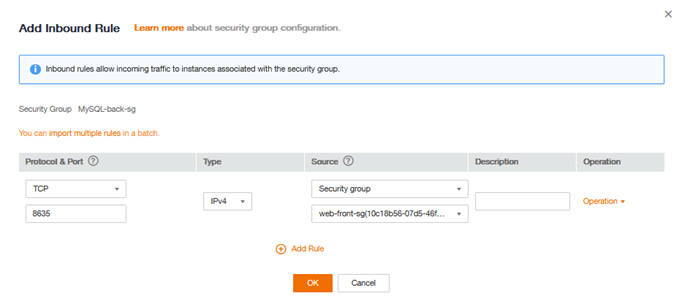
Finally, you need to add a rule to allow the web server to access the MySQL database. web-front-sg does allow the output of all streams, but MySQL-back-sg must allow the input. You have to add a rule to MySQL-back-sg for that:
- TCP
- Inbound
- 8635
- Security Group : web-front-sg (We remain within Flexible Engine so it is possible to use objects to increase security and avoid data entry errors)
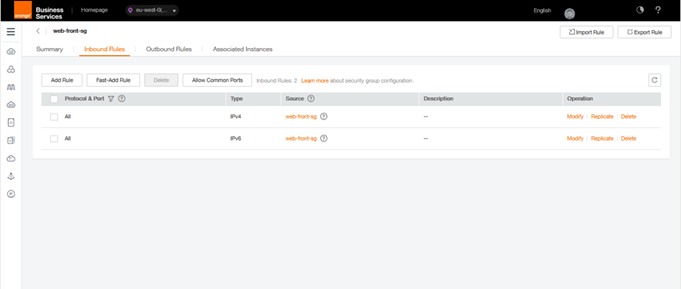
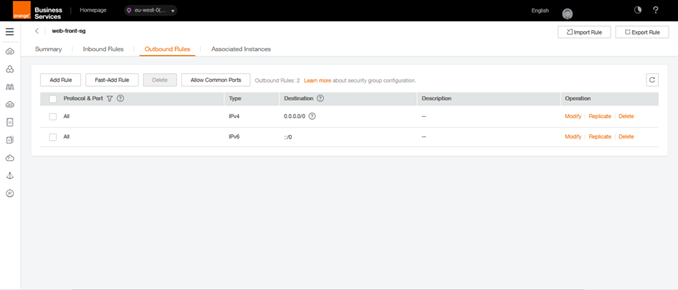
After our modifications, your Security Group Web-front-sg should be equivalent to this one:
Web Front-SG Inbound Rules

Web Front SG Outbound Rules
