Troubleshooting guide
What to do when getting an error…
- Understanding the error codes
- Checking the logs
- Checking the Jobs
- Check readiness
- FAB Services / daemons
- Looking for alerts
- Microsoft 365 sync issues
- Microsoft 365 TEAMS backup issue
| Error code | Description |
| 2 | Installation was canceled |
| 3 | Requires a reboot for completing the installation |
| 11 | The specified client name is in use |
| 15 | Detected an unfinished install |
| 18 | Available disk space is low |
| 31 | Multi instance not allowed |
| 43 | Failed to install package |
| 44 | Failed to start services |
| 59 | Failed to register client |
| 128 | No available CVD port |
| 137 | Reboot required for Windows update |
| 141 | Anti-virus blocking installation |
Checking the logs
Logs files can be found on the host under below path:
For Windows: C:\Program Files\Commvault\ContentStore\Log Files\
For Linux : /var/log/commvault/Log_Files/
Below is the name and description of log files that can be used to troubleshoot various issues.
| Log file Name | Description |
| Install.log | Installation log file * |
| clBackup.log | File System backup log file |
| clRestore.log | Restore log file |
| extidbdiscover.log | Initial Exchange DB discovery log file |
| extidbbackup.log | Exchange backup log file |
| SQLiDA.log | SQL backup log file |
| vsbackup.log | Virtual server agent backup log file |
| Vsrst.log | Virtual server agent restore log file |
| vsrst.log | New restore log file for Virtual server agent |
* for Windows if Log folder is not created for some reason during installation then, install log can be found in this location C:\ProgramData\Commvault Systems\Galaxy\LogFiles\Install.log.
| Note: ProgramData is a hidden folder ; you need to enable the Windows “show hidden folders” options |
Checking the Jobs
At first, it’s important to have a look at the job activity.
Look for the implied job, and check for events.
It may be relevant for deeper analysis on the jobs activity, to have a look at the events.
As explained in the Jobs Activity follow up chapter, you may find events related to each job within the job activity log.
Otherwise, you may also require having a more global look at the activity, by checking on all events occurring for your Company:
- In the FAB Backup console, go to the Monitoring / Events section

Depending on the case, and for further analysis, acquiring the job logs could be interesting (see the Active Jobs chapter).
Here follows a list of possible encountered errors and the action to be taken
| Error | Action to be taken |
| Source could not start the command | Check the network settings on the source computer |
| Destination could not start the command | Check the network settings on the destination computer |
| Services on destination are down | Make sure that the necessary services are up and running on the destination client computer (see FAB Services / daemons section) |
| Services on source are down | Make sure that the necessary services are up and running on the source client computer (see FAB Services / daemons section) |
| Connect timed out | Check the connectivity between the source and destination computers in this message and make sure that you can ping these computers from one another |
| Job Result Folder has low capacity | Increase capacity |
| Base Folder has low capacity | Increase capacity |
| Authentication failed | Make sure the proper authentication was used |
| Firewall connect failed. Source client <n> is not listed in the firewall config file. | Make sure that the firewall config file is correct and check if this client is listed in the file |
Check readiness
Often backups are pending due to a lack of communication between the FAB infrastructure and the agent located on the client to backup.
Such communication may be verified through the check readiness command:
- In the FAB Backup console, go to the Manage / Servers section

- Locate the concerned agent click on its action button, and click on Check Readiness
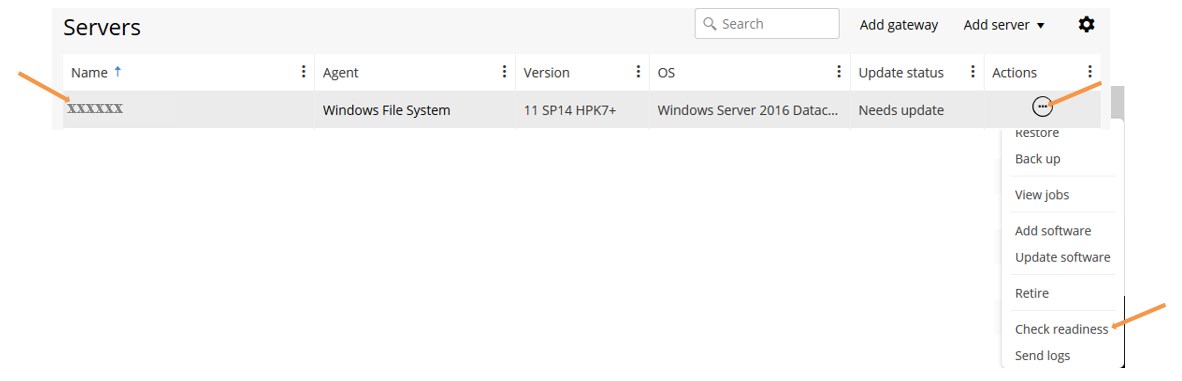
- Wait for the operation to complete and look for possible errors reported

FAB Services / daemons
Backup services on the clients have to be up and running for any backup & restore operation. Below is the list of services (name, process, description and log files).
| Windows Service Name | Processes (Linux / Windows) |
Description | Log file |
| Commvault Communications Service (GxCVD) | CVD | Base Service, Provides the ability to fetch or save metadata on the CommServe when backup or restore are in progress. | CVD.log |
| Commvault Network Daemon (GxFWD) | Cvfwd | File System backup log file | Cvfwd.log |
| Commvault Client Manager Service (GXClMgrS) | ClMgrS | Responsible for archiving or recovering the files | ClMgrS.log |
| N/A | cvlaunchd | Linux Process only – Responsible for spawning Commvault processes | cvlaunchd.log |
On your Windows devices, the FAB service management is done as follows :
Open the Windows Start menu -> expand the Commvault start menu folder -> click on Commvault Process Manager -> go to services tab.

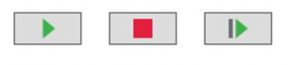
From this pane, your client services can be started, stopped, and restarted using the button at the bottom.
On your Linux devices, the FAB service management is done as follows :
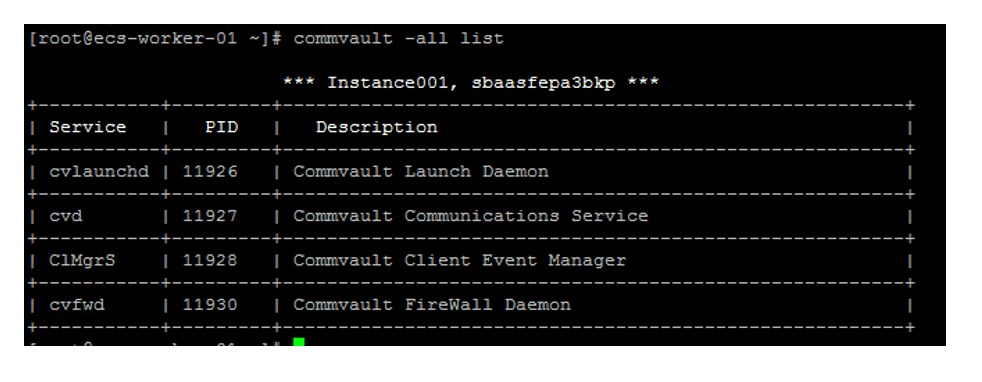
Verify services:
Run the commvault -all list as root user
To stop service run commvault -all stop as root user
To start service run commvault -all start as root user
To restart service commvault -all restart as root user
Looking for alerts
FAB logs all alerts set for you Company.
When analyzing an error, it could be relevant to have a look at the alerts:
- In the FAB Backup console, go to the Monitoring / Alerts section

| Note: The “No data available” message indicates that no alert was sent the past 7 days |
You may subscribe to pre-defined alerting policies:
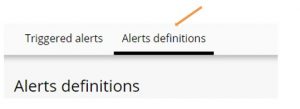
- In Monitoring / Alerts section, click on Alerts definitions
- Click on the Alert definition you wish to setup
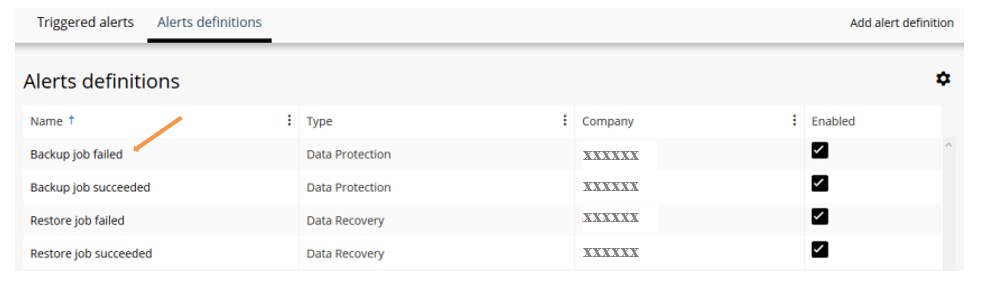
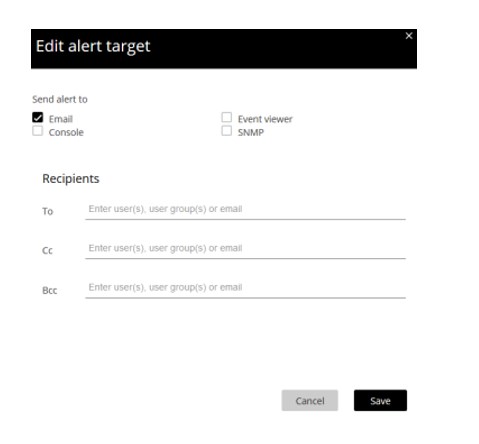
- In the Alert target section, click on Edit
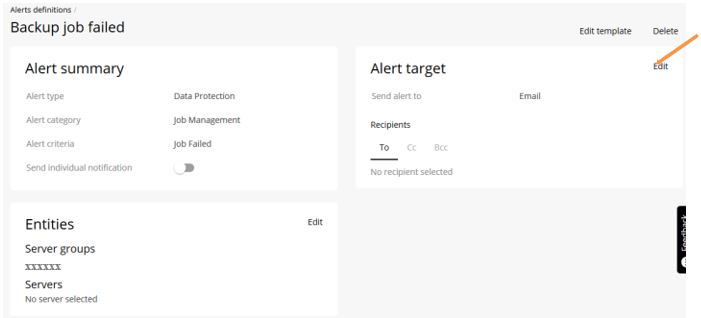
- Select the options you require and click on Save
| Note: Make sure your desired alerts are enabled in the Alerts definitions section (checkbox Enabled) |
Microsoft 365 sync issues
Microsoft 365 clients (Exchange Online, SharePoint Online, OneDrive for Business and Teams) are synchronized once during the initial configuration, Any Users, sites etc created after the client configuration might not be visible on the FAB console.
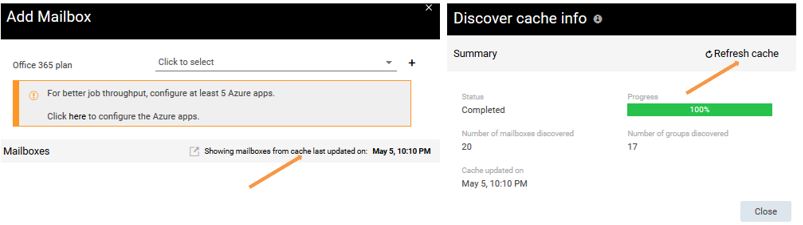
- In the FAB Backup console, under the Protect / Applications / Office 365 section, click on the MS 365 App name
- Click on the Add Mailbox / Add sites / Add user / Add team (depending on the O365 solution in question) window
- Click on the message “Showing…” and then on Refresh Cache in the Discover cache info window:
Microsoft 365 TEAMS backup issue
Sometimes, the TEAMS backup may end up in status “Completed with errors”, with error message: “We failed to backup posts from these channels”.
Error message like this one:

In order to solve such, 2 steps are required:
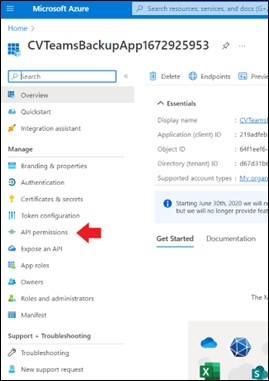
- Step1: Make sure the correct Azure App permissions are set in Microsoft Azure:
- From the FAB Backup console, under the Protect / Applications / Office 365 section,
- Click on your MS 365 TEAMS App name
- Go to the Configuration tab (on top)
- Locate the Teams connection settings section, and collect the Azure App name
- Connect to your Microsoft Azure portal and locate your Azure App based on the previously found Azure App name from FAB
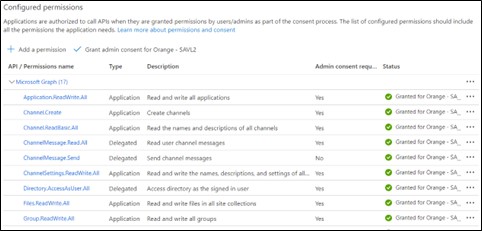
- Compare the permissions settings with the Commvault requirements HERE
- Step2: Request to Microsoft the permission to use Protected APIs:
- Fill up this FORM, based on the following instructions:
- Write your email address (it should be a tenant email ID).
- Select Yes.
- In the Publisher name box, write the tenant company name.
- In the App name box, write the semicolon-separated app names, such as, App1;App2.
- Write the semicolon-separated app ID, such as, 7054f33-74a8-4e75-8fbe-d26987f883dd; 32882231-2ff8-4711-8f75-2c70d9f38277
- Write – “The app is used for data protection and information management software applications and products”.
- Write – “The app is used as a vital extension of the protection native to O365 applications. To provide enhanced data protection to the Microsoft environments, it is necessary to have read access to all the messages in the tenant. This will provide the functionality such as point-in-time recovery, granular restores, and long-term retention”.
- Select the second option – “It is obvious to any admin installing this app that it will make a copy of Microsoft Teams messages”.
- Write the tenant directory ID, such as, 22c2134-03ww-43b7-abfe-7879478a67c0.
- Select Yes.


Instructions to Fill the Microsoft Graph Form: