Automating Flexible Engine Deployments with Terraform and GitHub Actions
Scenario
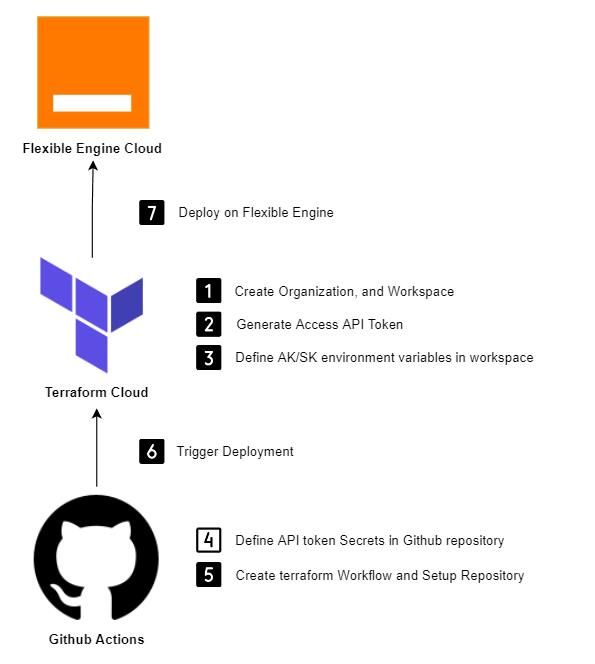
This section describes how to automate Flexible Engine Cloud Infrastructure deployments with Terraform Cloud and GitHub Actions.
Introduction
Terraform:
Terraform is an open-source infrastructure as code software tool that enables you to safely and predictably create, change, and improve infrastructure.
Terraform Cloud:
For this project we will use Terraform Cloud which is HashiCorp’s managed service.
That will provision infrastructure in a remote environment that is optimized for the Terraform workflow.
Terraform Cloud enables infrastructure automation for provisioning, compliance, and management of any cloud, data center, and service.
GitHub Actions:
Terraform CLI or Terraform Console can be used to deploy infrastructures locally.
This may work for a while if you are a single team member, if your teams grow it will be crucial to centralize deployment for all team members to have visibility, control and rollback.
GitHub Actions is a powerful automation tool that integrates with your GitHub repositories and enables you to create custom software development workflows. One of the many uses for GitHub Actions is to automate the deployment of infrastructure and applications to the cloud. In this tutorial, we will show you how to use GitHub Actions to automate the deployment of infrastructure to Flexible Engine Cloud, using Terraform Cloud.
Prerequisites:
First you must have these configured and seted up before being able to follow this demonstration:
-
FlexibleEngine Account with Access Key and Secret Key generated and valid.
-
For more details about downloading AK/SK from FlexibleEngine Console please refer to the following documentation .
-
-
Terraform Cloud Account, if you don’t have one, please create one with an organization name associated to it.
-
Terraform GitHub Repository that contains your terraform code deployment and configuration files.
Terraform Cloud
Step 1: Create Terraform Cloud Workspace
First, you need to create a workspace in Terraform Cloud. A workspace is a logical container for a Terraform configuration and can represent a single application or a group of related resources.
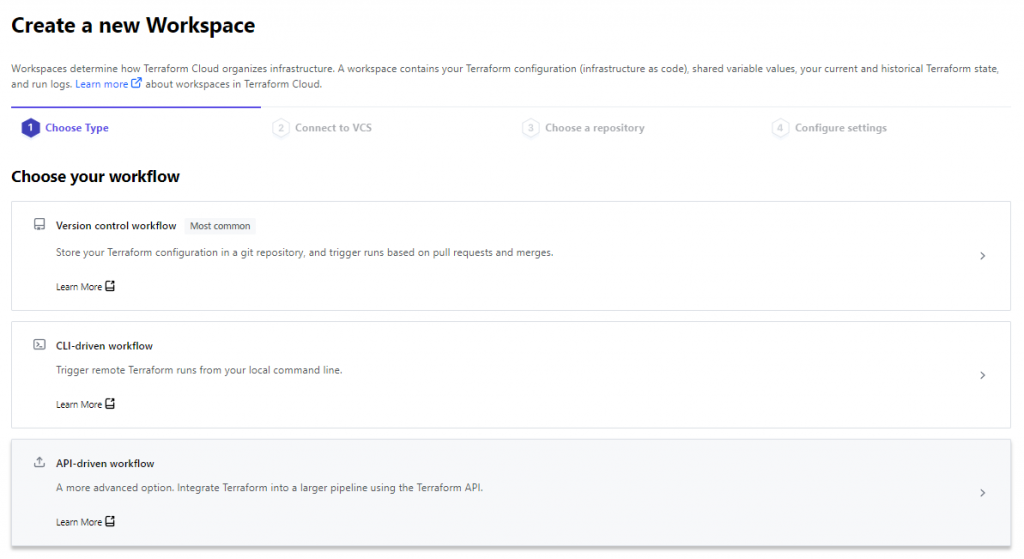
To create a workspace, From Terraform Cloud, select a new API-driven-workflow workspace.
for this demonstration we have already created an account with the organization name: FlexibleEngine
The organization name will be used later to refer to terraform cloud account from GitHub.
When you create a workspace, you have three options for designing your Terraform workflow:
-
Version Control Workflow
-
CLI-Driven Workflow
-
API-Driven Workflow
For this demonstration API-Driven Workflow fits well our requirements and scenario.
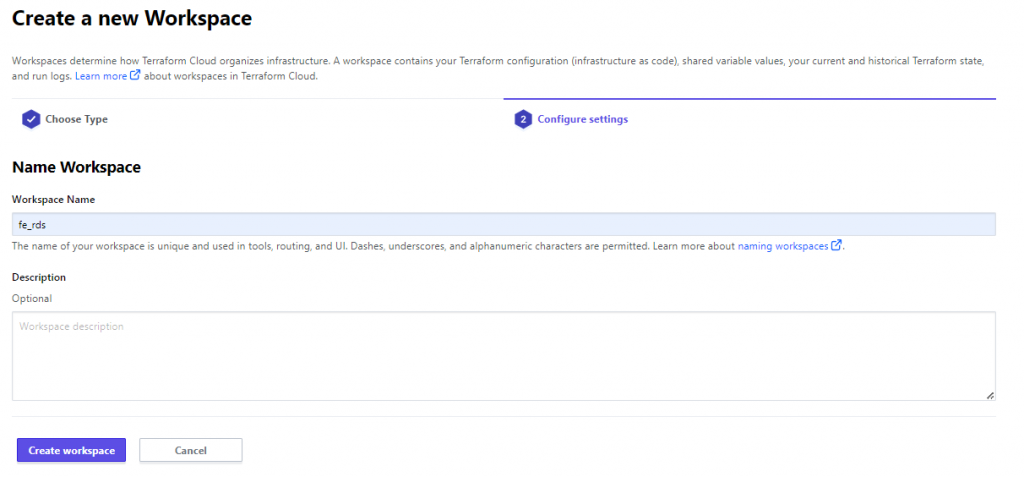
Give your Workspace a name, and Click Create Workspace
Step 2: Generate an API Token
In Terraform Cloud, an API token is a unique, personal key that you can use to authenticate with the Terraform Cloud API. This allows you to programmatically access and manage your Terraform Cloud workspaces, runs, and other resources.
To create an API token, you will need to log in to your Terraform Cloud account, go to the “User Settings” page, and click the “API Tokens” tab. From there, you can create a new token by giving it a name and selecting the permissions you want it to have. Once you have created the token, you will be shown a one-time-use token value. Make sure to copy this value and store it somewhere safe, as you will not be able to see it again.
From Terraform Cloud, select User settings from dropdown list menu. And Click Tokens
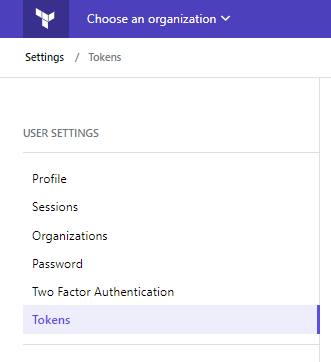
Next Create an API token.
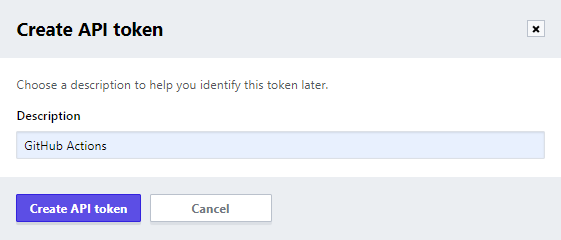
Copy the generated token, and save it elsewhere temporarily, we will use it later.
Note: Keep in mind that API tokens are tied to your user account and can be revoked or deleted at any time. You should treat them with the same level of care as you would with a password, any leakage of this sensitive data could lead to an insecurity.
Step 3: Define Access key and Secret key in environment variables
In Flexible Engine Cloud, an access key and secret key are a pair of credentials that are used to authenticate a FE user or service and grant access to FE resources.
It’s important to note that access keys and secret keys should be treated with the same level of care as a password. You should never share your access key or secret key with anyone or store them in plain text. Instead, you should well preserve them.
Next, add these credentials access key and secret key as Environment Variables to your terrafom cloud workspace.
For more details about generating an access key and a secret key, please refer to flexible engine documentation.
https://docs.prod-cloud-ocb.orange-business.com/api/workspace/workspace_03_0007.html

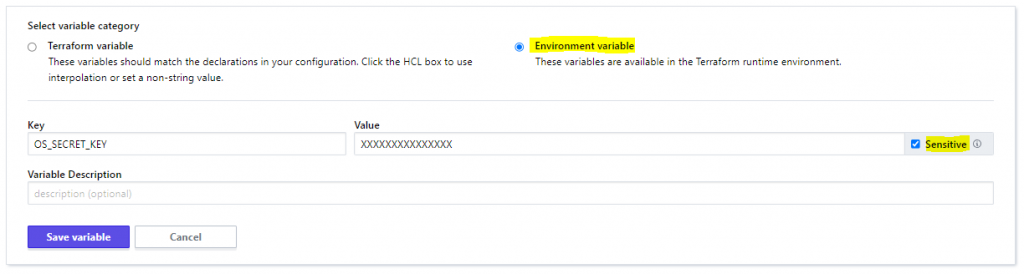
OS_ACCESS_KEY = XXXXXXXXXXXX
OS_SECRET_KEY = XXXXXXXXXXXX
Step 4: Define API Token in repository
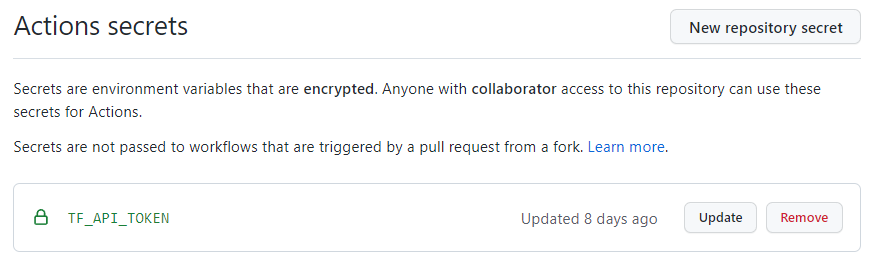
The TF_API_TOKEN is an environment variable that is used to authenticate a user or service with Terraform Cloud. It is a personal access token (PAT) that is generated in Terraform Cloud and can be used to perform actions on behalf of a user or service.
you supposed to have already generated an API token in Step2, you can use it to authenticate with Terraform Cloud in your scripts or programs by setting the TF_API_TOKEN environment variable to the value of your token.
Please keep in mind that we have already a terraform repository on GitHub that deploys an RDS database on FlexibleEngine Cloud. and it will be used as an example in this tutorial.
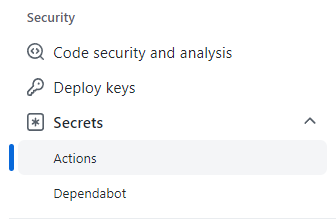
From GitHub Repository, go to Settings tab

Form Secrets list, select Actions
TF_API_TOKEN will be used for GitHub Actions to authenticate to terraform Cloud and submit deployments.
And it will be referenced from GitHub Actions yaml config file that we will set next section.
Github Actions
Step 5: Create terraform workflow
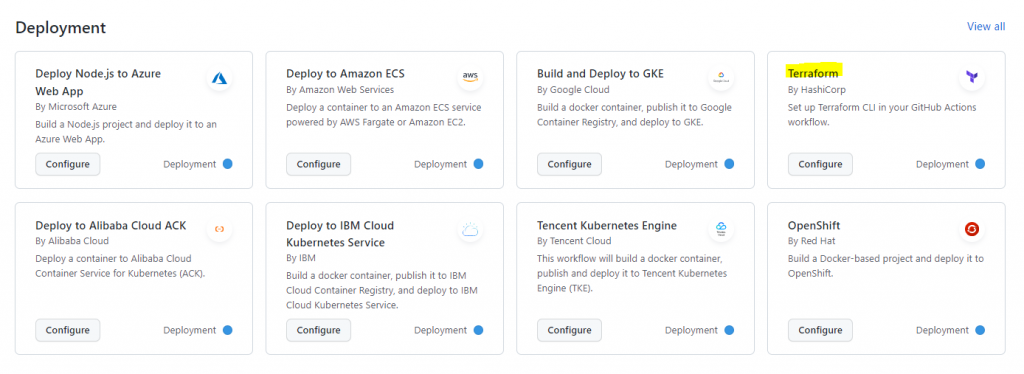
From your GitHub repository, go to Actions, and click New Workflow

You can either write your own workflow file, or start from a template file.
for this demo, we will use an already existing template of terraform.
You must comment terraform format check.
# Checks that all Terraform configuration files adhere to a canonical format
#- name: Terraform Format
#  run: terraform fmt -check
And comment apply condition.
# if: github.ref == 'refs/heads/"master"' && github.event_name == 'push'
For more details, refers to .
Finally, Commit changes.
Your terraform workflow yaml file shoud be the as in the following example :
.github/workflows/terraform.yml
name'Terraform'
on
push
branches
"master"
pull_request
permissions
contentsread
jobs
terraform
name'Terraform'
runs-onubuntu-latest
environmentproduction
# Use the Bash shell regardless whether the GitHub Actions runner is ubuntu-latest, macos-latest, or windows-latest
defaults
run
shellbash
steps
# Checkout the repository to the GitHub Actions runner
nameCheckout
usesactions/checkout@v3
# Install the latest version of Terraform CLI and configure the Terraform CLI configuration file with a Terraform Cloud user API token
nameSetup Terraform
useshashicorp/setup-terraform@v1
with
cli_config_credentials_token$ secrets.TF_API_TOKEN
# Initialize a new or existing Terraform working directory by creating initial files, loading any remote state, downloading modules, etc.
nameTerraform Init
runterraform init
# Checks that all Terraform configuration files adhere to a canonical format
#- name: Terraform Format
# run: terraform fmt -check
# Generates an execution plan for Terraform
nameTerraform Plan
runterraform plan -input=false
# On push to "master", build or change infrastructure according to Terraform configuration files
# Note: It is recommended to set up a required "strict" status check in your repository for "Terraform Cloud". See the documentation on "strict" required status checks for more information: https://help.github.com/en/github/administering-a-repository/types-of-required-status-checks
nameTerraform Apply
# if: github.ref == 'refs/heads/"master"' && github.event_name == 'push'
runterraform apply -auto-approve -input=false
Setup GitHub Repository:
Now edit your terraform main.tf file and Add backend block, by referring to your terraform cloud organization and workspace that you created previously.
Terraform Cloud Organization: FlexibleEngine
Terraform Cloud Workspace: fe_rds
versions.tf
terraform {
  backend "remote" {
    organization = "FlexibleEngine"
    workspaces {
      name = "fe_rds"
    }
  }
  required_providers {
    flexibleengine = {
      source = "FlexibleEngineCloud/flexibleengine"
    }
  }
}
provider "flexibleengine" {
  domain_name = var.domain
  region      = var.region
  tenant_name = var.tenant
}
main.tf
resource "flexibleengine_rds_instance_v3" "rdstest" {
  name              = "rds_by_GithubActions"
  flavor            = "rds.pg.s3.medium.4"
  availability_zone = [var.az]
  security_group_id = "0d2c2368-28c9-4d04-bbb7-abb693ecaa3a"
  vpc_id            = "76829416-46c8-4f08-a0f3-c41bfdd61bd5"
  subnet_id         = "208f3349-dc67-4e06-9ccc-62e468d0a66b"
  db {
    type     = "PostgreSQL"
    version  = "11"
    password = "PassW0rd!"
    port     = var.db_port
  }
  volume {
    type = "COMMON"
    size = 100
  }
Step 6: Trigger Deployment
Finally, to deploy your infrastructure you can either trigger deployment automatically from your GitHub Actions yaml configuration on Pull or Push,.. Actions.
For more details, refers to .
on
push
branches
"master"
pull_request
Or, manually from GitHub console. Select Actions from List. And Click on the commit that you want to deploy.
Next, From the right side, Click Run all jobs.

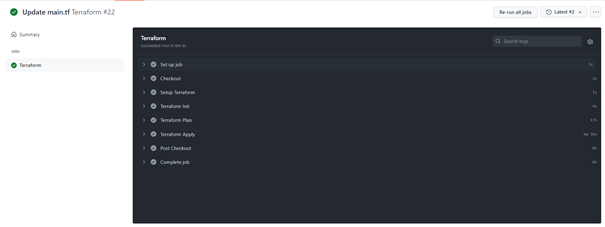
Workflow jobs declared in Workflow yaml file are as follows (checkout, setup, init, plan, apply).
you can customize your yaml workflow file as needed. To fit your scenario requirements.
In conclusion, automating FE deployments with Terraform Cloud and GitHub Actions is a powerful and efficient way to manage your infrastructure. By using GitHub Actions to automate the deployment of your infrastructure with Terraform Cloud, you can streamline your workflow, ensure that your infrastructure is up-to-date, and avoid manual errors.
By following these steps, that we have covered in this tutorial, you should be able to automate the deployment of your FE infrastructure with Terraform Cloud and GitHub Actions and enjoy the benefits of a more efficient and reliable workflow.