-
Overview
-
Practical sheets
-
-
- Aucun article
-
-
- Aucun article
-
-
-
- Backup : Agent-Level B&R via NSS for IAAS offer
- Backup : Create VCOD Backup
- Backup : Netbackup Agent Installation for Linux
- Backup : Netbackup Agent Installation for Windows
- Backup : Overall Design for VCOD Offer
- Backup : User's Guide for VCOD Offer
- NSX-T : Configuring a Distributed Firewall
- NSX-T : Create VPN Ipsec
- NSX-T : Creation of T1
- NSX-T : DNAT configuration
- NSX-T : How to configure a Gateway Firewall
- NSX-T : SNAT configuration
- NSX-T: Create and Configure a Geneve Overlay Segment
- NSX-T: How to configure an IPSEC solution
- vCenter : Clone a VM
- VCenter : Create a new VM
- VCenter : Create a snapshot of a VM
- VCenter : Reset cloudadmin password
- VCenter : Storage Vmotion on a VM
- VCenter : Upgrade Vmware tools on a VM
-
-
Q & A
-
Services
-
-
- Aucun article
-
- Aucun article
-
- Aucun article
-
- Aucun article
-
- Aucun article
-
- Aucun article
-
- Aucun article
-
-
-
- Aucun article
-
- Aucun article
-
- Aucun article
-
-
-
- Aucun article
-
- Aucun article
-
-
Deploy a VM
Overview
Note !
With VMware vCloud Director, it is important to understand the concept of vApp.
A vApp is a container used to group one or more VMs in order to simplify their management.
A VM will systematically be part of a vApp even if it has been deployed independently. It is possible to deploy a vApp containing a VM but it is also possible to deploy a VM in an already existing vApp.
The deployment of a VM can be done in several ways :
- From a catalog
- From a Blank VM
- From an OVF/OVA file
Prerequisites
- You must have enough available resources in your VDC to deploy a new VM.
- Know how to Access your VMs
Note !
You can deploy a VM from a catalog in two ways :From a new vApp or by adding it to an existing vApp.
Reminder : CPU, RAM and Storage resources are allocated at the VDC level, it is important to carefully choose your target VDC.
1st method – From a Template
The 1st method allows the deployment of a VM from an existing vApp or a new vApp with a VM. More Details HERE
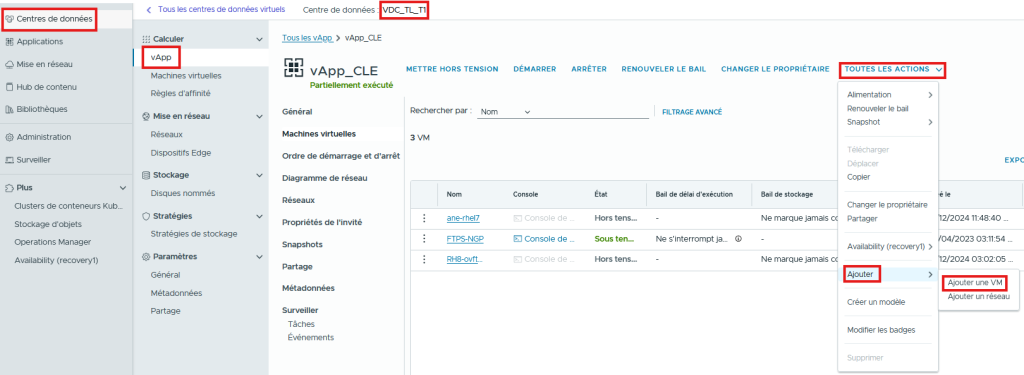
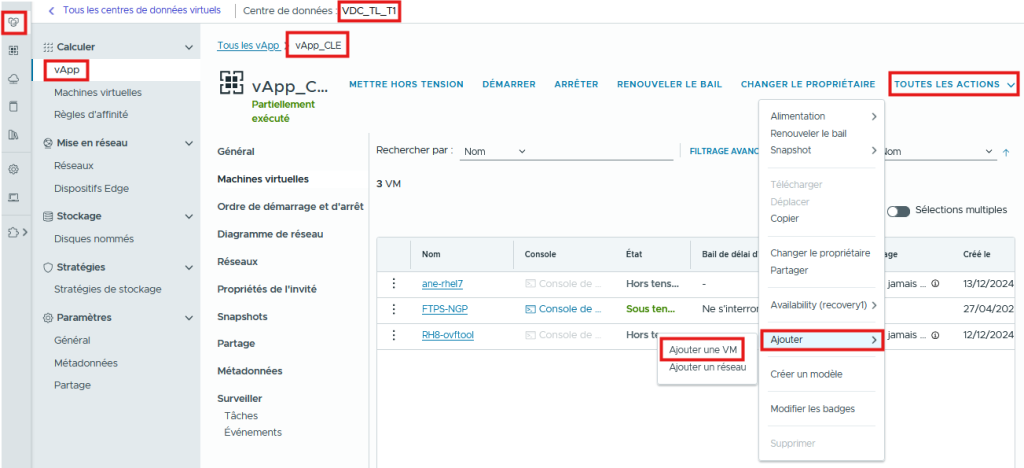
- A VM in an existing vApp :
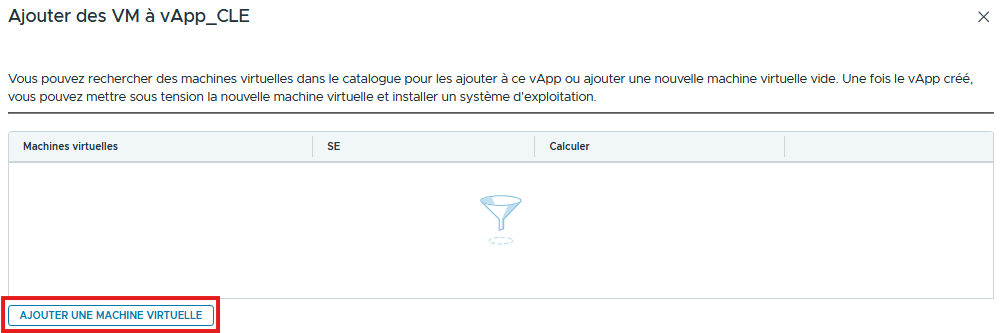
- From Data Centers / vApp / ALL ACTIONS / Add / Add VM then ADD VIRTUAL MACHINE
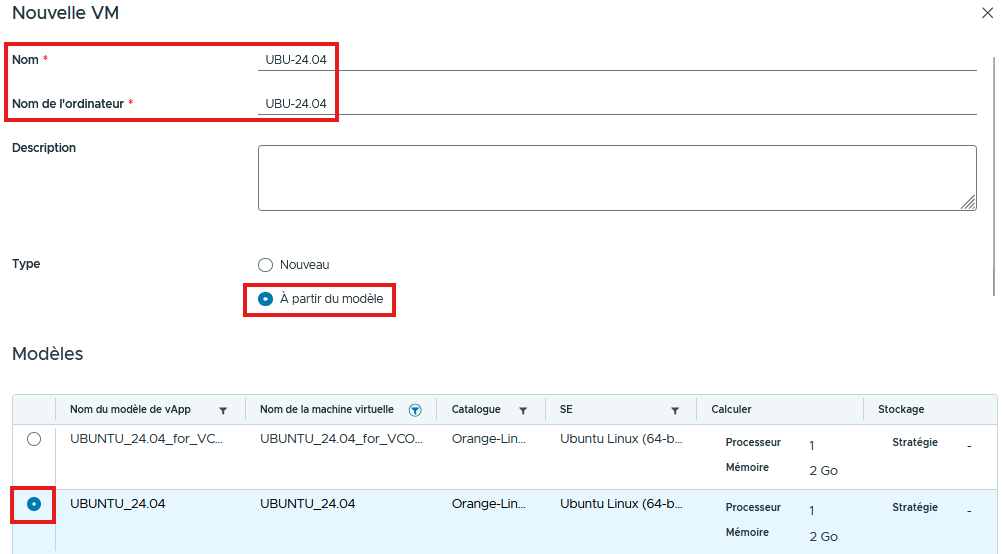
- Choose the Name of the VM, the desired CPU, Memory, Storage Resources and click OK
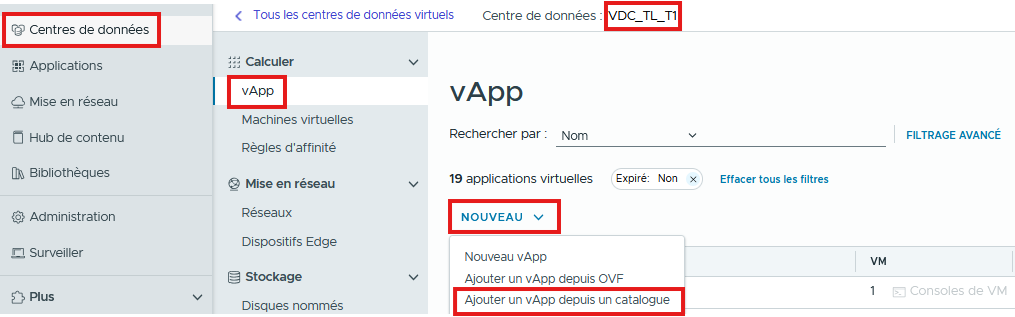
- or a VM in a new vApp :
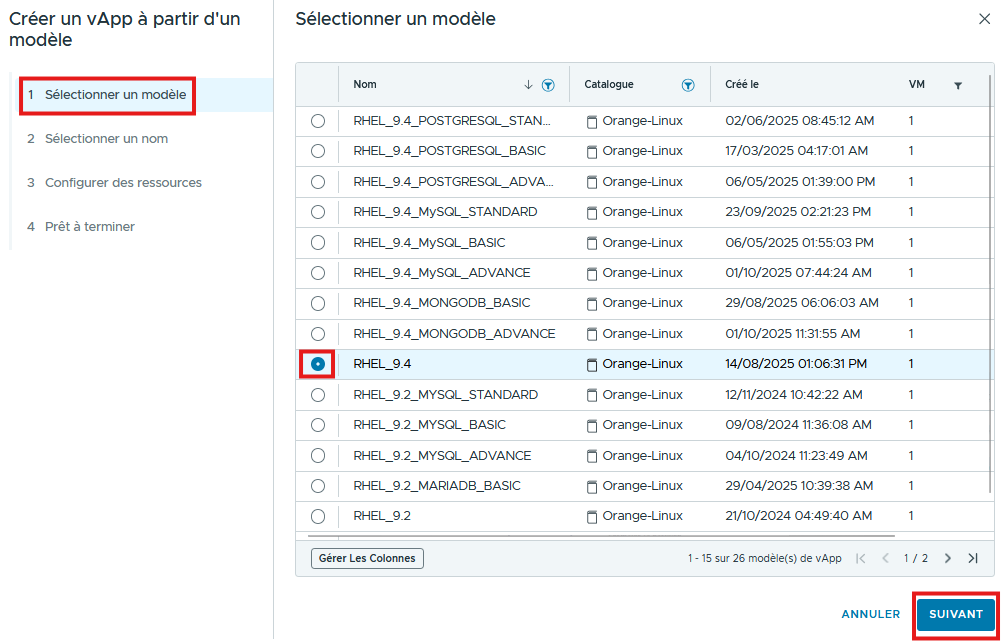
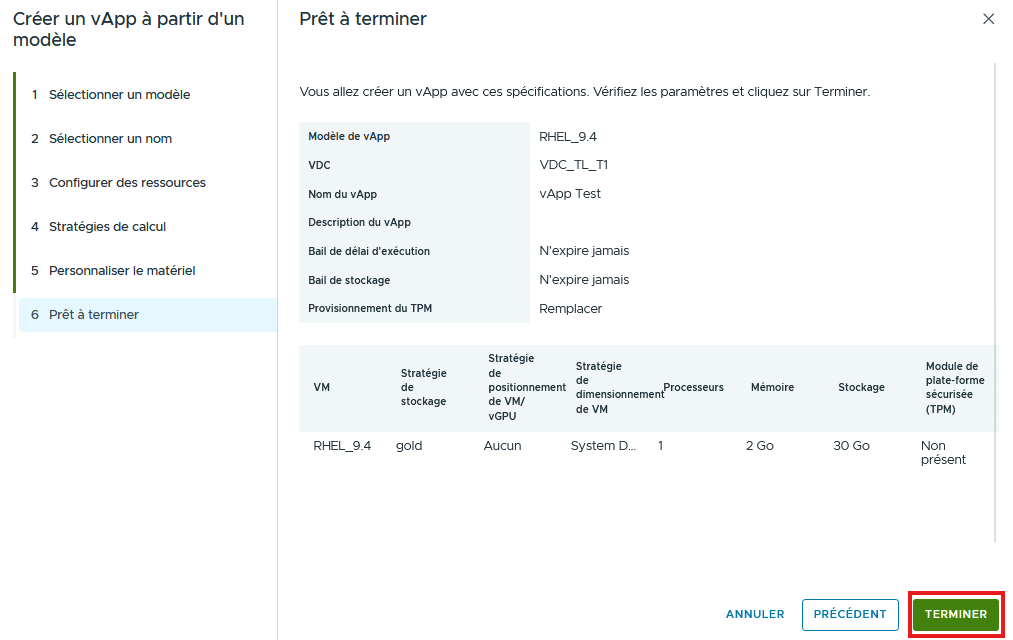
- Go to Data Centers > vApp > NEW > Add vApp from catalog
- Select the Template to deploy then fill in the required fields to create the new VM: Hardware Configuration: CPU, memory and hard disk, Storage Class….
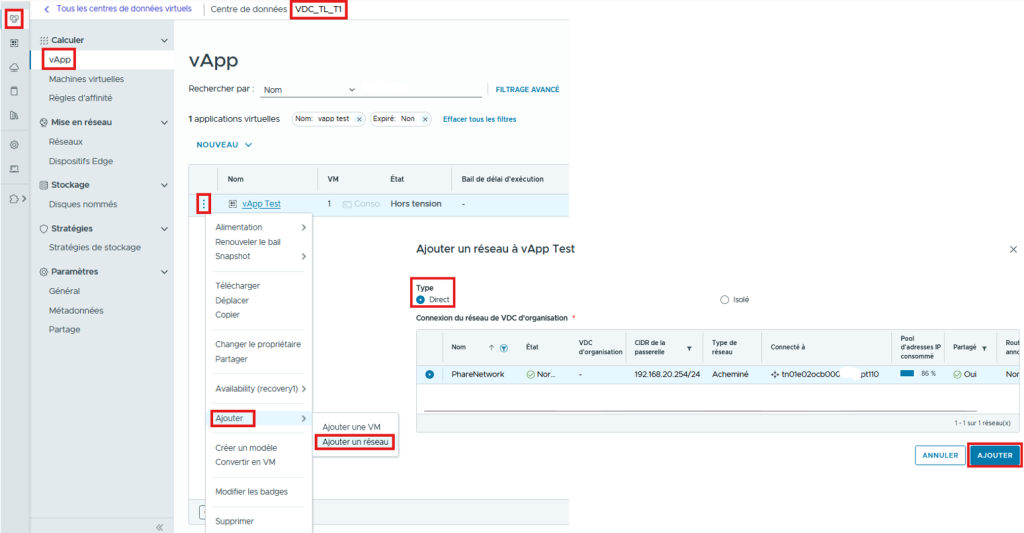
- Add the Network to the vApp so that you can then add it to the VM.
- From Data Center / vApp / Add / Add Network
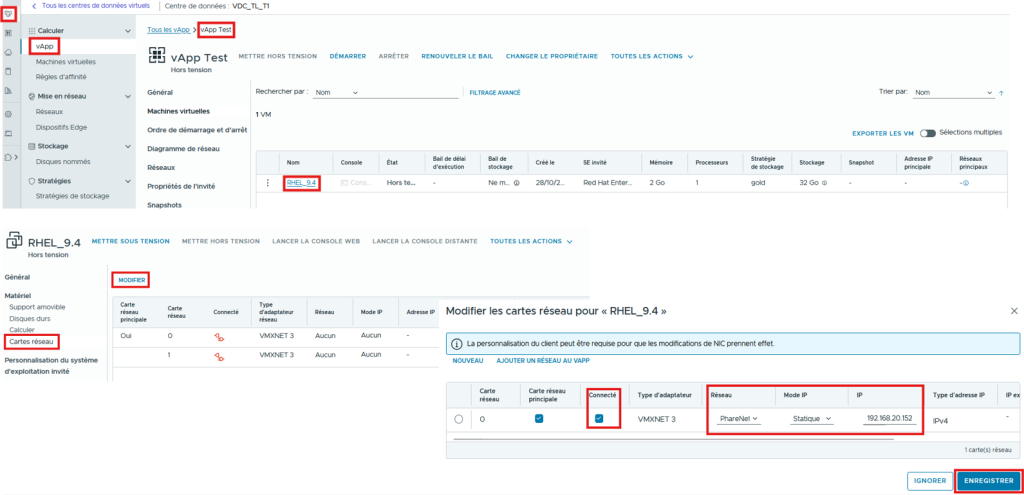
- Then add the network to the VM and start the VM by clicking POWER ON
2nd method – From an ISO Image
The 2nd method makes it possible to Create a VM in an existing vApp or in Standalone mode : More Details HERE
- Create a VM from an already existing vApp :
- From Data Centers / vApp / ALL ACTIONS / Add / Add VM
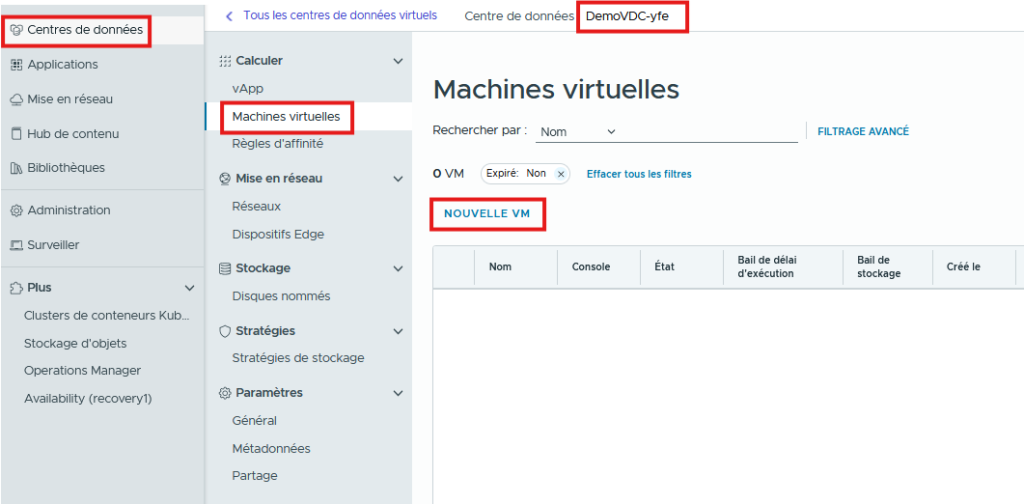
- Create a VM in Standalone Mode :
- From Data Centers / Virtual Machines (Standalone) / NEW VM
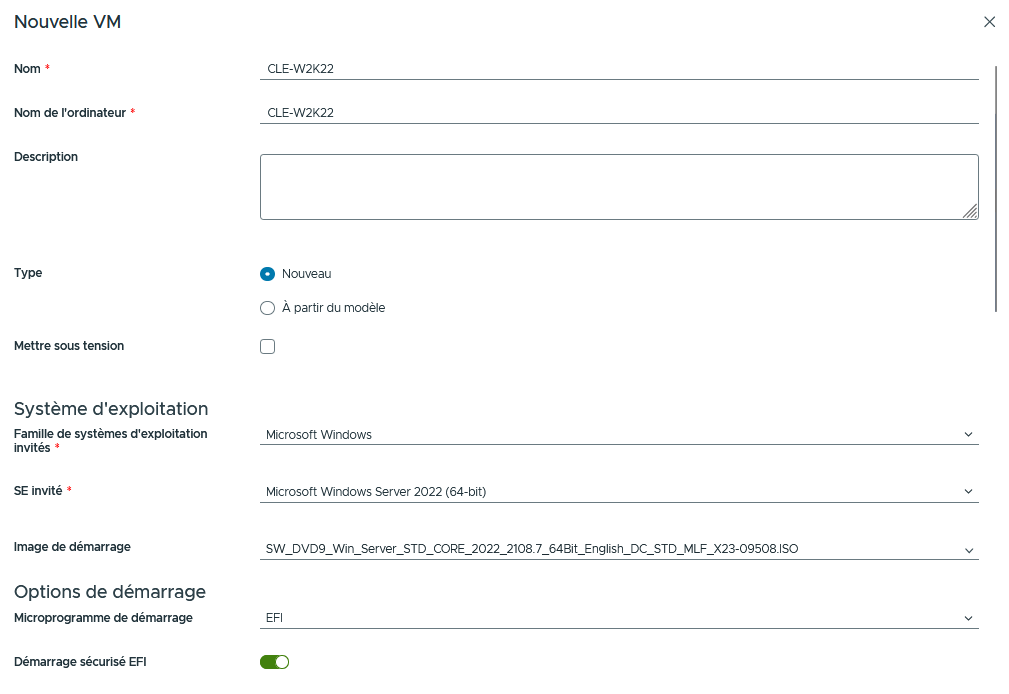
- Choose a Name for the VM.
- Choose the Computer Name (hostname).
- Optionally a description.
- Type : New
- Select the Operating system family.
- Select the Operating system.
- Select a Boot image from the catalog, this step can be done afterwards. *
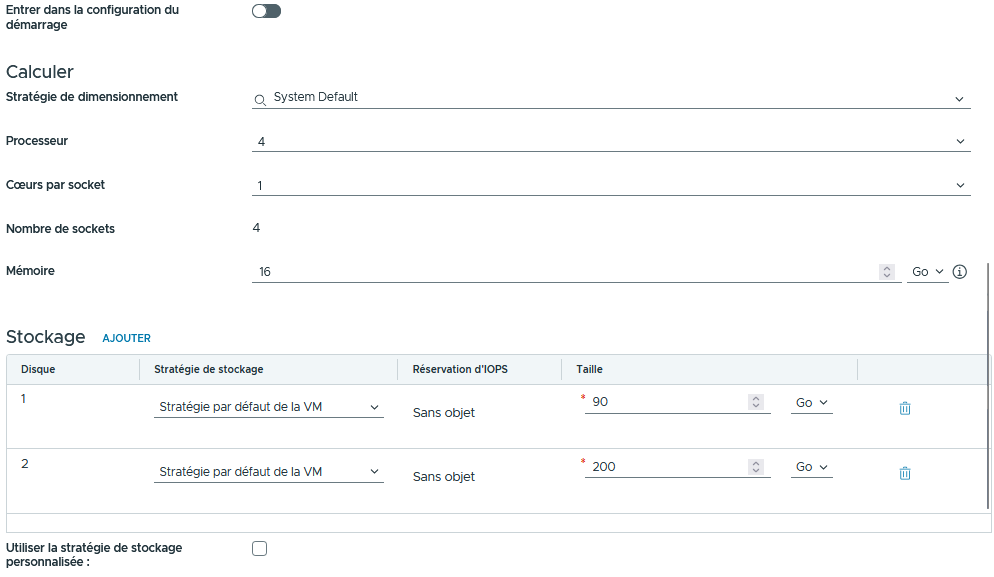
- Determine the computing power.
- Configure/Add your disks.
- Configure/Add your network cards.
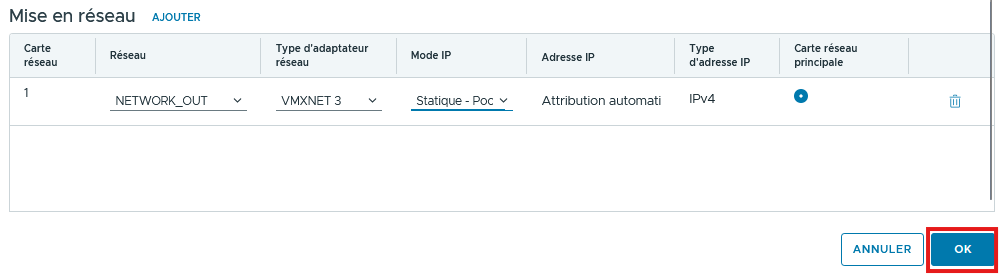
3rd method – From an OVA/OVF file
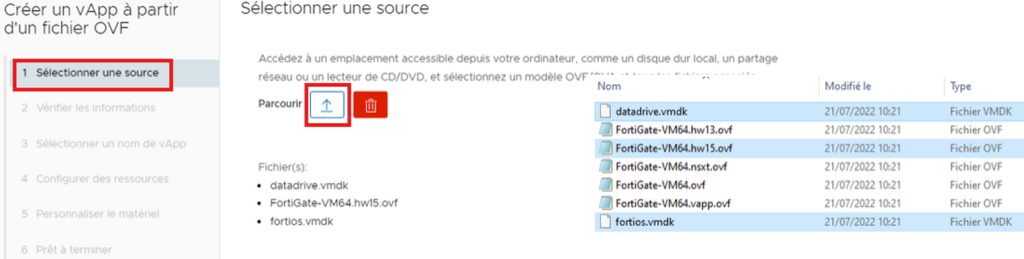
The 3rd method consists in to add a vApp from an OVF : More Detail HERE
- In the same way that we deployed a vApp from a catalog, we will simply add a vApp from an OVF
- From the Application section / Virtual Applications / NEW / Add vApp from OVF then select the associated VDC

File selection
- An OVF consists of a .ovf file and one or more vmdk disks, an OVA is all of these files compressed into a single file.
Sometimes you may have several ovf files, it is necessary to choose one depending on the version of the ESXi (Hardware version 21)
You can find the mapping on the Broadcom site: HERE
Particularities
The rest of the procedure is similar to what is offered when adding a vApp from a template, except for the following :
You may be prompted to :
- Accept the licenses
- Enter the custom properties