-
Overview
-
Q & A
-
Practical sheets
-
-
- Aucun article
-
-
- Aucun article
-
-
-
- Backup : Agent-Level B&R via NSS for IAAS offer
- Backup : Create VCOD Backup
- Backup : Netbackup Agent Installation for Linux
- Backup : Netbackup Agent Installation for Windows
- Backup : Overall Design for VCOD Offer
- Backup : User's Guide for VCOD Offer
- NSX-T : Configuring a Distributed Firewall
- NSX-T : Create VPN Ipsec
- NSX-T : Creation of T1
- NSX-T : DNAT configuration
- NSX-T : How to configure a Gateway Firewall
- NSX-T : SNAT configuration
- NSX-T: Create and Configure a Geneve Overlay Segment
- NSX-T: How to configure an IPSEC solution
- vCenter : Clone a VM
- VCenter : Create a new VM
- VCenter : Create a snapshot of a VM
- VCenter : Reset cloudadmin password
- VCenter : Storage Vmotion on a VM
- VCenter : Upgrade Vmware tools on a VM
-
-
Services
-
-
- Aucun article
-
- Aucun article
-
- Aucun article
-
- Aucun article
-
- Aucun article
-
- Aucun article
-
- Aucun article
-
-
-
- Aucun article
-
- Aucun article
-
- Aucun article
-
-
- Aucun article
-
- Aucun article
-
-
VCenter : Create a new VM
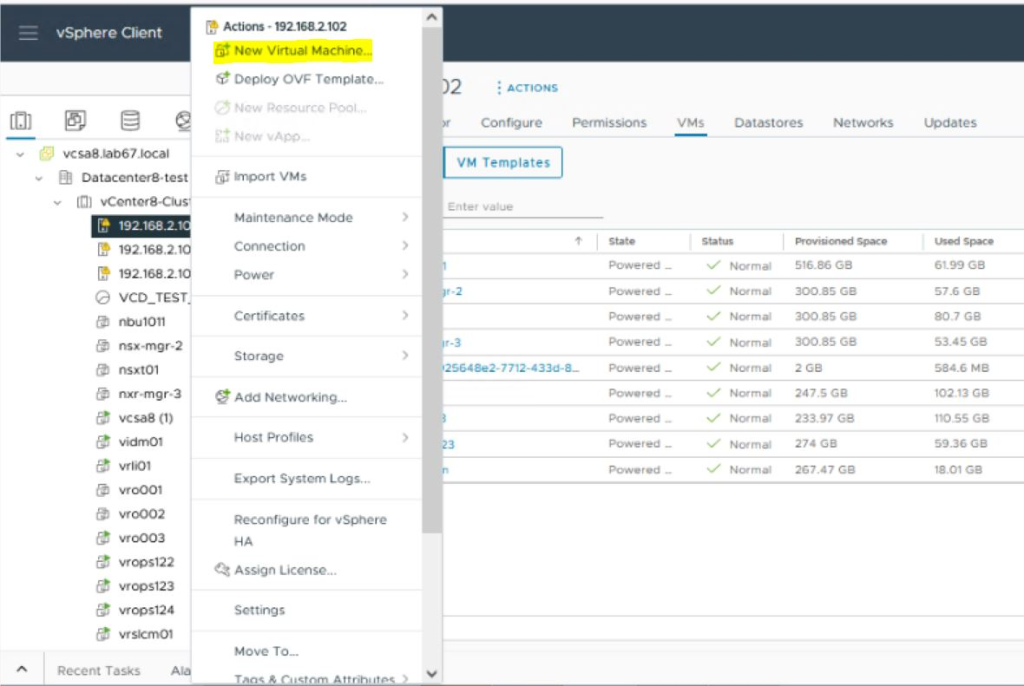
1. Right-click any inventory object that is a valid parent object of a virtual machine, such as a data center, folder, cluster, resource pool, or host, and select New Virtual Machine.
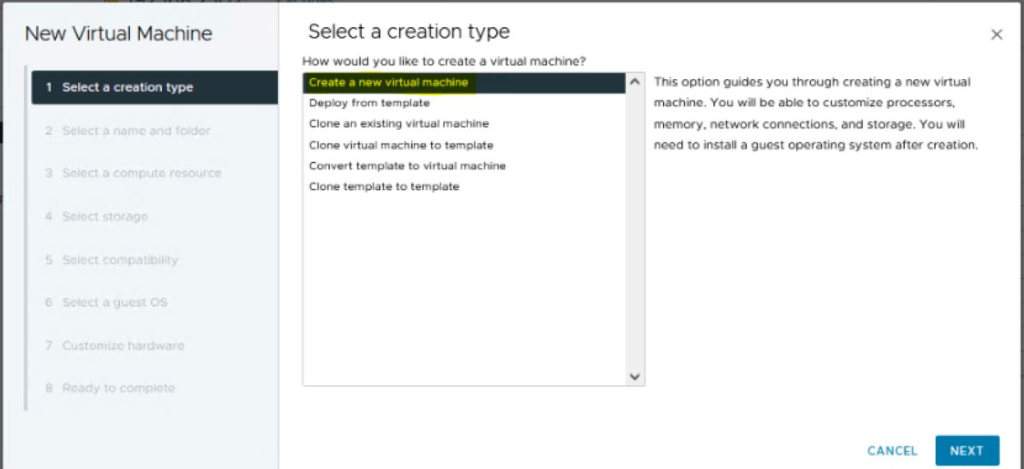
2. On the Select a creation type page, select Create a new virtual machine and click Next.
3. On the Select a name and folder page, enter a unique name for the virtual machine and select a deployment location.
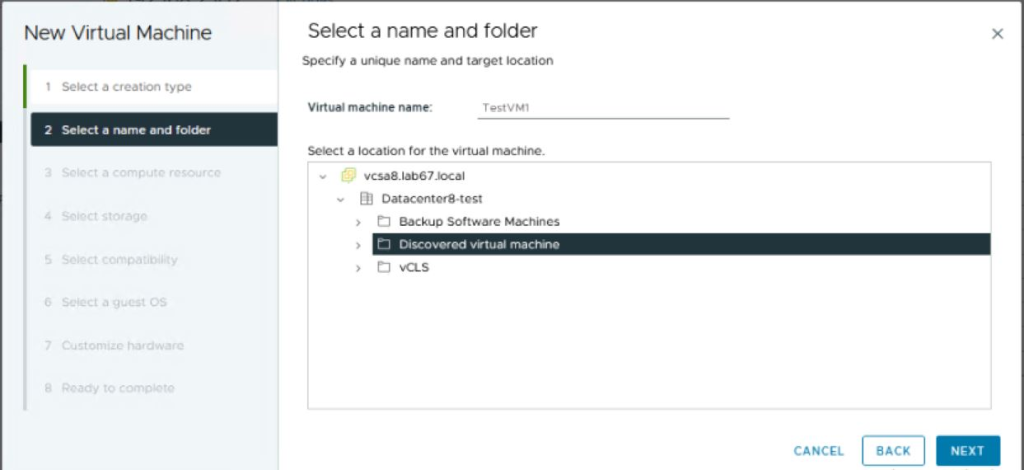
4. Click Next.
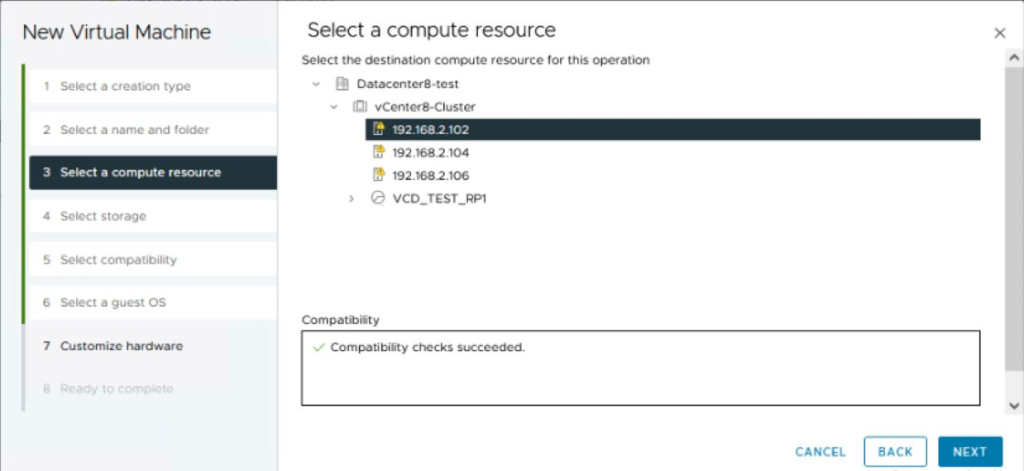
5. On the Select a compute resource page, select the host, cluster, resource pool, or vApp where the virtual machine will run and click Next.
If creating the virtual machine at the selected location causes compatibility problems, an alarm appears in the Compatibility pane.
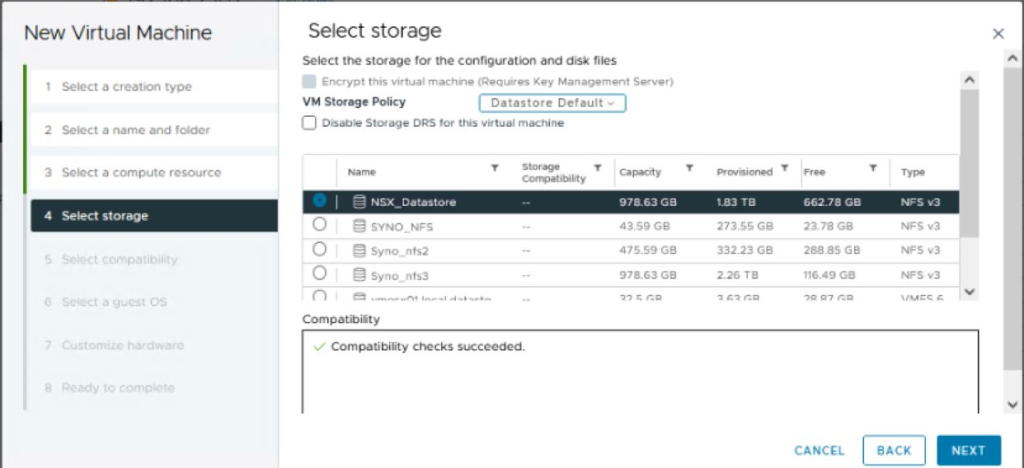
6. On the Select storage page, choose the storage type, the storage policy, and a datastore or datastore cluster where to store the virtual machine files.
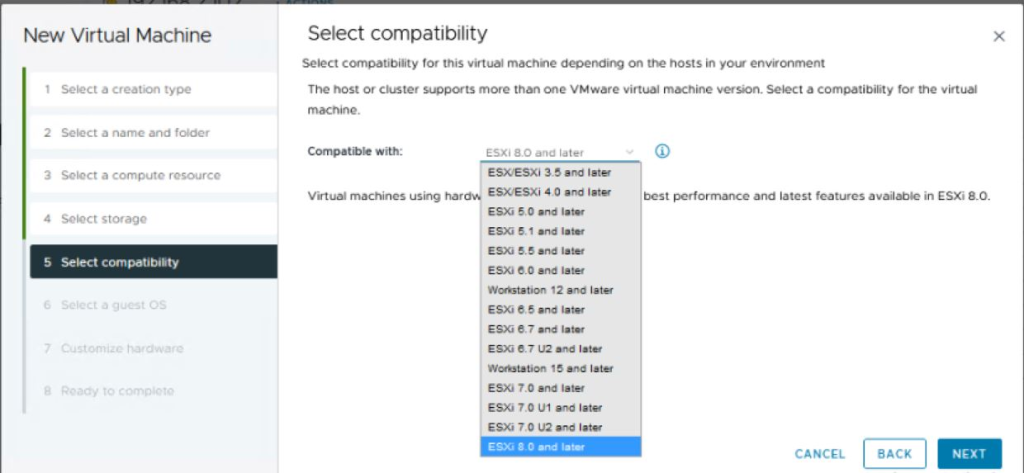
7. On the Select compatibility page, select the virtual machine compatibility with ESXi host versions and click Next.
To have access to the latest hardware features, select the latest ESXi host version.
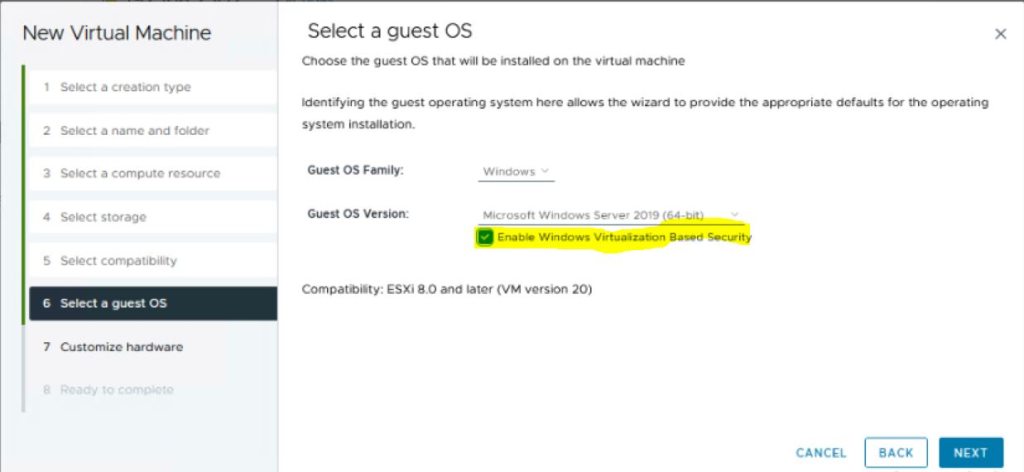
8. On the Select a guest OS page, select the guest OS family and version and click Next
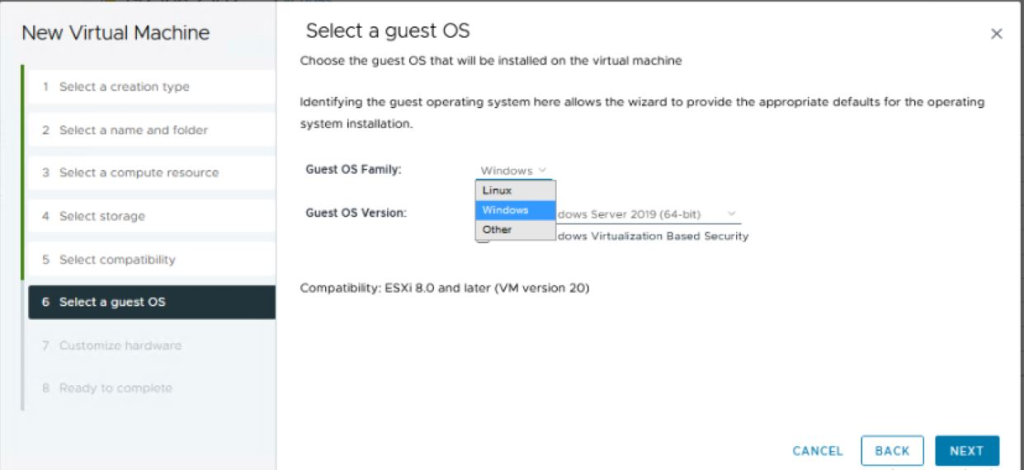
9. (Optional) Enable Windows Virtualization Based Security.
When you enable this option, hardware virtualization, IOMMU, EFI, and secure boot become available to the guest operating system. You must also enable Virtualization Based Security within the guest operating system of this virtual machine.
The Enable Windows Virtualization Based Security option is available only for the latest Windows OS versions, for example Windows 10 and Windows Server 2016. For more information about VBS, see the documentation.
10. Click Next.
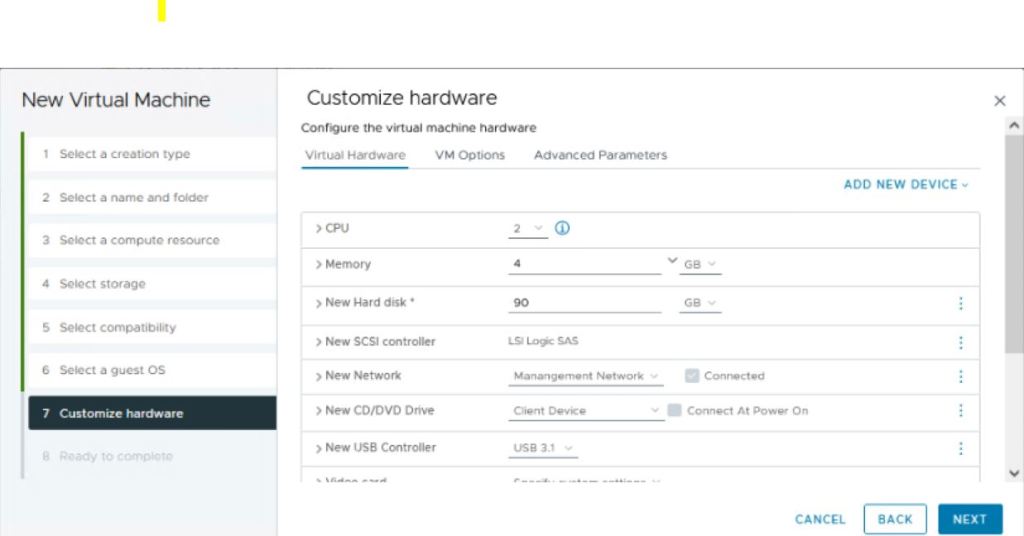
11. On the Customize hardware page, configure the virtual machine hardware and options and click Next.
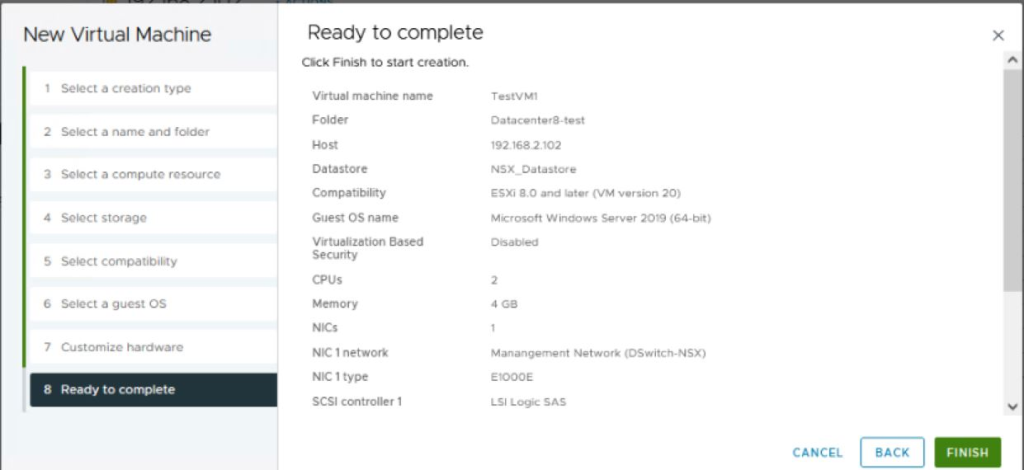
12. On the Ready to complete page, review the details and click Finish