Backup : Agent-Level B&R via NSS for IAAS offer
Introduction
This draft explains the customer journey to activate Agent-Level Backup & Restore “B&R” services via NSS for the IAAS offer
Technical Procedure for Registration
General Notes
⚠️ Known Issue: Internet Connectivity When Installing the Agent
When deploying the Agent-Level B&R service in the IAAS offer via NSS, users may encounter internet connectivity issues from the VM despite having connected a NIC to the internet-access-network.
Context:
- VM deployed on the EcoVDC (the only VDC supporting connection to the
internet-access-network). - A secondary NIC is attached to a dedicated
backup-network, correctly routed to T1. - A static IP is set on the backup NIC, and the VM is successfully registered in the Veritas NetBackup portal.
- However, the installation of the backup agent fails due to no internet access from within the VM.
Hypotheses / Root Causes:
- Incorrect routing or missing default gateway on the internet NIC.
- Network rules or NSX-T firewall policies blocking internet traffic.
- Misconfigured
internet-access-networkin the EcoVDC context.
Recommendations:
- Validate routing tables inside the VM.
- Ensure that the internet NIC has the correct default route.
- Check firewall or NSX-T rules applied to the
internet-access-network. - Perform connectivity tests (ping, tracert, curl) from the VM.
Please take this into consideration when following the installation procedure. Further investigation is ongoing.
Please take into consideration the following recommendations before start using the Agent-Level B&R services :
- Dedicated “NIC” for B&R, per asset (VM/BMS)
- If the asset is a “VM“, it should be in a “vApp“
- From VCD side, if “Datacenter Group” is being used, make sure that the “NIC used for Agent-Level B&R” is configured on “T1” which is not part of “Datacenter Group” configuration
NSS Side
Registering for Agent-Level B&R
Please avoid registering multiple assets “VM/BMS” in the same time
| Customer | DC | URL | Notes |
|---|---|---|---|
| Internal | VDR | https://backup2.cloudavenue.orange-business.com | |
| CHA | https://backup5.cloudavenue-cha.itn.intraorange | ||
| External | VDR | https://backup1.cloudavenue.orange-business.com | |
| CHA | https://backup4.cloudavenue.orange-business.com |
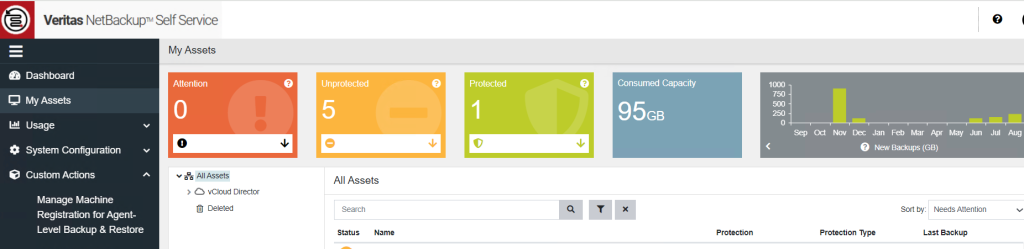
Click on Custom Actions from left pane

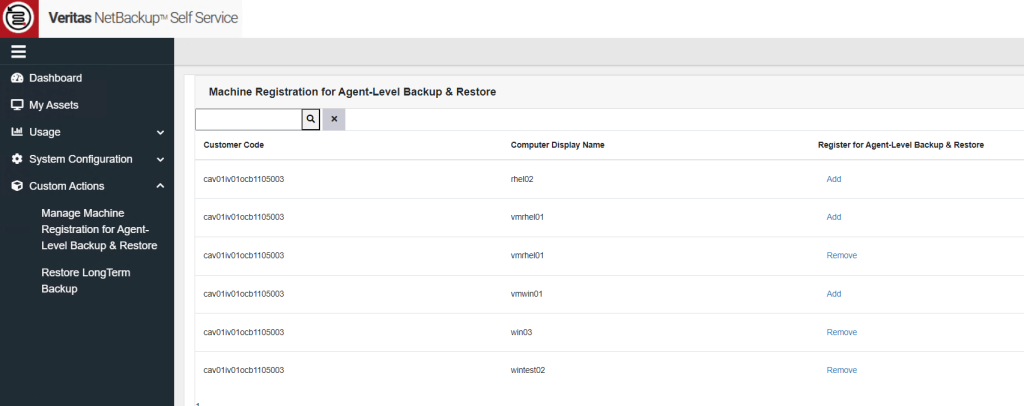
Expand the Custom Actions and click on “Manage Machine Registration for Agent Level Backup & Restore”
Search & click on Add Button next to machine which machine (VM/BMS) needs to be registered/un-registered for Agent-Level Backup & Restore.
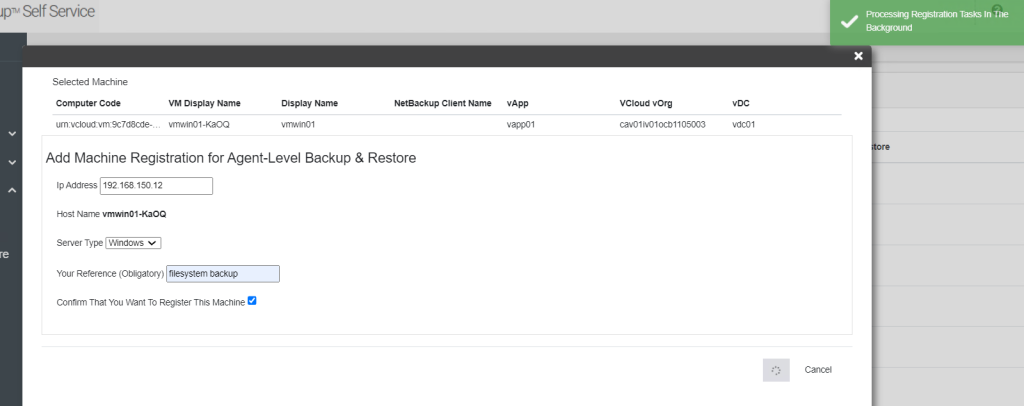
Fill-in the forum with the private IP which is configured on the VM/BMS OS level,
select the “Server Type”, Fill Your reference, Confirm and submit the request
Please wait till the following “Confirmation” message appears on the NSS to proceed for another NSS action if needed

Wait till the submitted request being finished successfully
to be able installing/configuring the agent on the VM/BMS OS level
Make sure that the generated “Netbackup Client Name” is 64 characters maximum otherwise agent will not work probably.
To avoid such behavior, please take into consideration the following notes:
- If the asset is a “VM“, it is not in a “vApp“
- Asset “Display Name” is not too long
Note that, an email should be sent, to the one who submitted the “Registration” action, which contains the same info

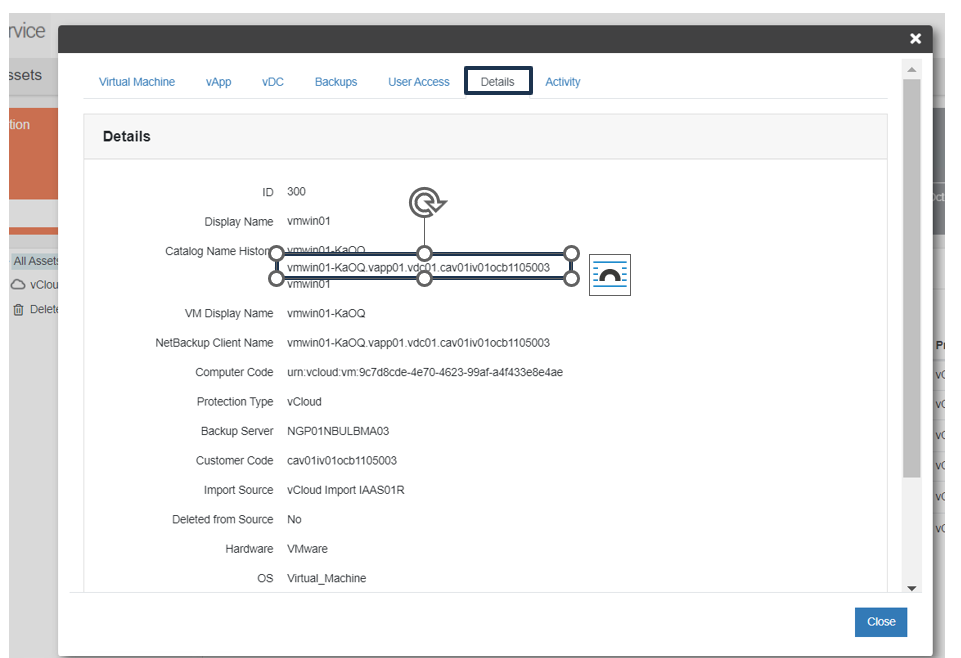
Once the submitted request finished successfully,
click on the machine (“Details” tab) to get the “Netbackup Client Name” which should be 64 characters maximum
which will be used during Agent installation
Machine Side
Prerequisites
Common Prerequisites
Add the required entries (FQDN & short names) of the target Backup env to the hosts file :
| Customer | DC | Master Server | Additional Servers | Notes |
|---|---|---|---|---|
| Internal | VDR | 57.203.214.113 ngp01nbuprma02.ngp.infra ngp01nbuprma02 57.203.214.201 ngp01nbuprma09.ngp.infra ngp01nbuprma09 | 57.203.214.114 ngp01nbuprme06.ngp.infra ngp01nbuprme06 57.203.214.202 ngp01nbuprme12.ngp.infra ngp01nbuprme12 57.203.214.204 ngp01nbuprme20.ngp.infra ngp01nbuprme20 | |
| CHA | 57.203.214.121 ngp02nbuprma06.ngp.infra ngp02nbuprma06 | 57.203.214.122 ngp02nbuprme12.ngp.infra ngp02nbuprme12 | ||
| External | VDR | 57.203.214.115 ngp01nbuprma03.ngp.infra ngp01nbuprma03 57.203.214.206 ngp01nbuprma10.ngp.infra ngp01nbuprma10 | 57.203.214.116 ngp01nbuprme08.ngp.infra ngp01nbuprme08 57.203.214.203 ngp01nbuprme13.ngp.infra ngp01nbuprme13 57.203.214.207 ngp01nbuprme21.ngp.infra ngp01nbuprme21 57.203.214.200 ngp01nbuprme22.ngp.infra ngp01nbuprme22 | |
| CHA | 57.203.214.123 ngp02nbuprma03.ngp.infra ngp02nbuprma03 | 57.203.214.124 ngp02nbuprme07.ngp.infra ngp02nbuprme07 57.203.214.120 ngp02nbuprme08.ngp.infra ngp02nbuprme08 |
“Static Route” to be configured on the “NIC used for Agent-Level B&R” to communicate with the target Backup env
If the firewall is activated on the OS level, make sure that the required ports are already opened in bi-direction
| Source/Desitnation | Destination/Source | Service Name | Port |
|---|---|---|---|
| Machine (VM/BMS) | Backup Env | BKP_TCP_bpcd | 13782 |
| BKP_TCP_bprd | 13720 | ||
| BKP_TCP_spad | 10102 | ||
| BKP_TCP_spoold | 10082 | ||
| BKP_TCP_veritas_pbx | 1556 | ||
| BKP_TCP_vnbmqbroker | 13781 | ||
| BKP_TCP_vnetd | 13724 | ||
| BKP_TCP_ portmapper | 111 | ||
| BKP_TCP_ nbfsd | 7394 |
For better performance, it is recommended that the MTU Size = 8872 configured on the “NIC used for Agent-Level B&R“
Windows-Based OS Prerequisites
No prerequisites, up-till-now
Linux-Based OS Prerequisites
| The following libraries are needed: libnsl libnsl.so.1 | yum install libnsl yum install libnsl.so.1 | Needed for: RHEL CentOS |
Agent Download
Before download the agent, please make sure that the following “NAT” configuration is already presented on the “T1” level of your “vOrg“:
The following procedure can be used at both VDR & CHA DCs
Windows-Based OS
Agent Download for Windows-Based OS
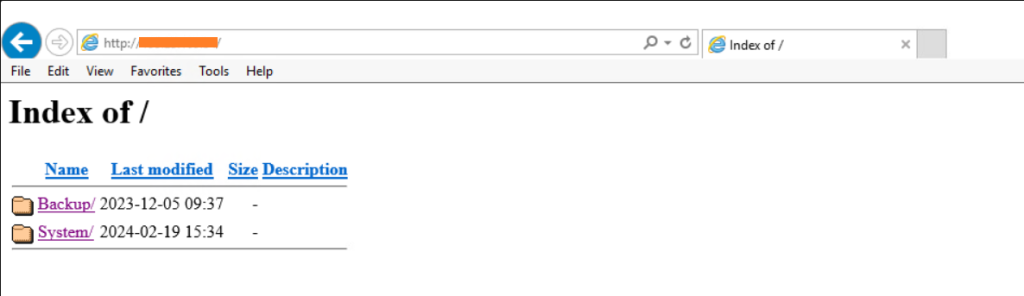
Login to the machine (VM/BMS) where the agent will be installed
Open a web browser and go to “http://57.199.209.213“
Click on Backup > Agent_File to download the required agent
Linux-Based OS
Agent Download for Linux-Based OS
Login to the machine (VM/BMS) where the agent will be installed
Enter the command: wget “http://57.199.209.213/Backup/Agent
Agent Installation
Windows-Based OS
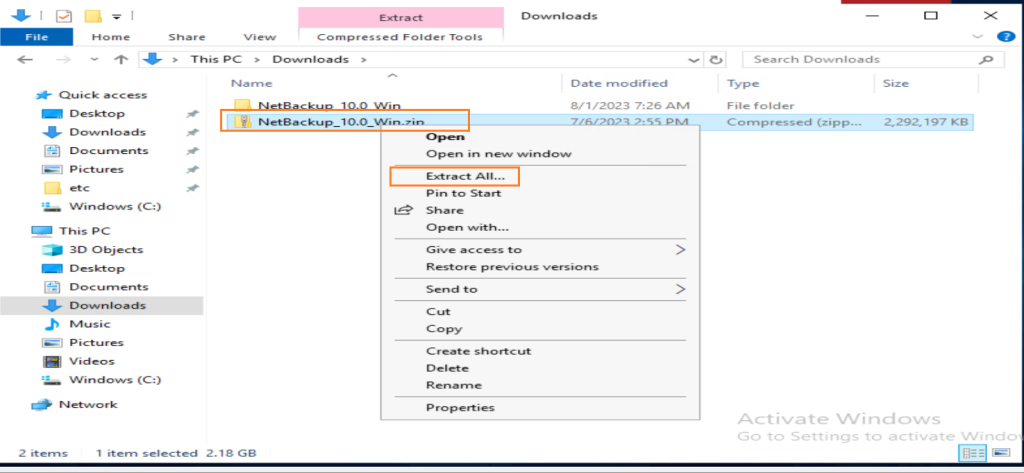
Extract the contents of the source Zip file
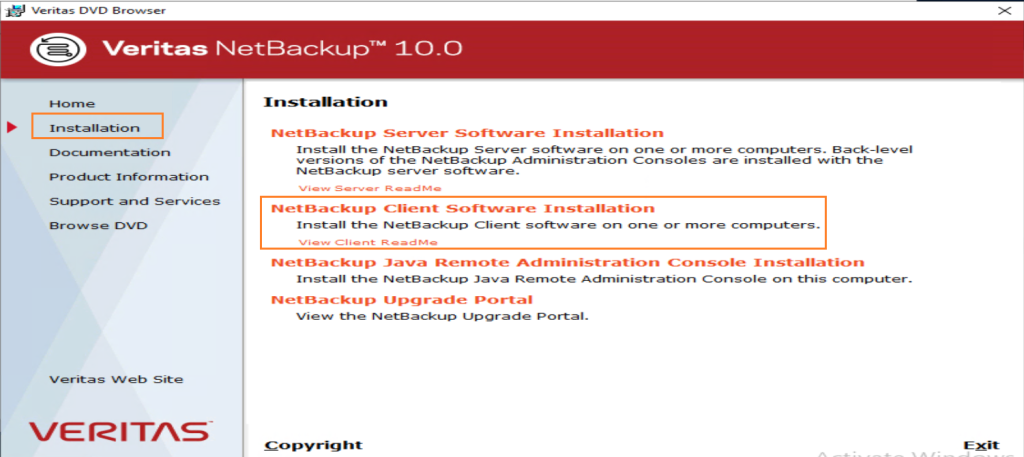
Open the extracted folder and run Browser.exe
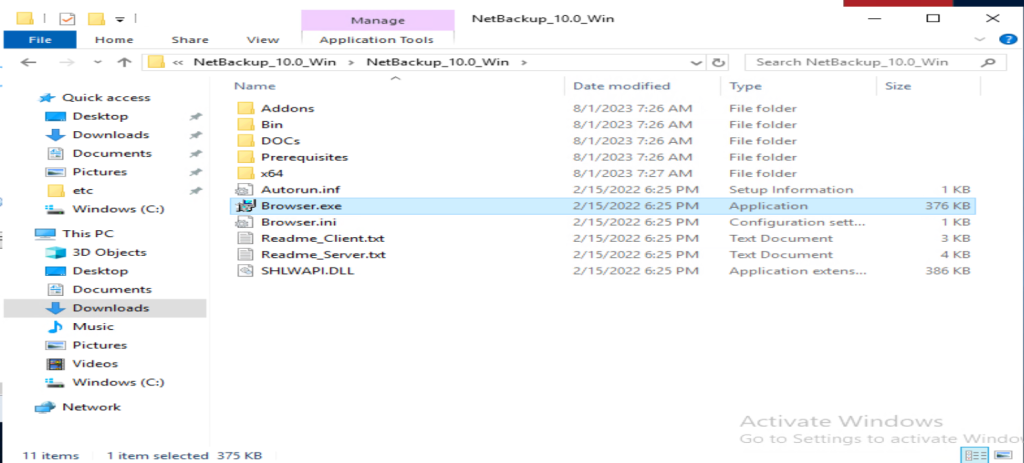
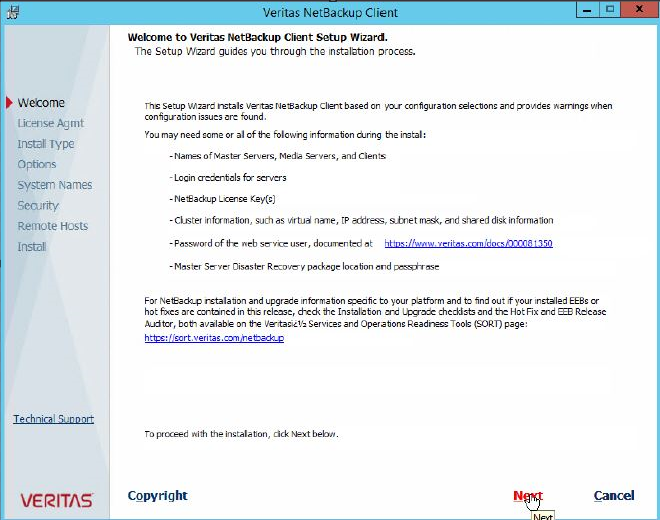
Click on Installation > Netbackup Client Software Installation
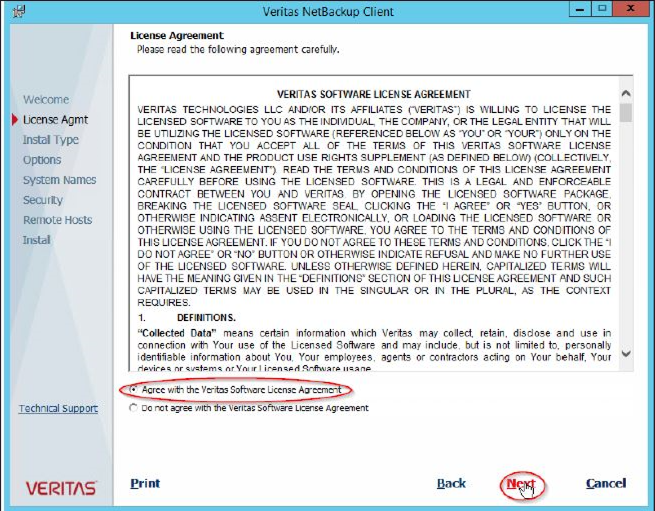
Click Next to Accept the Agreement and select Typical Installation
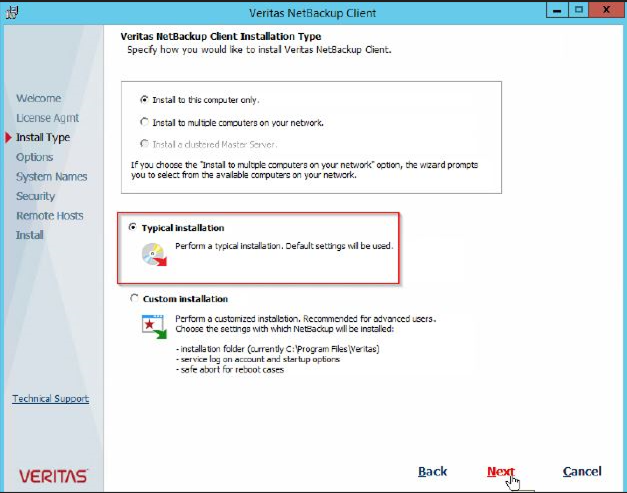
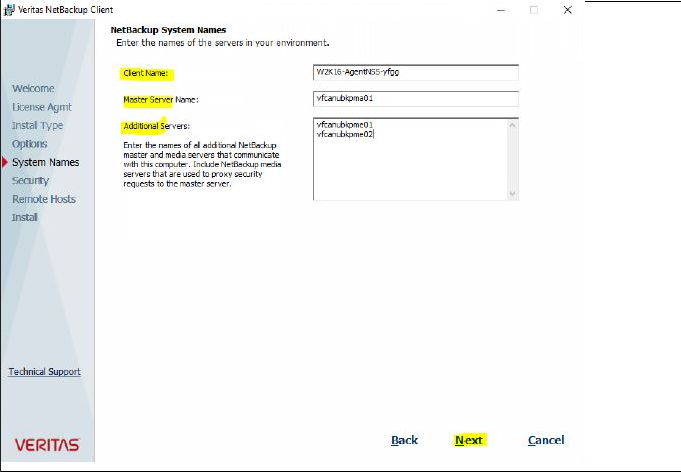
Enter the names of the servers in your environment as per the following table, then click Next
| Attribute | Variable | Notes |
|---|---|---|
| Client Name | Backup: Agent-Level B&R via NSS for IAAS offer#Registering for Agent-Level B&R | Netbackup Client Name |
| Master Server Name | Backup: Agent-Level B&R via NSS for IAAS offer#Prerequisites | Master Server |
| Additional Servers | Backup: Agent-Level B&R via NSS for IAAS offer#Prerequisites | Additional Servers |
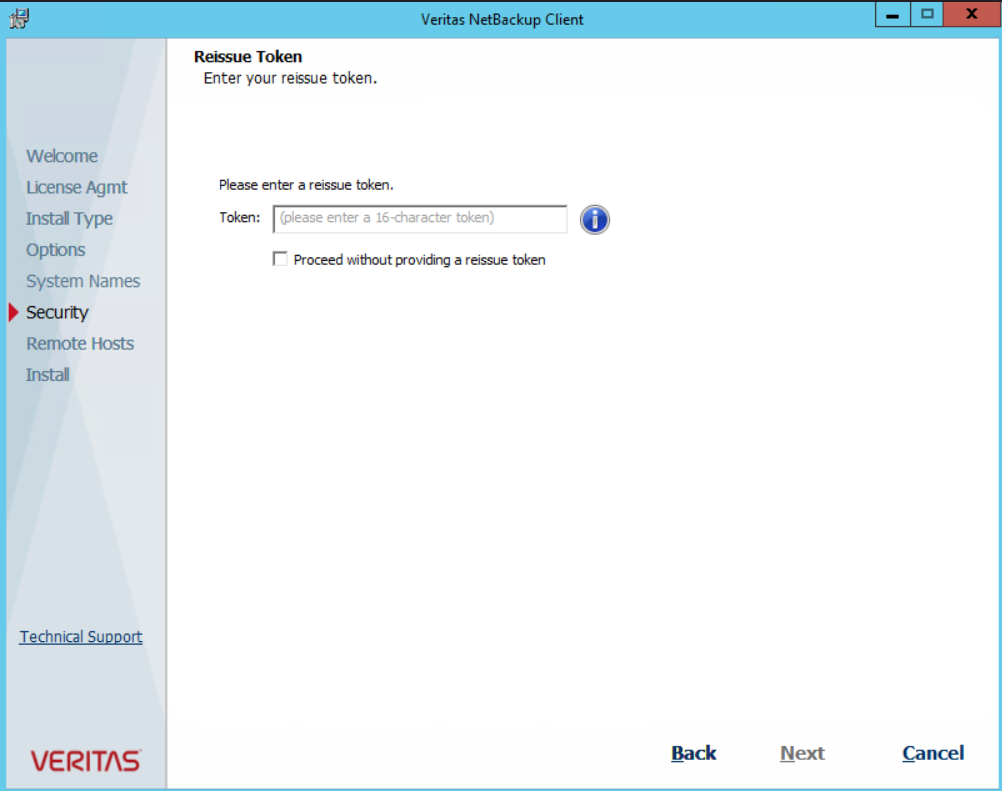
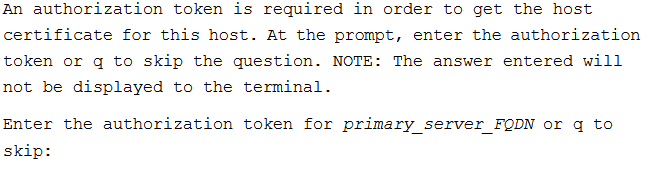
In case of:
- Agent New Installation: A token maybe needed as per the following table:
| Customer | DC | Master Server | Token |
|---|---|---|---|
| Internal | VDR | ngp01nbuprma02.ngp.infra | JJERTUCFGBVPYKWE |
| CHA | ngp02nbuprma06.ngp.infra | BGMWKGPXANJMWPUG | |
| External | VDR | ngp01nbuprma03.ngp.infra | MWFLCLSWTBFVNLEY |
| CHA | ngp02nbuprma03.ngp.infra | UXRPGDMVKAPGPNGA |
- Agent Re-Installation: A re-issue token will be needed by contacting the Service Desk (SD) to submit a SWAN or Ocean request to ATQIIZ to generate it
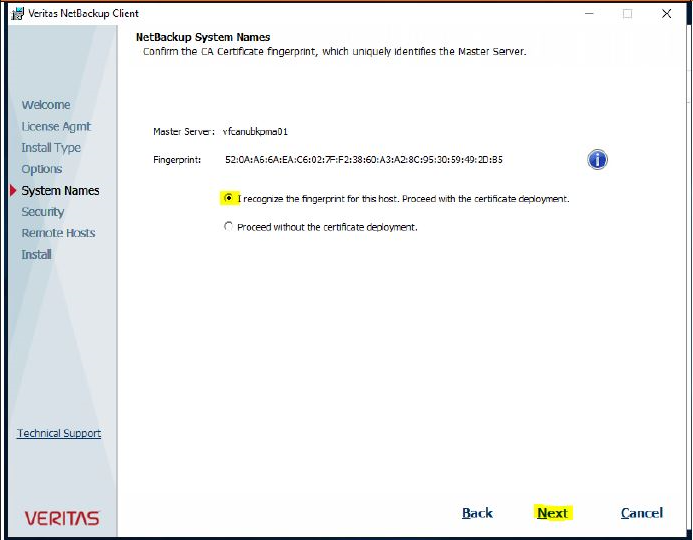
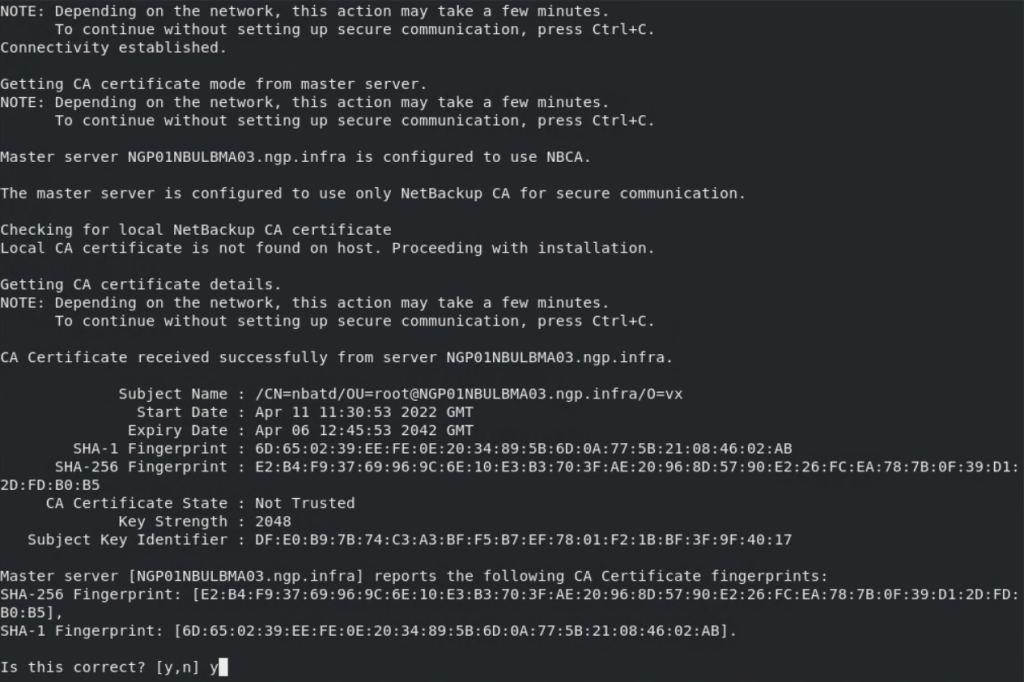
Confirm the CA certificate which has been retrieved from the Backup server, then click Next
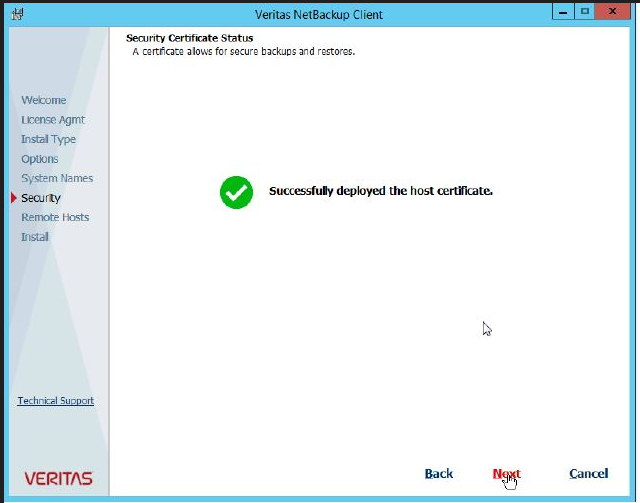
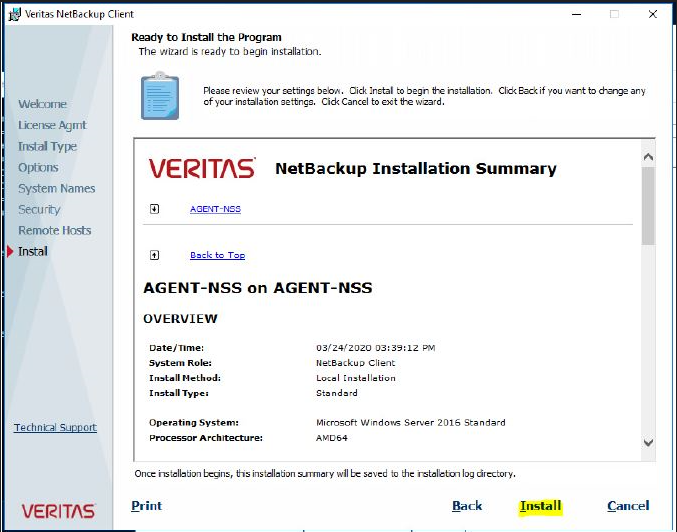
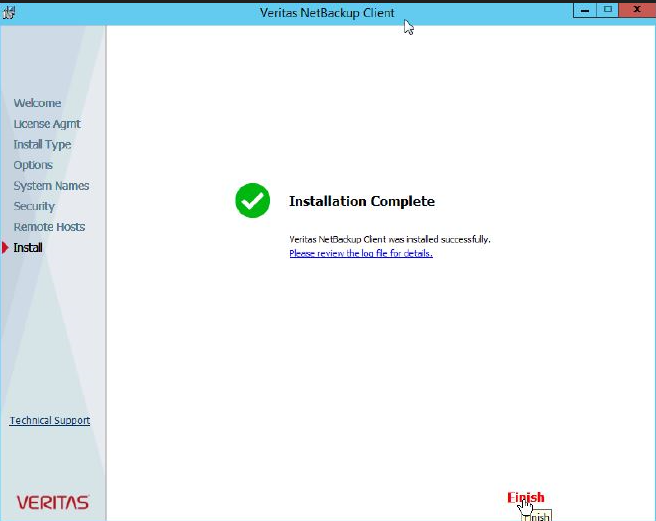
Select Install after reviewing the installation summary, then click Finish once the installation completed successfully
Linux-Based OS
Agent Installation for Linux-Based OS
Extract the contents of the source Zip file : tar -xzvf package_name.tar.gz
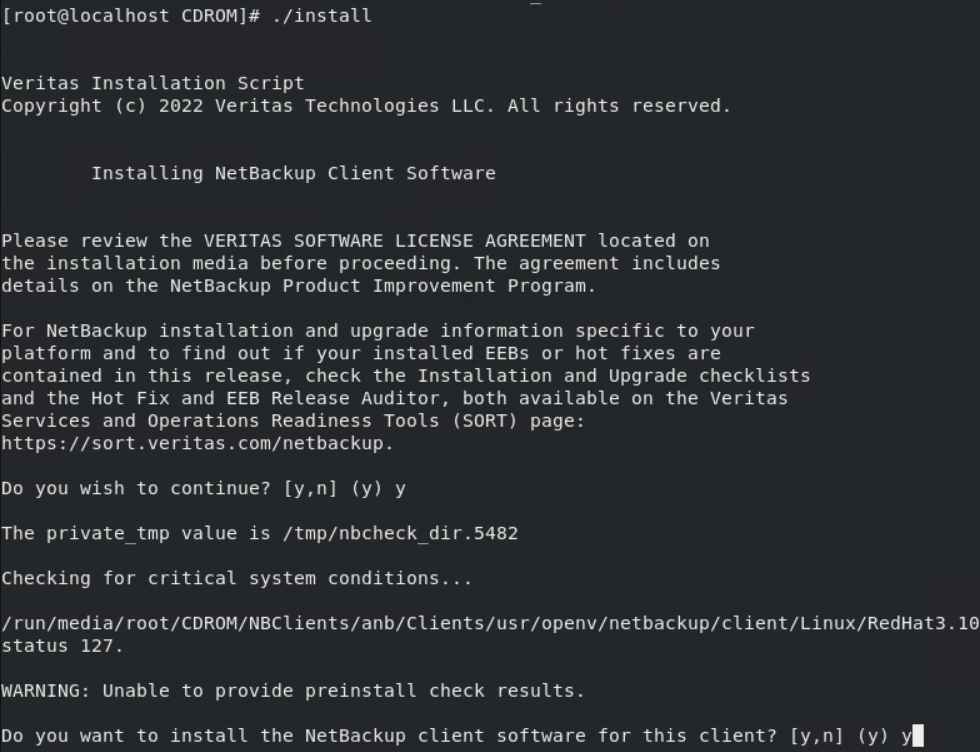
Open the extracted folder and run ./install

Answer by “Y” when prompting for the following questions:
- Do you wish to continue ?
- Do you want to install the Netbackup software on this client ?
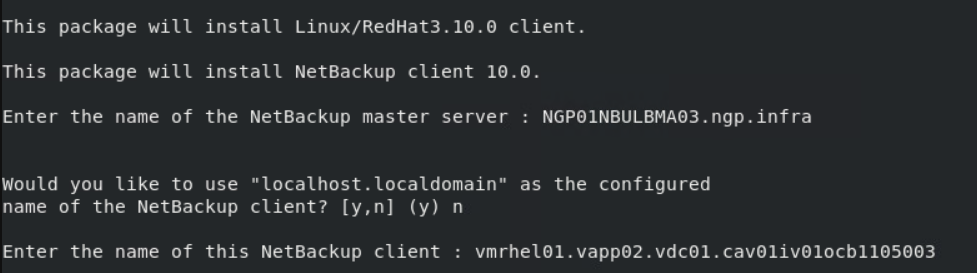
Enter the names of the servers in your environment as per the following table:
| Attribute | Variable | Notes |
|---|---|---|
| Client Name | Backup: Agent-Level B&R via NSS for IAAS offer#Registering for Agent-Level B&R | Netbackup Client Name |
| Master Server Name | Backup: Agent-Level B&R via NSS for IAAS offer#Prerequisites | Master Server |
| Additional Servers | Backup: Agent-Level B&R via NSS for IAAS offer#Prerequisites | Additional Servers |
Answer by “Y” once the certificate has been retrieved from the Backup env
In case of:
- Agent New Installation: A token maybe needed as per the following table:
| Customer | DC | Master Server | Token |
|---|---|---|---|
| Internal | VDR | ngp01nbuprma02.ngp.infra | JJERTUCFGBVPYKWE |
| CHA | ngp02nbuprma06.ngp.infra | BGMWKGPXANJMWPUG | |
| External | VDR | ngp01nbuprma03.ngp.infra | MWFLCLSWTBFVNLEY |
| CHA | ngp02nbuprma03.ngp.infra | UXRPGDMVKAPGPNGA |
- Agent Re-Installation: A re-issue token will be needed by contacting the Service Desk (SD) to submit a SWAN or Ocean request to ATQIIZ to generate it
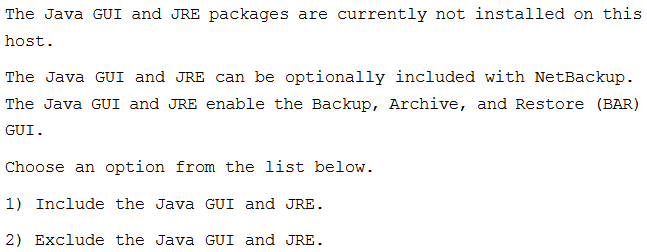
When prompted, specify 1 or 2options if you want Java and the JRE packages installed
- Include the Java GUI and JRE
- Exclude the Java GUI and JRE
Follow the prompts to complete the installation
After the installation is complete, select Exit from this Script
Initiate & Schedule Agent-Level B&R Operations
This section explains how to initiate Agent-Level Backup & Restore operations from NSS or the Agent
Files & Folders
From NSS
Backup Operation
Two types of Backup operations can be configured, BackupNow & Scheduled, as per the following procedure:
BackupNow
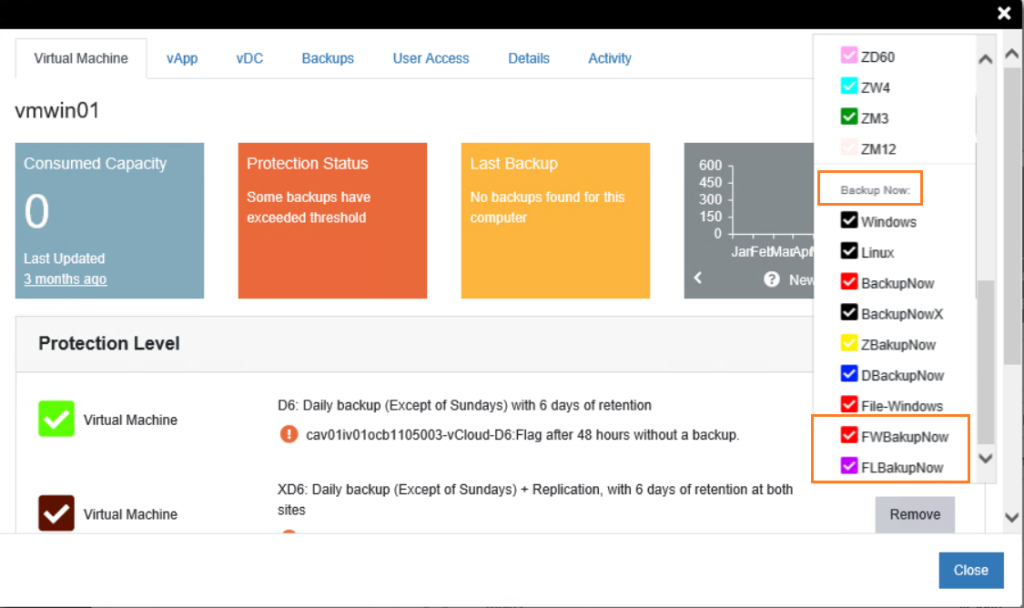
Login back to the NSS using the tenant`s credentials, click on the Asset, select Actions menu
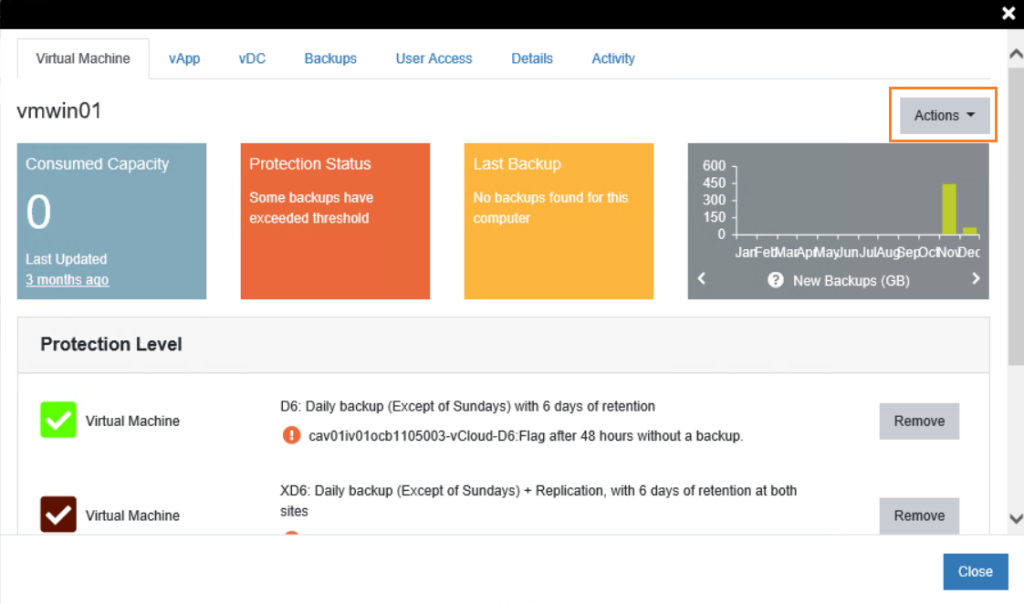
Select one of the BackupNow Policies/Protection-Levels (PLs)
| NSS Policy | Description |
|---|---|
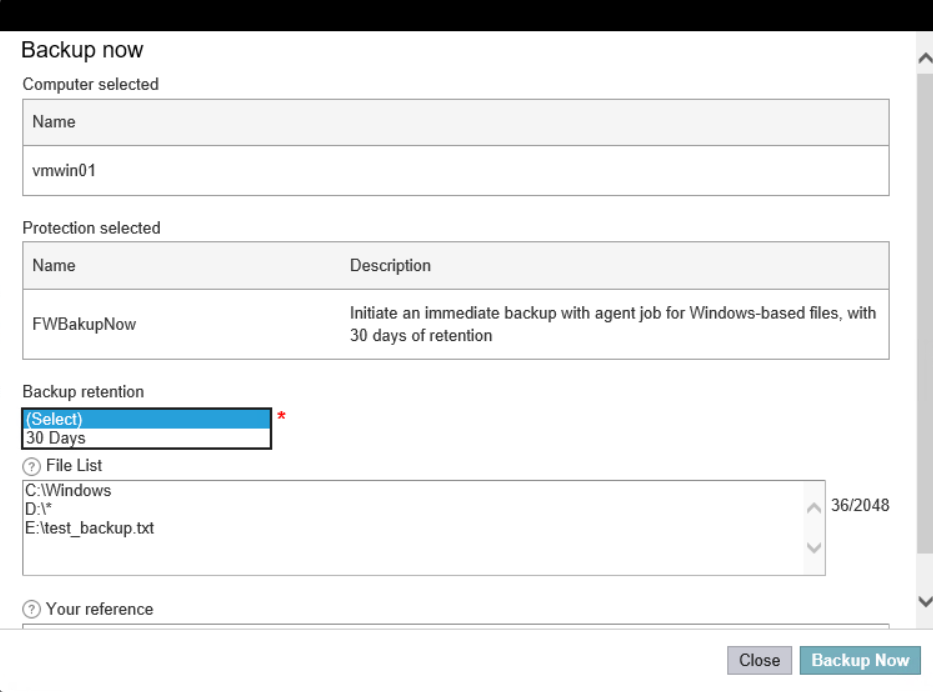
| FWBakupNow | Initiate an immediate backup with agent job for Windows-based files, with 30 days of retention |
| NSS Policy | Description |
|---|---|
| FLBakupNow | Initiate an immediate backup with agent job for Linux-based files, with 30 days of retention |
Select the Retention & specify the list of Files/Folders which will be backed-up, click on BackupNow
Notes:
- Files & Folders can be specified
- Asterisk character (*) can be used to specify all the files/folders under specific path
You can check the operation progress from the Current Activity > View Request section

Scheduled Backup
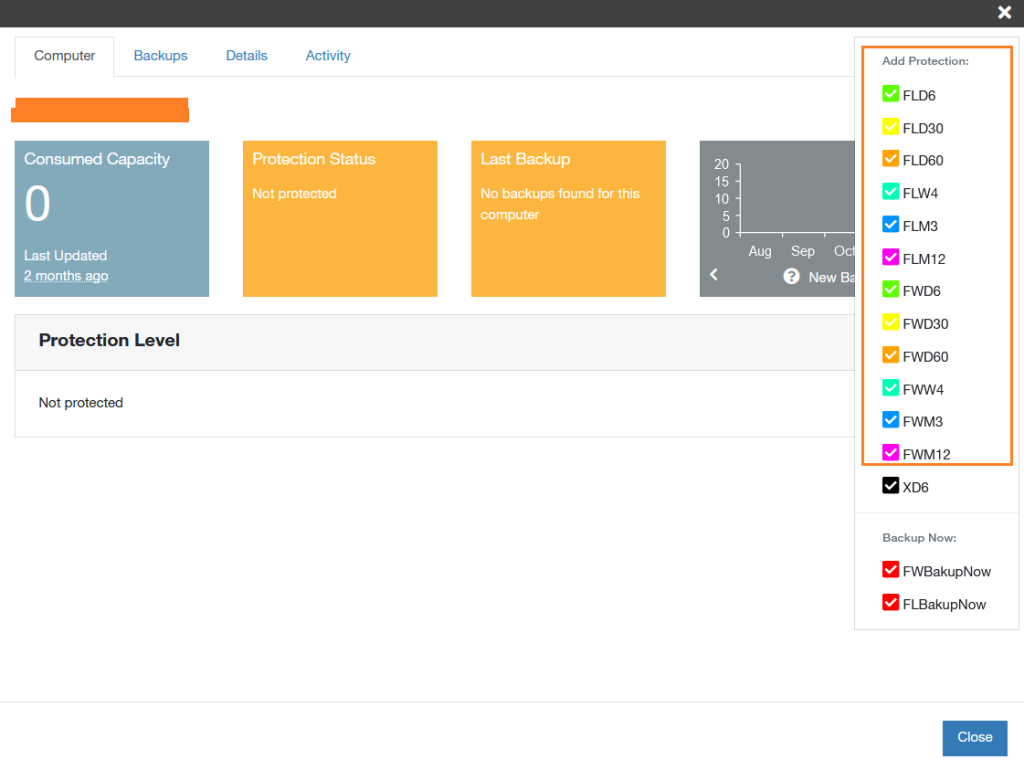
Login back to the NSS using the tenant`s credentials, click on the Asset, select Actions menu

Select one of the Scheduled Backup Policies/Protection-Level (PLs)
| NSS Policy | Description |
|---|---|
| FWD6 | Daily backup with agent for Windows-based files (Except of Sundays & 1st Monday of the month), with 6 days of retention |
| FWD30 | Daily backup with agent for Windows-based files (Except of Sundays & 1st Monday of the month), with 30 days of Retention |
| FWD60 | Daily backup with agent for Windows-based files (Except of Sundays & 1st Monday of the month), with 60 days of retention |
| FWW4 | Weekly backup with agent for Windows-based files every 1st Sunday of each week, with 4 weeks of retention |
| FWM3 | Monthly backup with agent for Windows-based files, every 1st Monday of the month. with 3 months of retention |
| FWM12 | Monthly backup with agent for Windows-based files, every 1st Monday of the month, with 12 months of retention |
| XFWD6 | Daily backup with agent job for Windows-based files (Except of Sundays & 1st Monday of the month) + Replication, with 6 days of retention at both site |
| XFWD30 | Daily backup with agent for Windows-based files (Except of Sundays & 1st Monday of the month) + Replication, with 30 days of Retention at both sites |
| XFWD60 | Daily backup with agent for Windows-based files (Except of Sundays & 1st Monday of the month) + Replication, with 60 days of retention at both sites |
| XFWW4 | Weekly backup with agent for Windows-based files, every 1st Sunday of each week + Replication, with 4 weeks of retention at both sites |
| XFWM3 | Monthly backup with agent for Windows-based files, every 1st Monday of the month + Replication, with 3 months of retention at both sites |
| XFWM12 | Monthly backup with agent for Windows-based files, every 1st Monday of the month + Replication, with 12 months of retention at both sites |
| NSS Policy | Description |
|---|---|
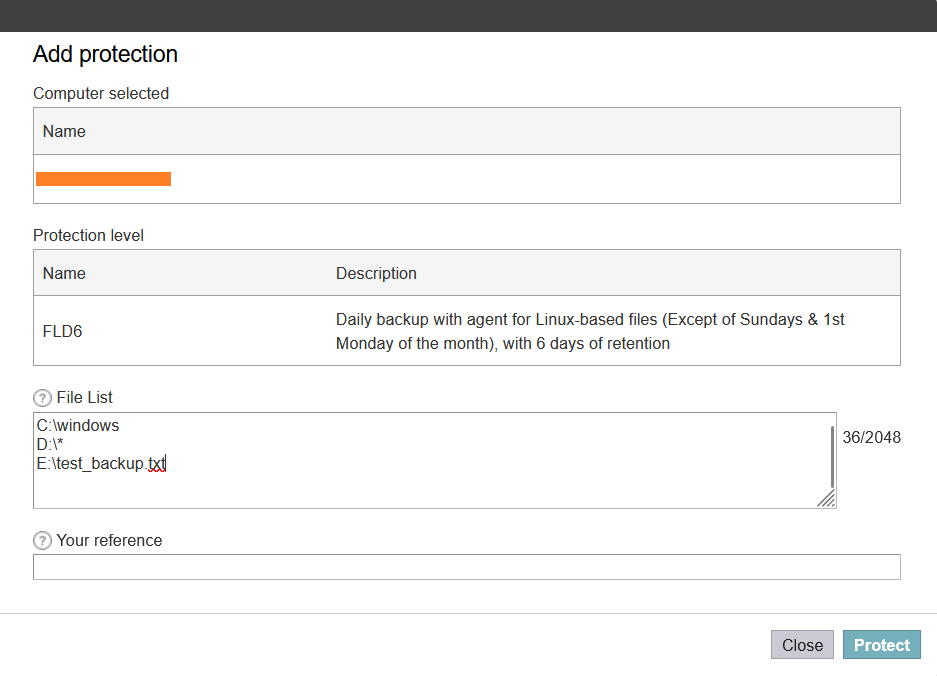
| FLD6 | Daily backup with agent for Linux-based files (Except of Sundays & 1st Monday of the month), with 6 days of retention |
| FLD30 | Daily backup with agent for Linux-based files (Except of Sundays & 1st Monday of the month), with 30 days of Retention |
| FLD60 | Daily backup with agent for Linux-based files (Except of Sundays & 1st Monday of the month), with 60 days of retention |
| FLW4 | Weekly backup with agent for Linux-based files every 1st Sunday of each week, with 4 weeks of retention |
| FLM3 | Monthly backup with agent for Linux-based files, every 1st Monday of the month. with 3 months of retention |
| FLM12 | Monthly backup with agent for Linux-based files, every 1st Monday of the month, with 12 months of retention |
| XFLD6 | Daily backup with agent job for Linux-based files (Except of Sundays & 1st Monday of the month) + Replication, with 6 days of retention at both site |
| XFLD30 | Daily backup with agent for Linux-based files (Except of Sundays & 1st Monday of the month) + Replication, with 30 days of Retention at both sites |
| XFLD60 | Daily backup with agent for Linux-based files (Except of Sundays & 1st Monday of the month) + Replication, with 60 days of retention at both sites |
| XFLW4 | Weekly backup with agent for Linux-based files, every 1st Sunday of each week + Replication, with 4 weeks of retention at both sites |
| XFLM3 | Monthly backup with agent for Linux-based files, every 1st Monday of the month + Replication, with 3 months of retention at both sites |
| XFLM12 | Monthly backup with agent for Linux-based files, every 1st Monday of the month + Replication, with 12 months of retention at both sites |
Specify the list of Files/Folders which will be backed-up, click on Protect
Notes:
- Files & Folders can be specified
- Asterisk character (*) can be used to specify all the files/folders under specific path
You can check the operation progress from the Current Activity > View Request section

Restore Operation
Individual files & folders can be restored from NSS directly as per the following procedure :
Restore Operation
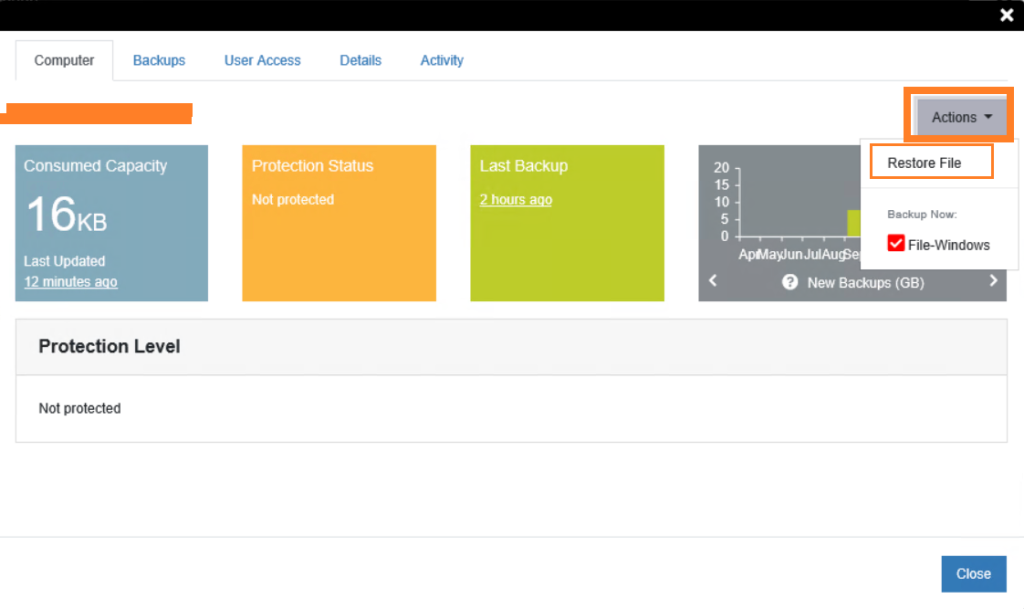
Login back to the NSS using the tenant`s credentials, click on the Asset, select Actions menu, select Restore Files
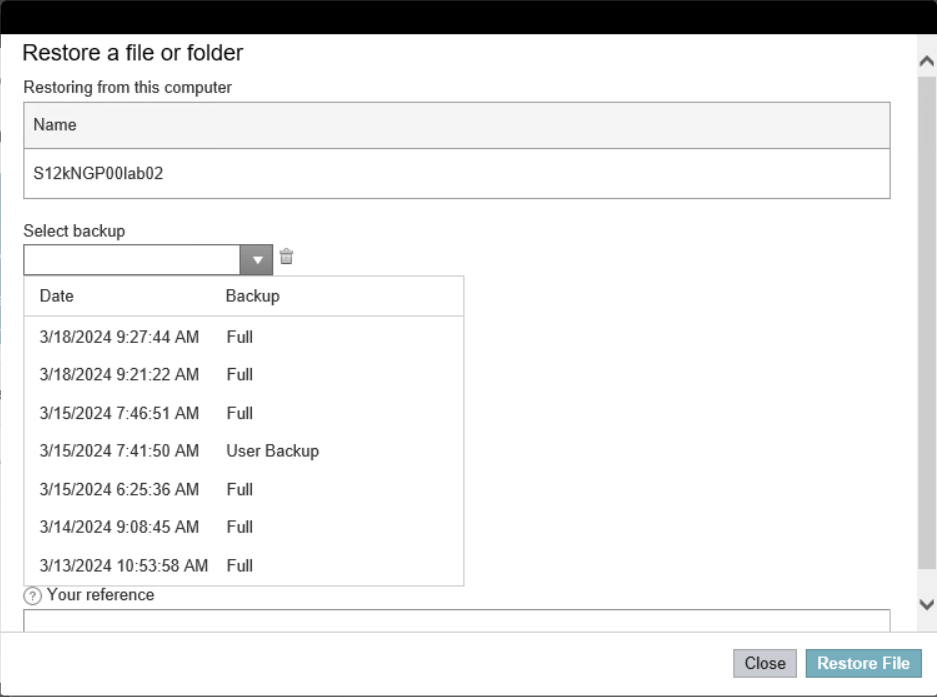
Select from the drop down menu Select a Backup,
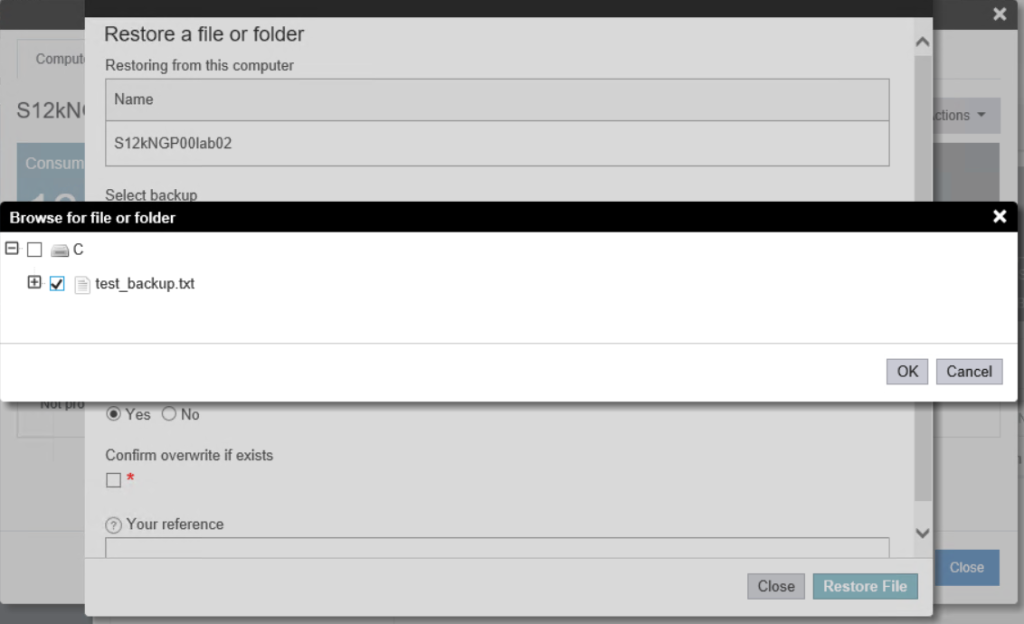
Choose either to Browse or Search for a file/folder,
Select the required file/folder to be restored,
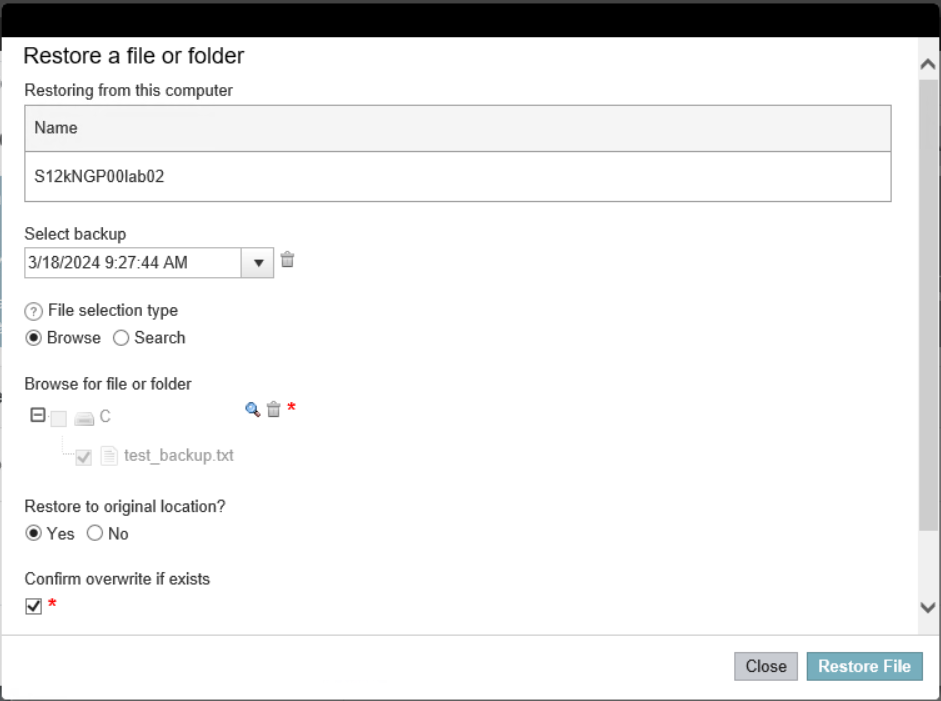
Choose either to Restore To Original Location or Not,
Confirm Overwrite If Exists,
Select Restore File
You can check the operation progress from the Current Activity > View Request section

From Agent
Backup & Restore Operations can be initiated from the Agent directly as an option
Backup Operation
Windows-Based OS
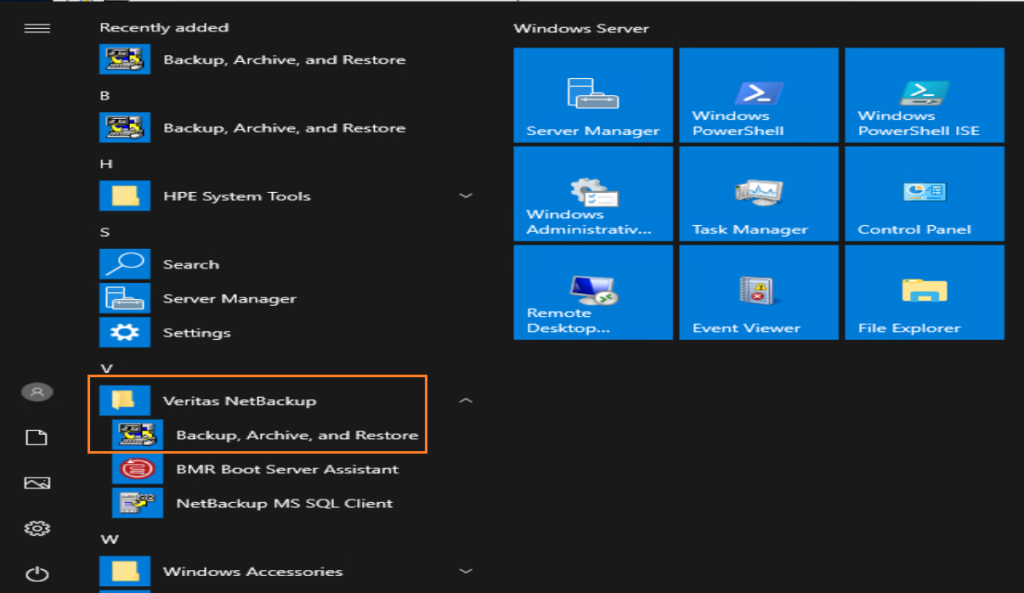
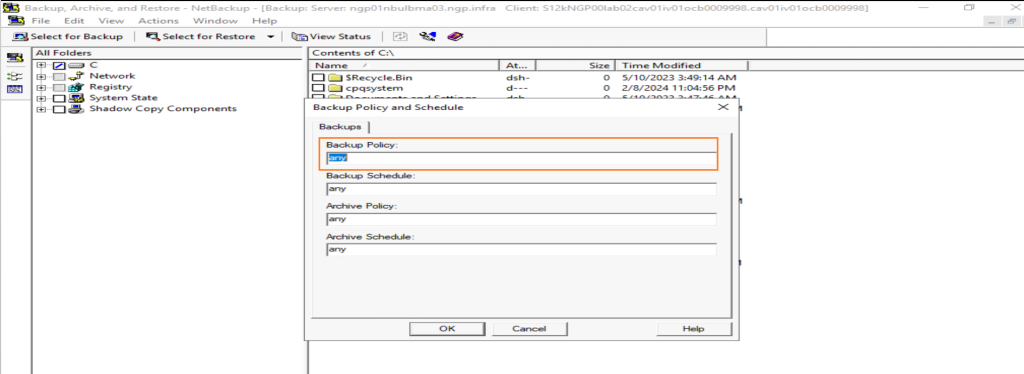
Login to the machine (VM/BMS) where the agent is already installed & open the Agent “Backup, Archive, Restore“
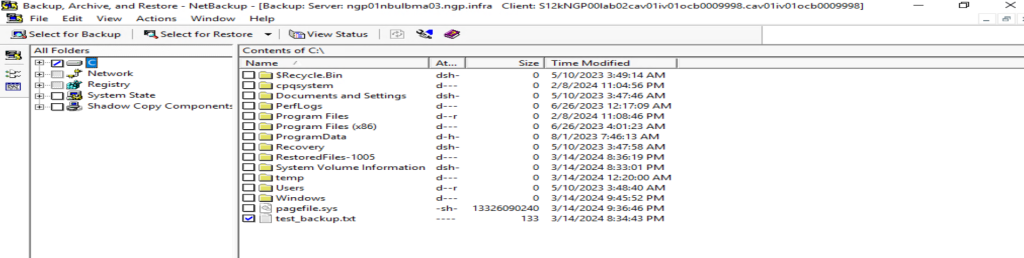
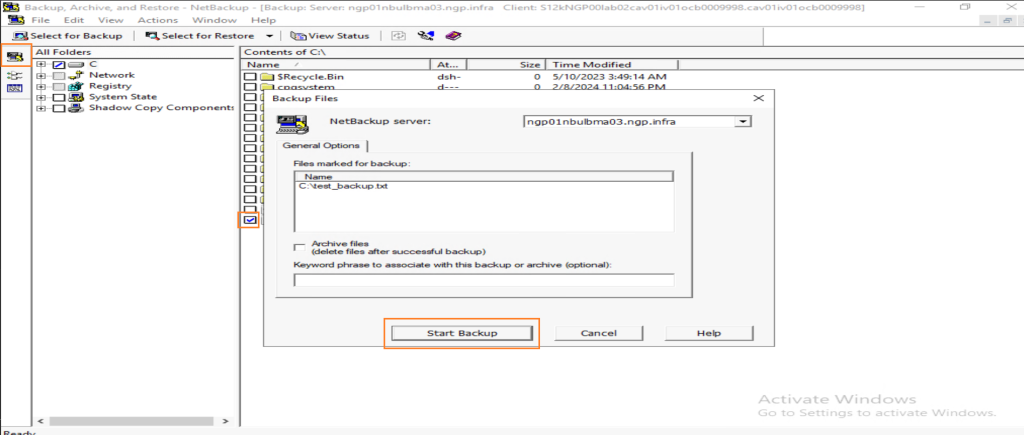
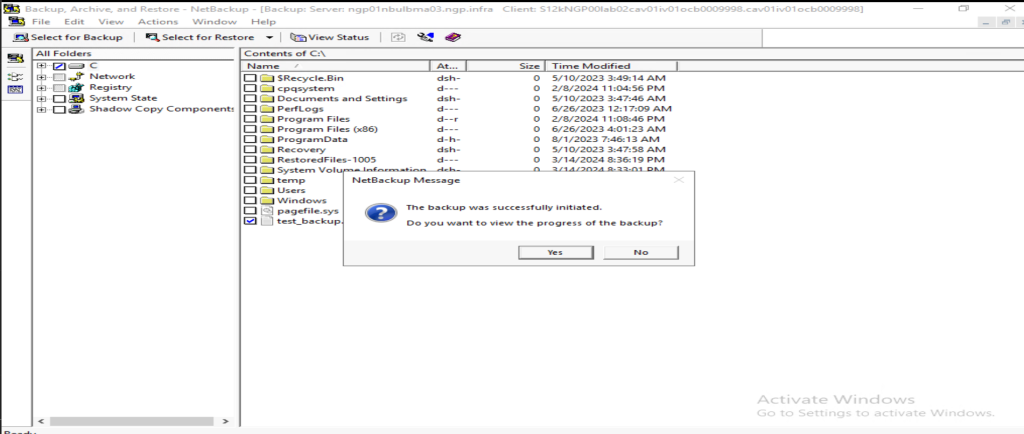
Select the Files/Folders need to be backed-up
Notes:
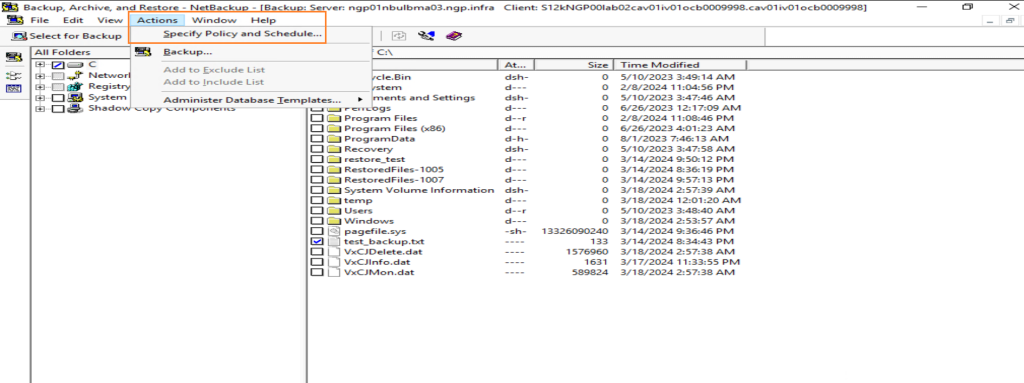
- The following BackupNow policies can be selected from Actions > Specify Policy and Schedule menus with their retention
| Agent Policy | Description |
|---|---|
| Tenant-Name-Windows-File1W | Initiate an immediate backup with agent job for Windows-based files, with 1 week of retention |
| Tenant-Name-Windows-File1M | Initiate an immediate backup with agent job for Windows-based files, with 4 weeks of retention |
| Tenant-Name-Windows-File3M | Initiate an immediate backup with agent job for Windows-based files, with 3 months of retention |
| Tenant-Name-Windows-File1Y | Initiate an immediate backup with agent job for Windows-based files, with 1 year of retention |
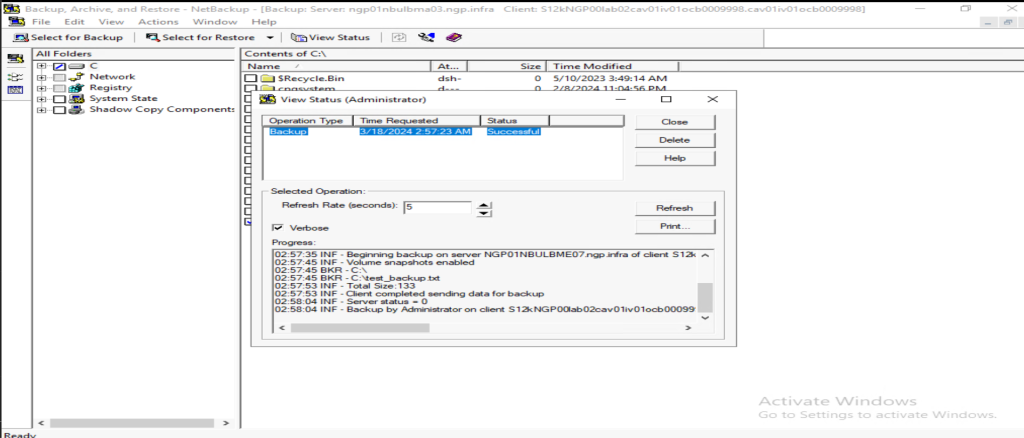
The Backup operation/job can be monitored from the agent as well by clicking on Yes
Linux-Based OS
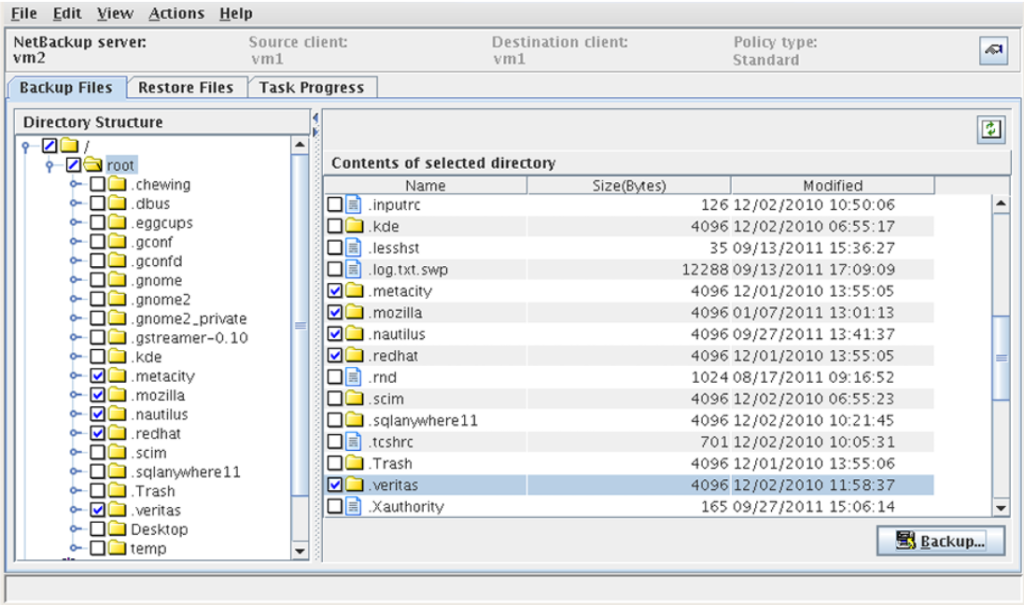
Open a terminal session with root privileges, type the one of the following command to start the User Interface: /usr/openv/netbackup/bin/jbpSA &
Select the Files/Folders need to be backed-up while Task Progress menu can be used the initiated operation
Notes:
- The following BackupNow policies can be selected from Actions > Specify Policy and Schedule menus with their retention
| Agent Policy | Description |
|---|---|
| Tenant-Name-Standard-File1W | Initiate an immediate backup with agent job for Linux-based files, with 1 week of retention |
| Tenant-Name-Standard-File1M | Initiate an immediate backup with agent job for Linux-based files, with 4 weeks of retention |
| Tenant-Name-Standard-File3M | Initiate an immediate backup with agent job for Linux-based files, with 3 months of retention |
| Tenant-Name-Standard-File1Y | Initiate an immediate backup with agent job for Linux-based files, with 1 year of retention |
To initiate an immediate Backup using CLI as an alternative way,
Open a terminal session with root privileges, type the one of the following command to start the User Interface:
/usr/openv/netbackup/bin/bpbackup -f file_names -S master_server -p policy_name
| Option | Description |
|---|---|
| -f files_names | List of files` paths which will be backed-up |
| -S master_server | The master server FQDN which has been used during the installation Backup: Agent-Level B&R via NSS for IAAS offer#Prerequisites |
| -p policy_name | Agent Policy Description Tenant-Name-Standard-File1W Initiate an immediate backup with agent job for Linux-based files, with 1 week of retention Tenant-Name-Standard-File1M Initiate an immediate backup with agent job for Linux-based files, with 4 weeks of retention Tenant-Name-Standard-File3M Initiate an immediate backup with agent job for Linux-based files, with 3 months of retention Tenant-Name-Standard-File1Y Initiate an immediate backup with agent job for Linux-based files, with 1 year of retention |

Restore Operation
Windows-Based OS
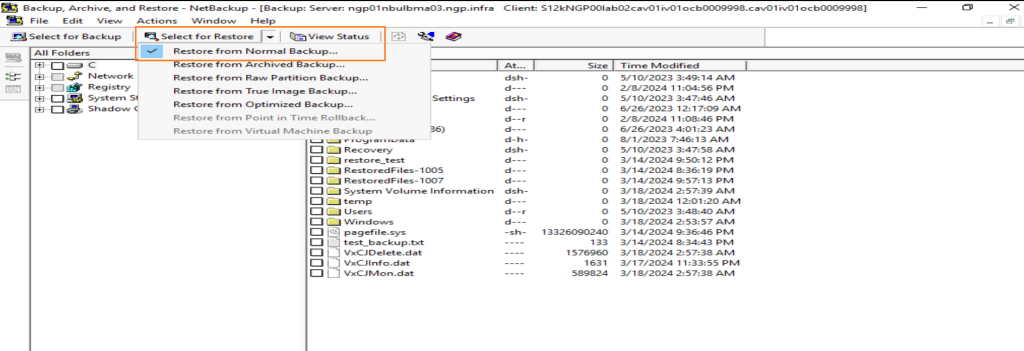
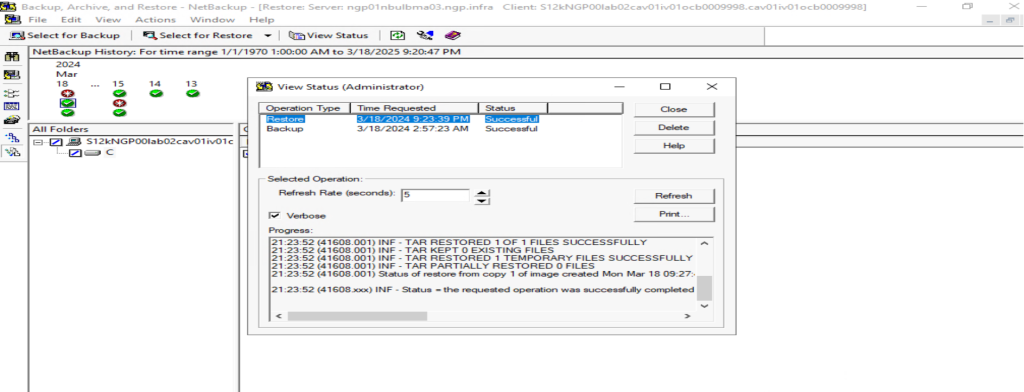
Login to the machine (VM/BMS) where the agent is already installed & open the Agent “Backup, Archive, Restore“

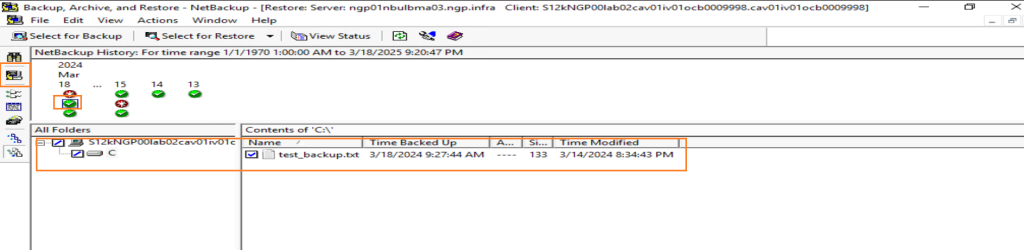
Choose the Backup image from the Select for Restore > Restore from Normal Backup menu , then click on Start Restore of Marked Files
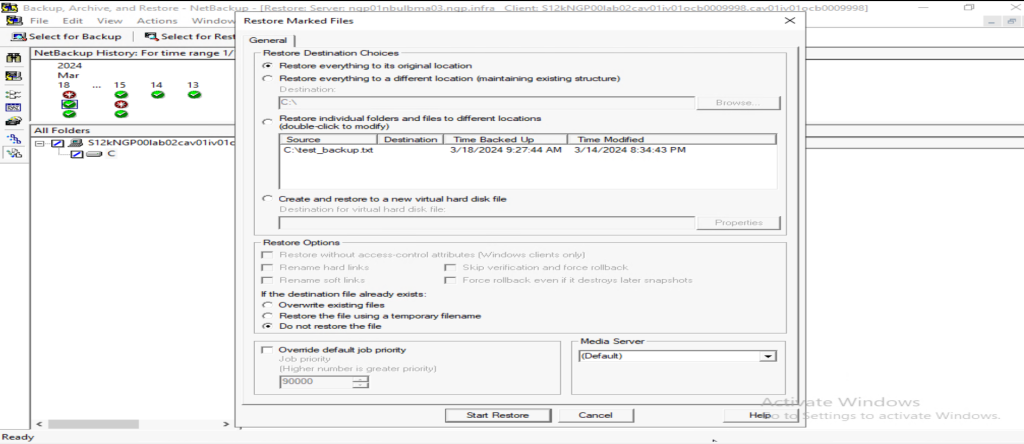
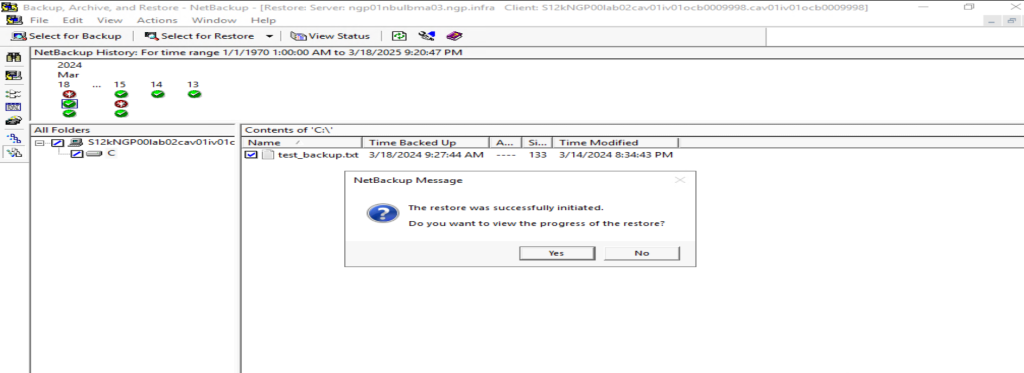
From Restore Marked Files menu, select the suitable options according to the use case and click on Start Restore
The Restore operation/job can be monitored from the agent as well by clicking on Yes
Linux-Based OS
Open a terminal session with root privileges, type the one of the following command to start the User Interface:
/usr/openv/netbackup/bin/jbpSA &
Select the Files/Folders need to be restored while Task Progress menu can be used the initiated operation

To initiate an immediate Restore using CLI as an alternative way,
Open a terminal session with root privileges, type the one of the following command to start the User Interface:
/usr/openv/netbackup/bin/bprestore -f file_names -S master_server
| Option | Description |
|---|---|
| -f files_names | List of files` paths which will be backed-up |
| -S master_server | The master server FQDN which has been used during the installation Backup: Agent-Level B&R via NSS for IAAS offer#Prerequisites |

Technical Procedure for Un-Registration
Please avoid un-registering multiple assets “VM/BMS” in the same time
The following sub-sections contain the complete procedure to NOT use Agent-Level Backup & Restore services
Machine Un-Registration
Un-Registering server from Agent-Level B&R
Login to the NSS using the tenant`s credentials
| Customer | DC | URL | Notes |
|---|---|---|---|
| Internal | VDR | https://backup2.cloudavenue.orange-business.com | |
| CHA | https://backup5.cloudavenue-cha.itn.intraorange | ||
| External | VDR | https://backup1.cloudavenue.orange-business.com | |
| CHA | https://backup4.cloudavenue.orange-business.com |

Click on Custom Actions from left pane

Expand the Custom Actions and click on “Manage Machine Registration for Agent Level Backup & Restore”

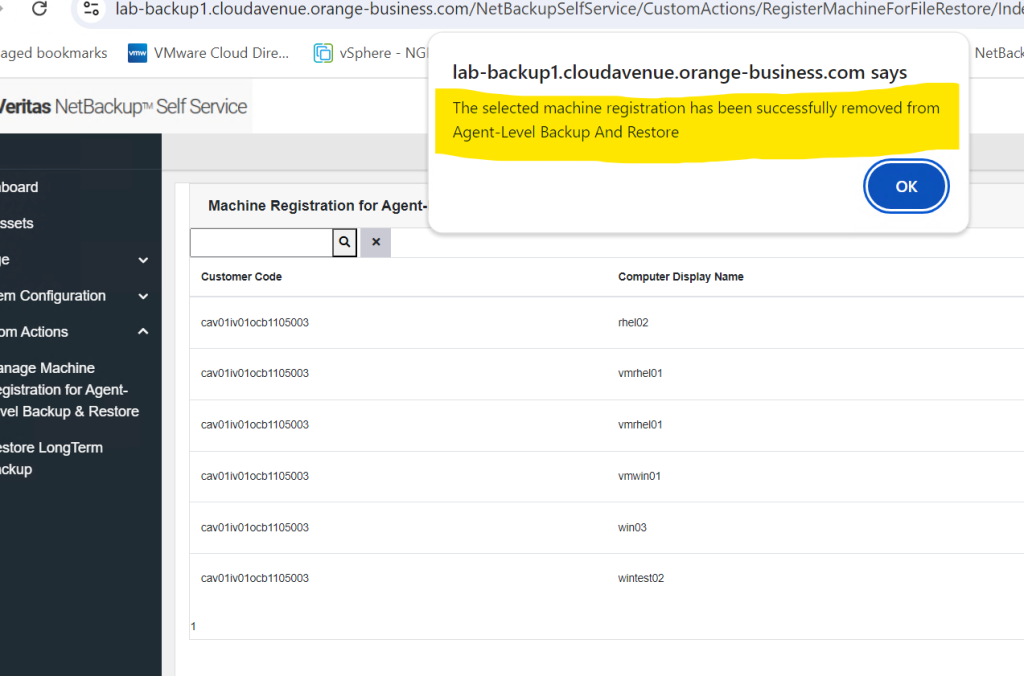
Search & click on Remove Button next to machine which machine (VM/BMS) needs to be
un-registered for Agent-Level Backup & Restore.
Please wait till the following “Confirmation” message appears on the NSS to proceed for another NSS action if needed

A confirmation message appears once the un registration process is complete. “The selected machine registration has been successfully removed from Agent-Level Backup and Restore.”
Note that, an email should be sent, to the one who submitted the “Un-Registration” action, which contains the same info
Machine Un-Protection
For Flat Files
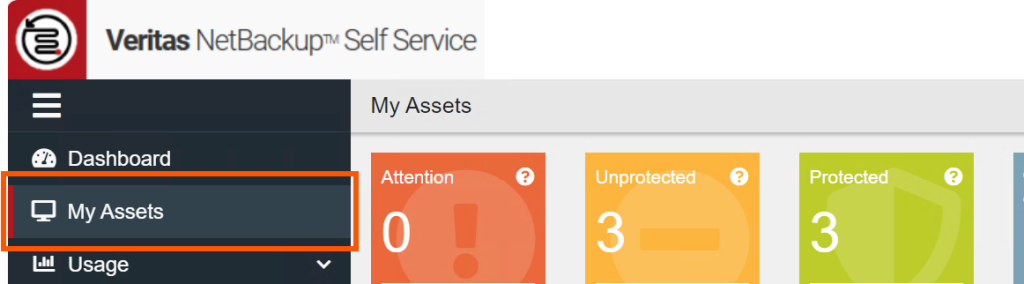
Login to NSS Portal with tenant credentials.
Click on My Asset
Click the sever which is already protected and need to un protect
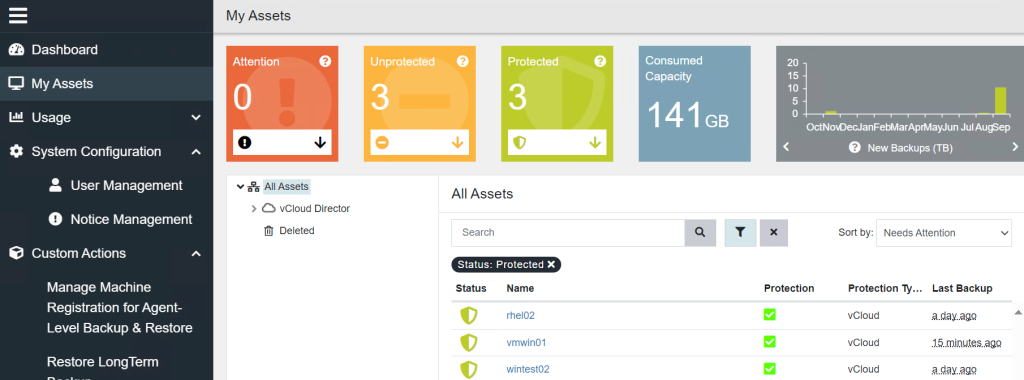
Click on “Remove” button to remove the Protection level.
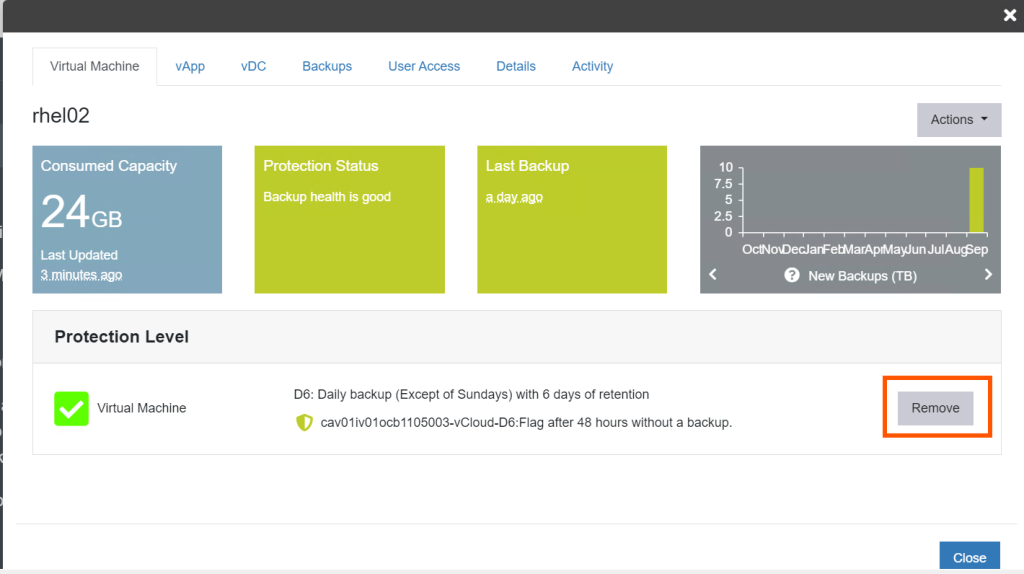
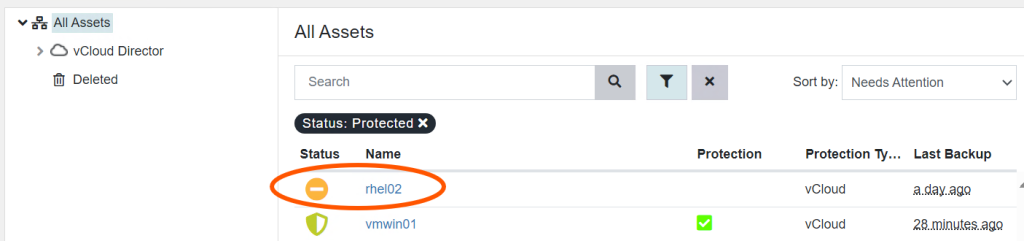
Server status will change from protected to un protected
Agent Un-Installation
Windows-Based OS
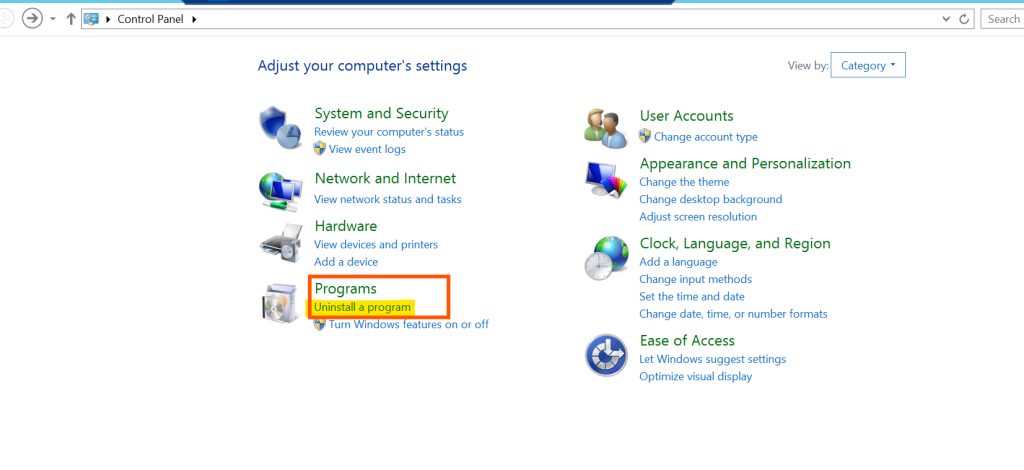
Login to Windows server where NetBackup client is installed. Go to Control Panel > Programs > Uninstall a Program
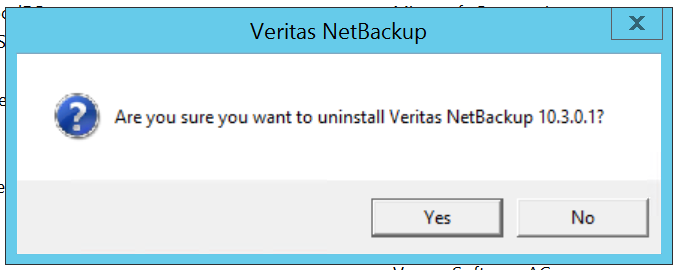
Search for NetBackup client in list of installed software’s. Right click on NetBackup client and click on Uninstall

When pop will appear with message “Are you sure you want to uninstall Veritas Netbackup” Click on Yes button.
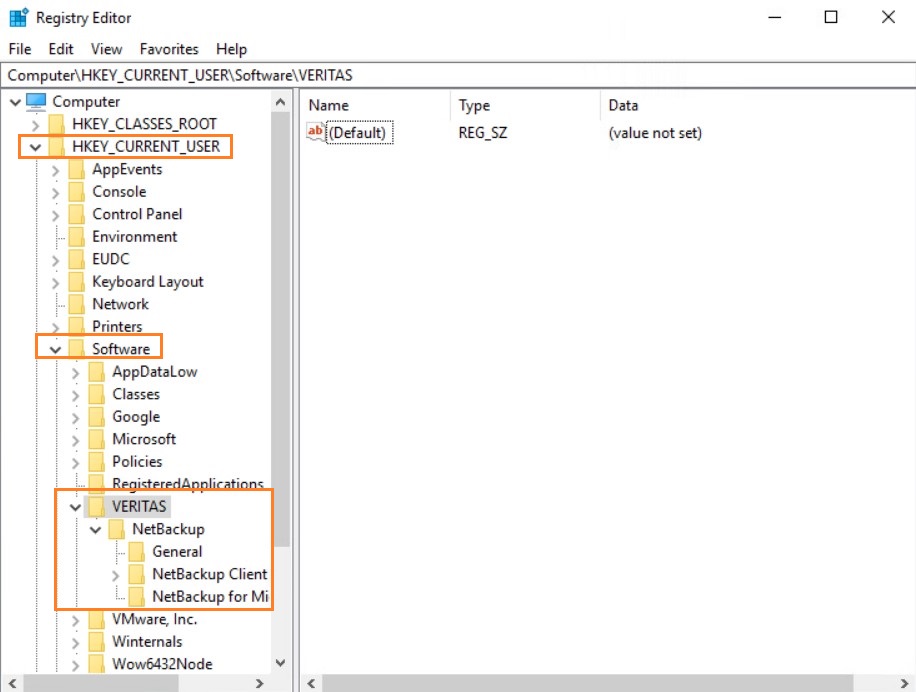
Open “Registry Editor” and remove “Veritas” folders under the following:
- HKEY_CURRENT_USER > Software
- HKEY_LOCAL_MACHINE > Software

Linux-Based OS
Login to Linux server where NetBackup client is installed.Stop the netbackup services with the following command./usr/openv/netbackup/bin/bp.kill_all

Delete the security certificates using the following command /usr/openv/netbackup/bin/nbcertcmd -deleteAllCertificates

Remove NetBackup folder
rm -rf /usr/openv

Remove the following NetBackup reference files in /etc/xinetd.d:
rm -f /etc/xinetd.d/bpcd
rm -f /etc/xinetd.d/bpjava-msvc
rm -f /etc/xinetd.d/vnetd
rm -f /etc/xinetd.d/vopied

Remove the PBX folder under /opt
rm -rf VRTSpbx
