Step 9 – Install phpMyAdmin
Step 9 is the installation of phpMyAdmin, a MySQL database administration software. We will configure it using the file modified (and copied) in step 7. Here are the commands to use:
- Install phpMyAdmin
|
cloud@guide-web-ecs:~$ sudo apt-get install phpmyadmin … Do you want to continue? [Y/n]y (Non dans la pop-up pendant l’installation)
|
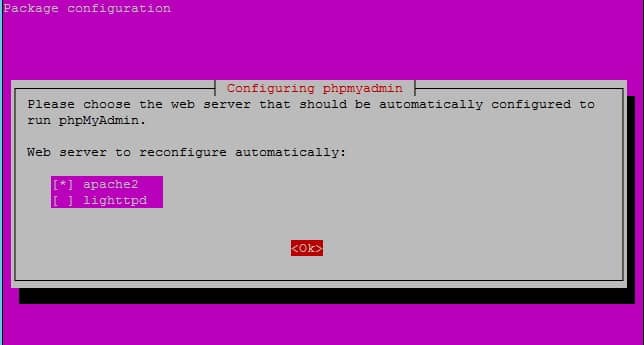
- A window opens, you must select apache2 as shown in the screen below (press the “space” key to select “apache2” then validate by pressing “Enter”).
- Select « no »for the « dbconfig-common » and validate

- Move the old configuration file, and copy the new one
|
cloud@guide-web-ecs:~$ sudo cp /etc/phpmyadmin/config-db.php /etc/phpmyadmin/config-db.php.old cloud@guide-web-ecs:~$ sudo cp /home/cloud/config-db.php /etc/phpmyadmin/config- db.php
|
- Check that the content of the configuration is correct
|
cloud@guide-web-ecs:~$ sudo cat /etc/phpmyadmin/config-db.php <?php $dbuser=’root’; $dbpass=’Cloudcoach123*’; $basepath=’’; $dbname=’phpmyadmin’; $dbserver=’192.168.100.2′; $dbport=’8635′; $dbtype=’mysql’; ?>
|
- Run the command below (adapting the command and putting the right ip address)
|
cloud@guide-web-ecs:~$ zcat/usr/share/doc/phpmyadmin/examples/create_tables.sql.gz | sudo mysql –u root –h 192.168.100.3 –P 8635 -p
|