Step 5 – Configuring Auto Scaling (AS)
For this step, we will configure Auto Scaling (AS) service, so that our website can adapt the consumption of its resources according to the number of user requests received.
The AS uses predefined rules to automatically adjust the resources of the service, according to user service requirements. With this service enabled, you can customize the scaling configurations and policies to meet service requirements and reduce resource consumption. The AS you create will allow you to automatically increase or decrease the number of ECS.
To create an AS, choose Auto Scaling service, click on the button Create AS Group and fill in the following information:
- AZ: eu-west-0a & eu-west-0b & eu-west-0c
- AS Group Name: as-group-advanced
- ECS Instance:
- Max. Instances: 3
- Expected Instances: 1
- Min. Instances: 1
- VPC: web-vpc
- Subnet: web-subnet
- Load Balancing: Use Enhanced Load Balancer
- Load Balancer: elb-advanced
- Listener: listener-advanced
- Backend Port : 80
- Load Balancing: Use Classic Load Balancer
- Load Balancer: elb-advanced
- Listener: listener-advanced-ssh
- Backend Port : 22
- Instance Removal Policy: Oldest instance created based on the oldest configurations
- EIP: Release
- Health Check Method: ELB health check
- Health Check Interval: 5 minutes
Click Next and fill in the following information:
- Click Create AS Configuration
- Configuration Name: as-config-advanced
- Configuration Template: create a new template
- Select the S3.Small.1
- Private Image
- Image : ecs-web-new
- Security Group : sg-web
- EIP: Do not use
- Key Pair: KeyPair-webKeyPair
- Click the box to acknowledge that you have downloaded the key pair
- Advance settings : Configure Now
- As text :
#!/bin/bash - Sudo sed -I -e “s/It works/$HOSTNAME \: It Works/” /var/www/html/index.html
- As text :
Click the button Create Now before confirming the specifications.
At the end of configuration, you will have as-group-advanced (AS Group) successfully created. After creating, go to view AS policy then add AS policy and fill in the following information:
- Policy Name: as-policy-cpu
- Policy Type: Alarm
- Alarm: Create
- Rule Name: as-alarm-sup10
- Trigger Condition: CPU Usage / Average > 10%
- Monitoring Interval: 5 minutes
- Consecutive Occurrences: 1
- Scaling Action: Add / 1
- Cooling Duration (s): 300
Click the button Create Now before confirming the specifications.
At the end of configuration, you will have as-group-advanced (AS Group) successfully created.

Click as-group-advanced for more details about the newly created instances by AS.
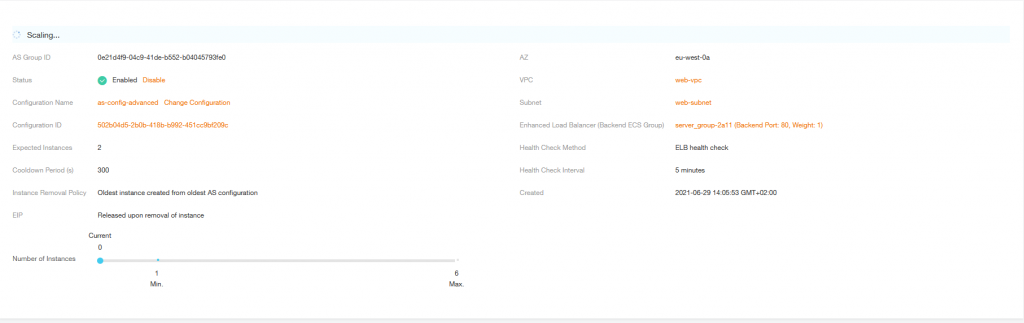
By clicking on the Instance, you will have the list of instances created by Auto Scaling. The newly created virtual machines may also be visible in this list of virtual machines within the Elastic Cloud Server service.